Building Your Geospatial Portfolio Website (Full Workshop)
A hands-on workshop for creating a modern portfolio website using GitHub Pages and MkDocs.
Ujaval Gandhi
![]()
Introduction
This workshop is a gentle introduction to Git, GitHub and Web Development with the goal of creating and publishing a personal portfolio website. We will start with a ready-to-use portfolio website template for geospatial professionals and learn how to edit and set up your GitHub repository to publish your website. We will cover best practices on leveraging LLM-based AI assistants to extract and format content from existing documents and populate the portfolio.
At the end of the workshop, you will have a beautiful, modern and customized portfolio website that is hosted for free on GitHub Pages and ready to be shared with your network.
No prior experience with Git or GitHub is required.
This workshop will cover the following topics:
- Introduction to GitHub and GitHub pages
- Introduction to Static Site Generators
- Fundamentals of Markdown
- Introduction to MkDocs
- Use of AI-Assistants to automatically extract and format content from your CV and Project Reports
- Setting up a local development environment and advanced customization

We will use the MkDocs static site generator with Material theme that creates modern responsive website from Markdown-formatted content.
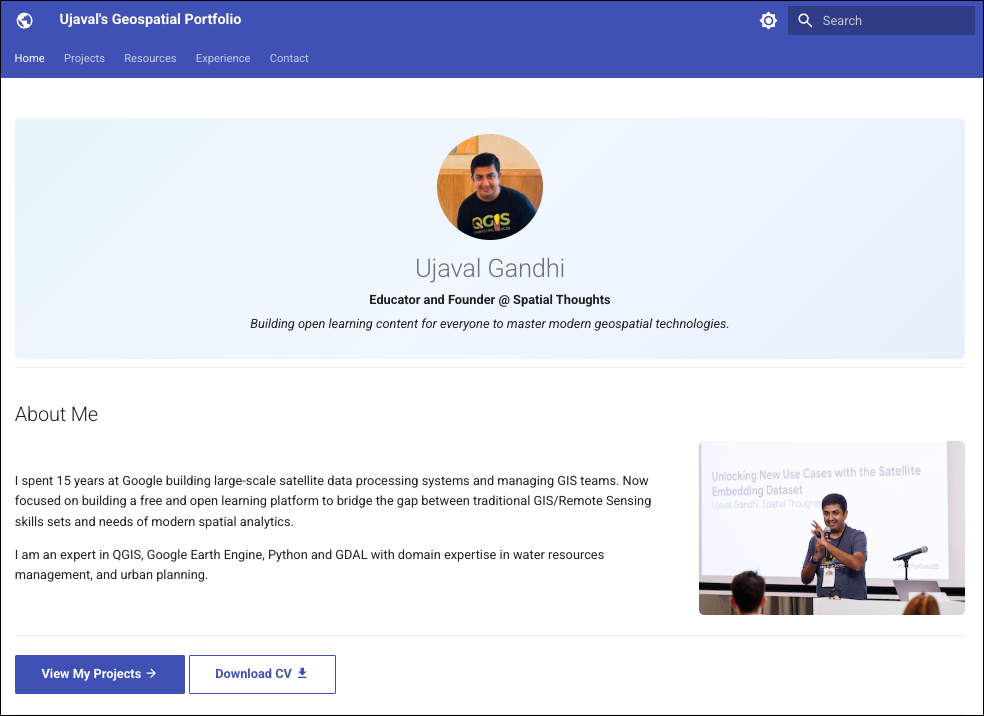
View Example Portfolio Website ↗
Installation and Preparation
Sign-up for GitHub
Visit GitHub.com and create a free account. If you already have an account, skip this step.
Install Git and GitHub CLI
Follow our Git and GitHub CLI Installation Guide install and configure Git and GitHub CLI.
Install Conda
We will use conda to install the required Python packages and manage local development environment.
Follow our step-by-step Conda Installation Guide to install Miniconda for your operating system.
Install Visual Studio Code
We recommend Visual Studio Code (VS Code) editor for this workshop.
Follow our step-by-step Visual Studio Code Installation Guide to install and configure VS Code on your system.
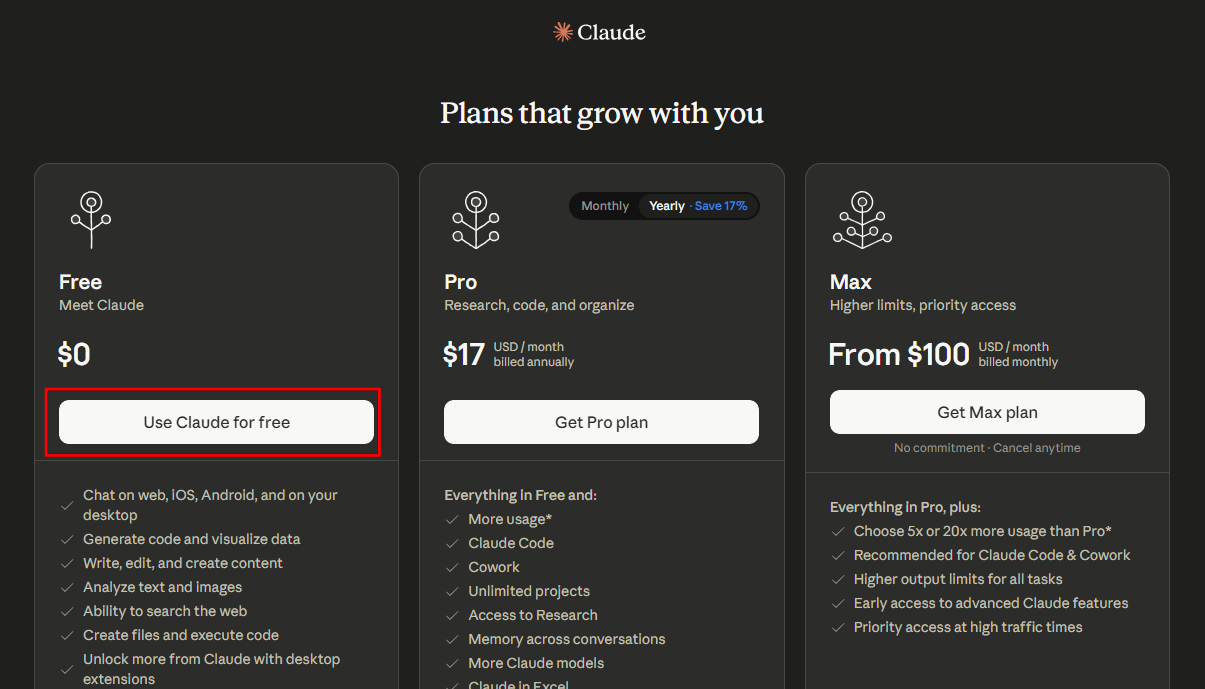
Sign-up for Claude
We rely heavily on LLM-based AI assistants for populating the content of your portfolio. If you already have a favorite coding assistant (ChatGPT, Microsoft Copilot etc.), you may use it for this workshop. However, we strongly recommend using Claude. You can sign-up for a free account using the instructions below.
- Visit Claude AI and sign-up for an account. Select the Free plan.
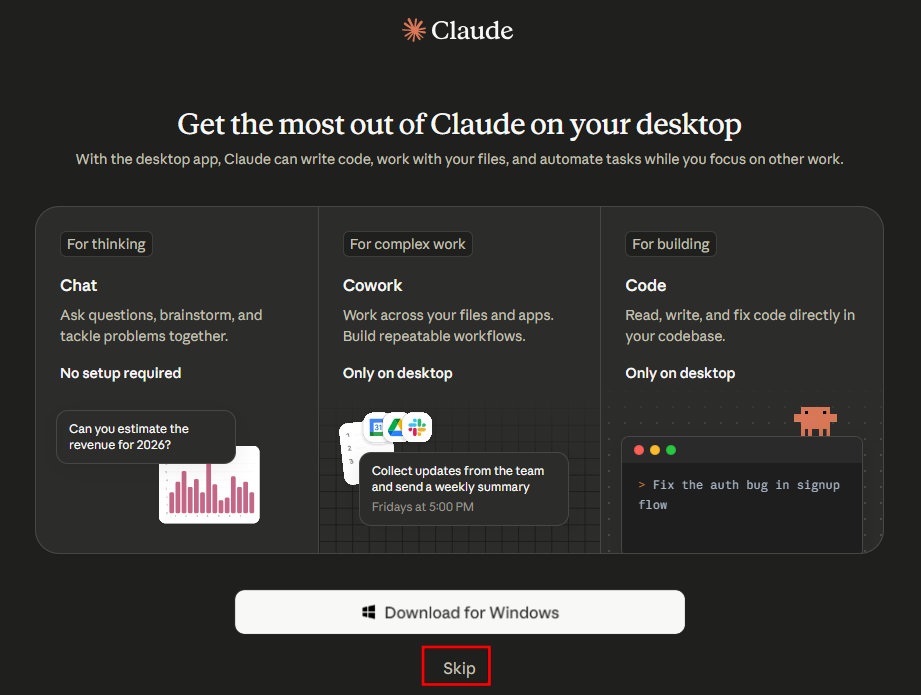
- For this workshop, we will be using the web interface. Click Skip when prompted to install the app.
Prepare Content for the Portfolio
Before you start building the portfolio, it will be helpful to have the following items saved to a local directory on your computer.
- Profile Picture: Save your preferred profile photo
as a PNG file named
profile.png. Preferably 300px x 300px in size. - Homepage Picture: A photo for the About Me
section. Save a photo you would like to use on the homepage as a PNG
file named
about.png. Maximum 500px width. - Your Resume/CV: Save a copy of your CV as a PDF
file named
[YOUR NAME]-CV.pdf. If your name is John, the file would beJohn-CV.pdf. - Project Artifacts: Project Reports, Jupyter Notebooks or any other data relating to the projects you would like to showcase in the portfolio.
Get the Workshop Videos
The workshop is accompanied by a set of videos covering the all the modules. These videos are recorded from our live instructor-led classes and are edited to make them easier to consume for self-study. We have 2 versions of the videos:
YouTube
We have created a YouTube Playlist with separate videos for each notebook and exercise to enable effective online-learning. Access the YouTube Playlist ↗
Vimeo
We are also making combined full-length video for each module available on Vimeo. These videos can be downloaded for offline learning. Access the Vimeo Playlist ↗
2. Setting up Your Local Development Environment
In this section, we will clone your GitHub repository to the computer, install the required packages, and start a local preview server.
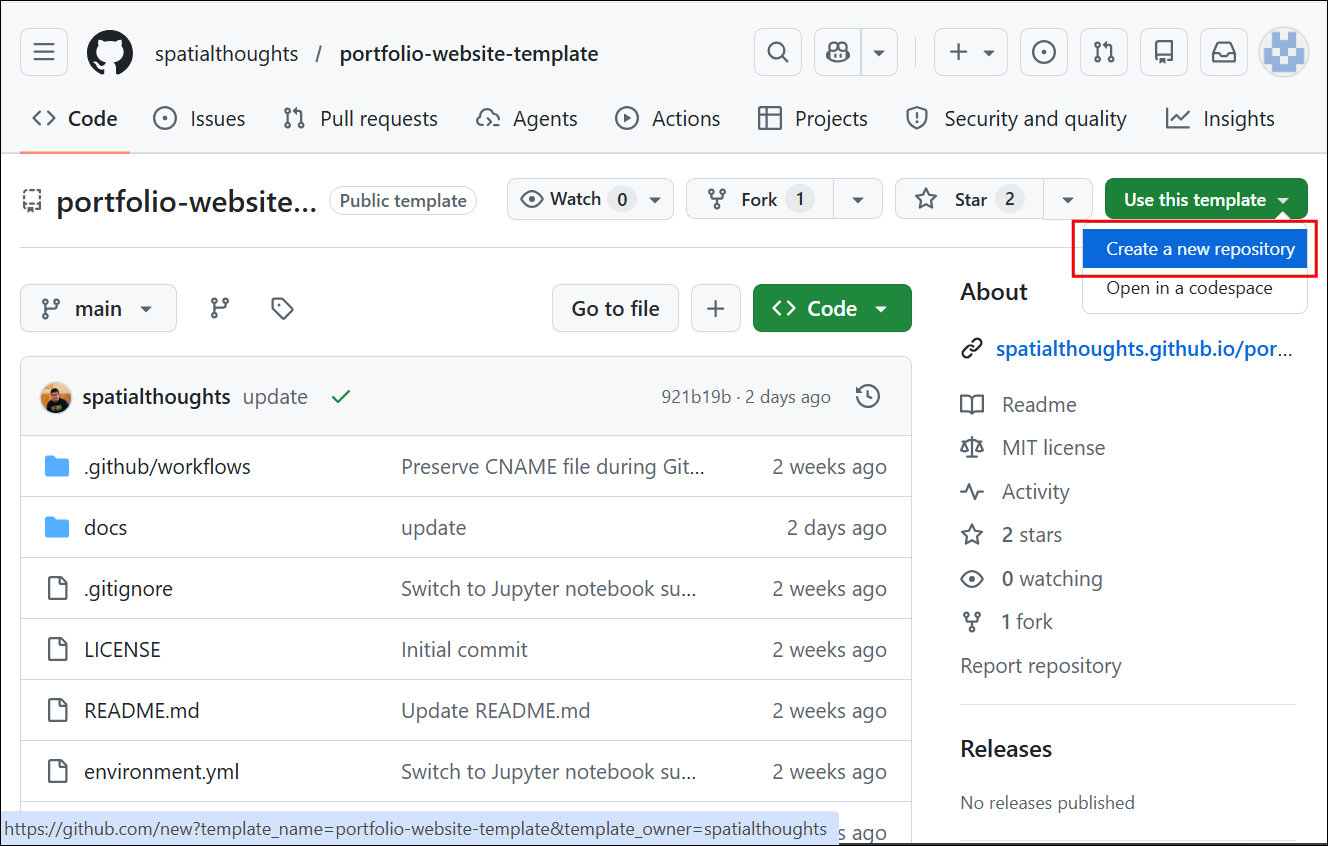
- Login to your GitHub account. Go to the template repository at https://github.com/spatialthoughts/portfolio-website-template/. Go to Use this template → Create a new repository.
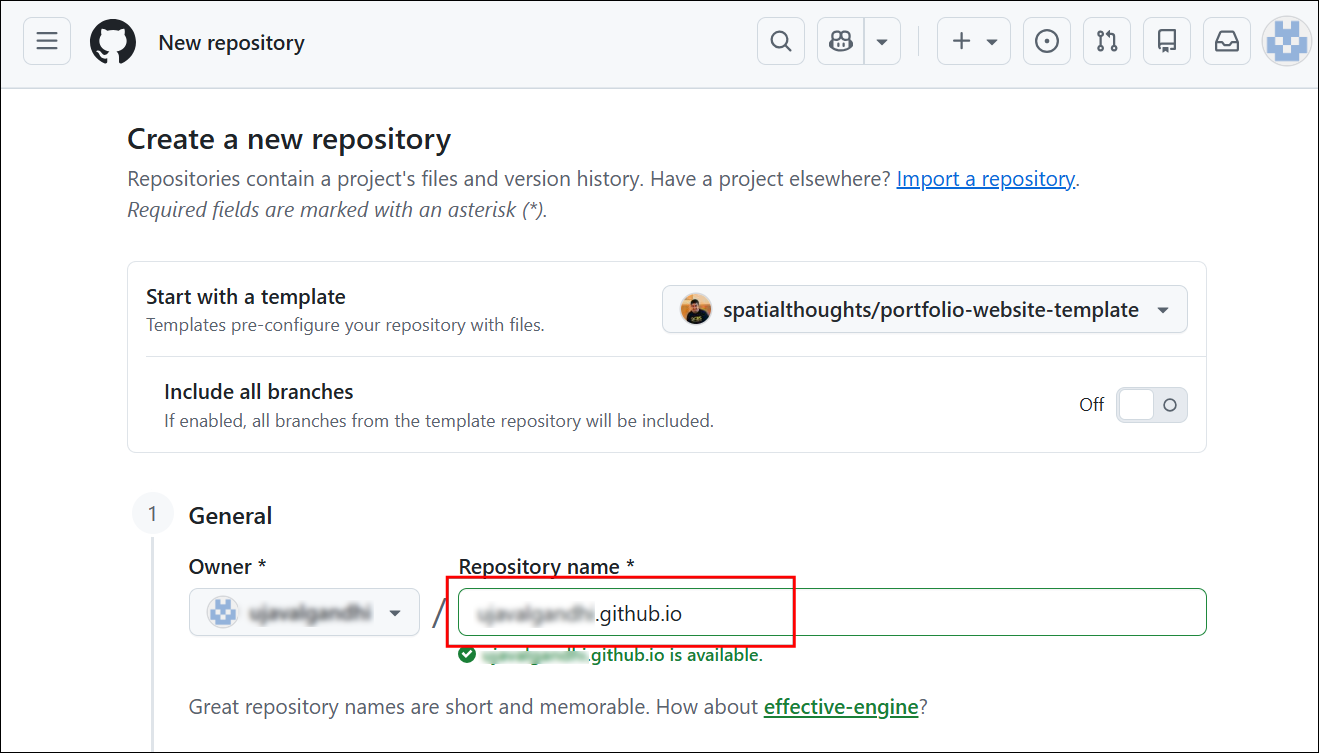
- Under General, enter the
Repository name. To use GitHub Pages for free at https://your-username.github.io, name the repository exactly asyour-username.github.io(replace your-username with your actual GitHub username). For example, if the github username isspatialthoughts, the repository name should bespatialthoughts.github.io. This is a special repository naming pattern that GitHub uses to publish the site at the root of your GitHub pages . Optionally, you may use any other name and the the site will be published at https://your-username.github.io/your-repository-name. Leave all other options as-is and click Create Repository.
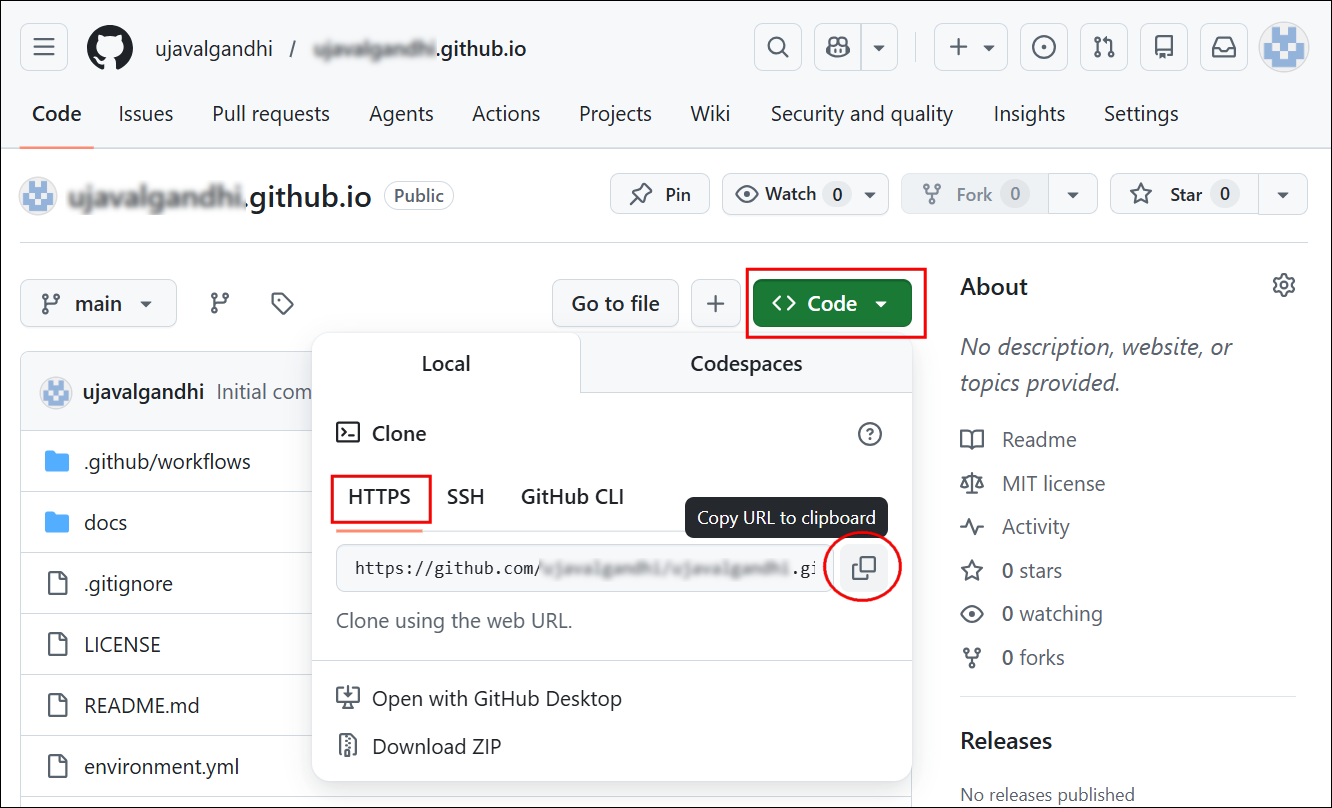
- In your GitHub repository, click the Code button and copy
the repository URL shown for HTTPS. The URL should be in the
form
https://github.com/<your-username>/<your-username>.github.io.git.
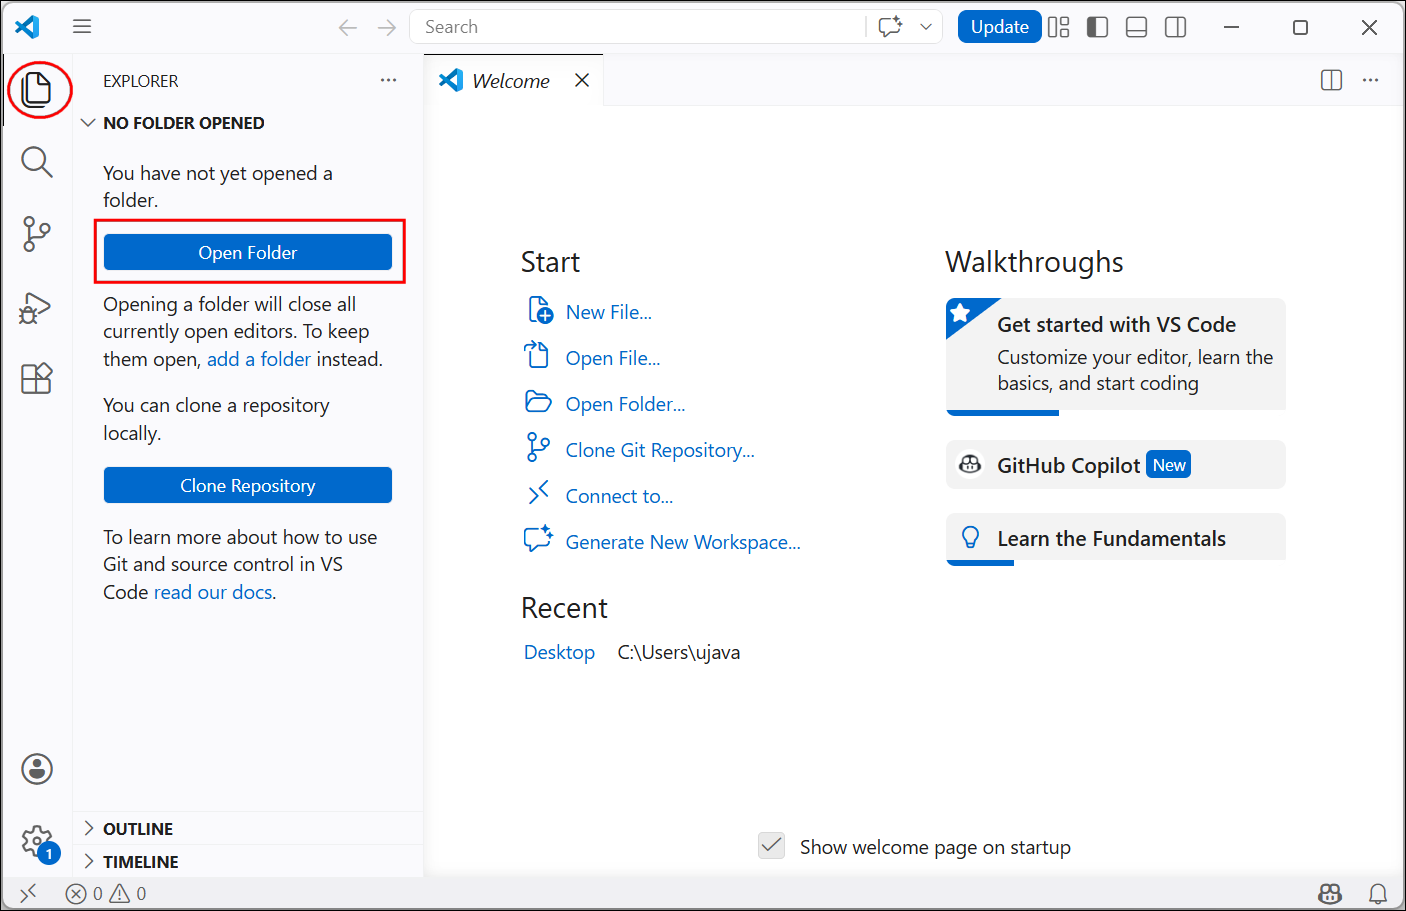
- On your computer, launch Visual Studio Code. Click the
Explorer button to open the file browser and click Open
Folder. Browse to a folder on your computer where you want the Git
repository. The
Desktopfolder is a good choice as you easily locate it for copy/pasting files. Select it and click Open. If you are prompted with a security warning, click Yes, I truest the authors.
- Once the folder is open, open a new terminal by going to Terminal → New Terminal.
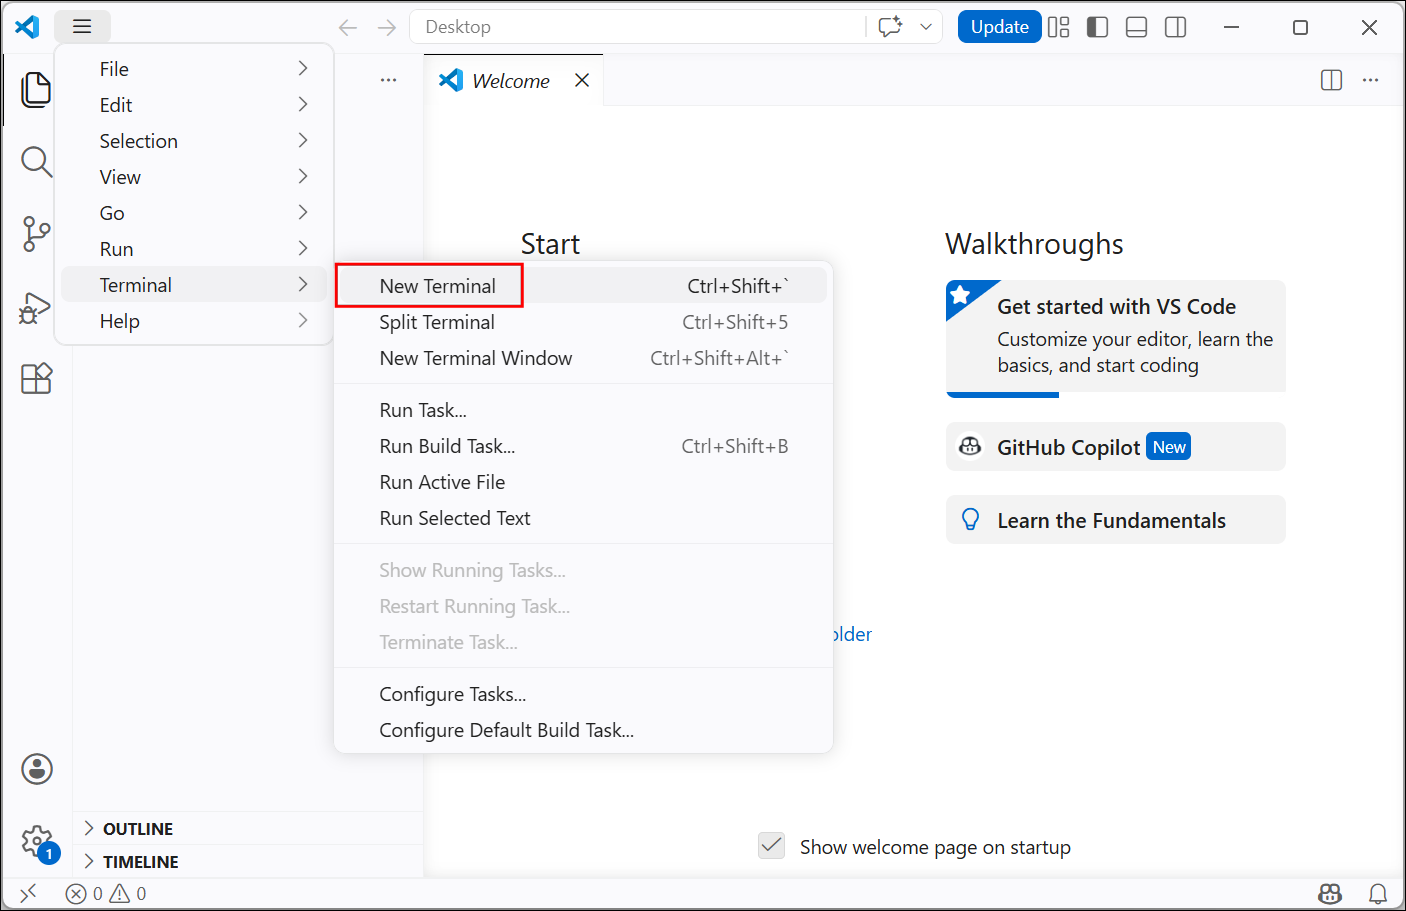
- A new terminal will open and the current working directory will be
set to the open folder in the editor. Also the conda environment will be
initialized and you should see the
baseenvironment activated.
On some Windows systems, you may get a Powershell
UnauthorizedAccesserror. Run this command and restart the terminal to fix it.
Set-ExecutionPolicy RemoteSigned -Scope CurrentUser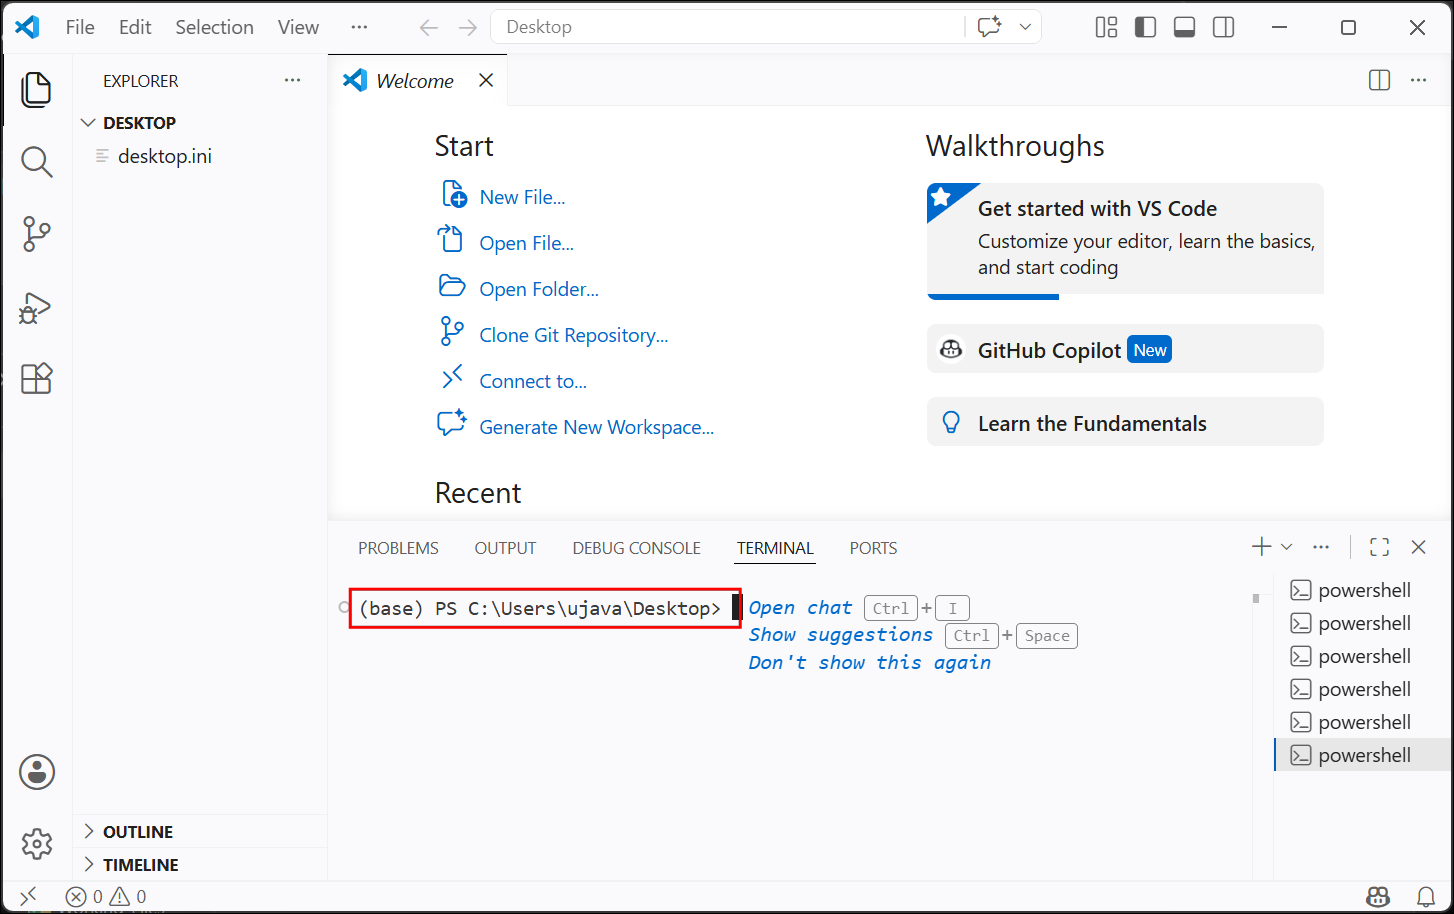
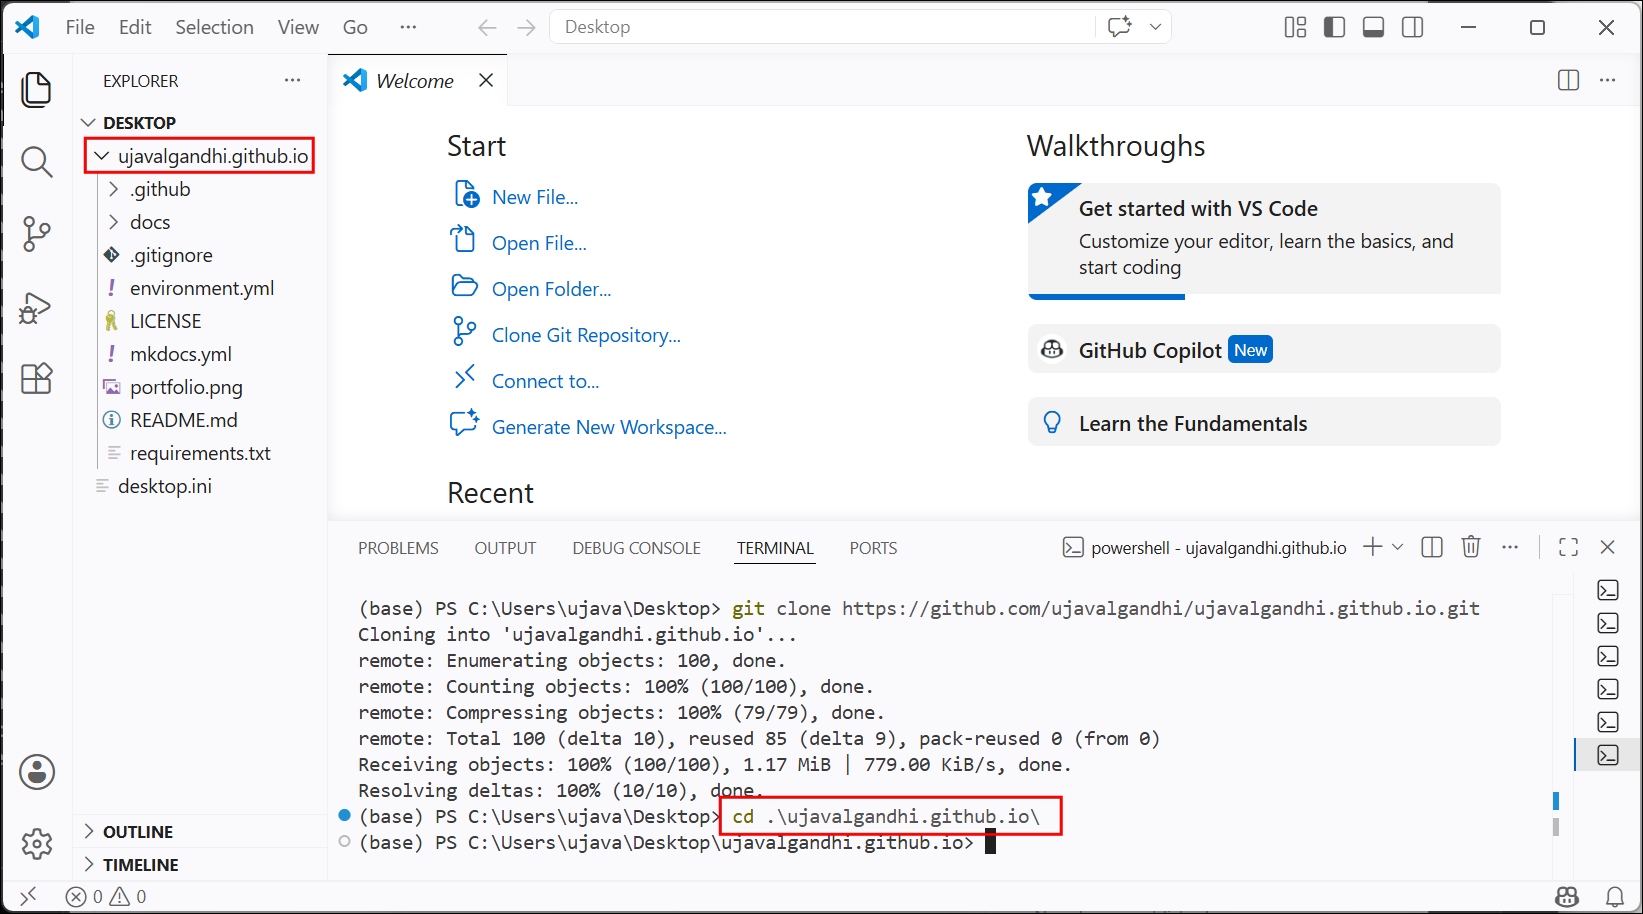
- Now we will clone your Git repository to computer. Enter the following command - replacing the URL with your own repository URL.
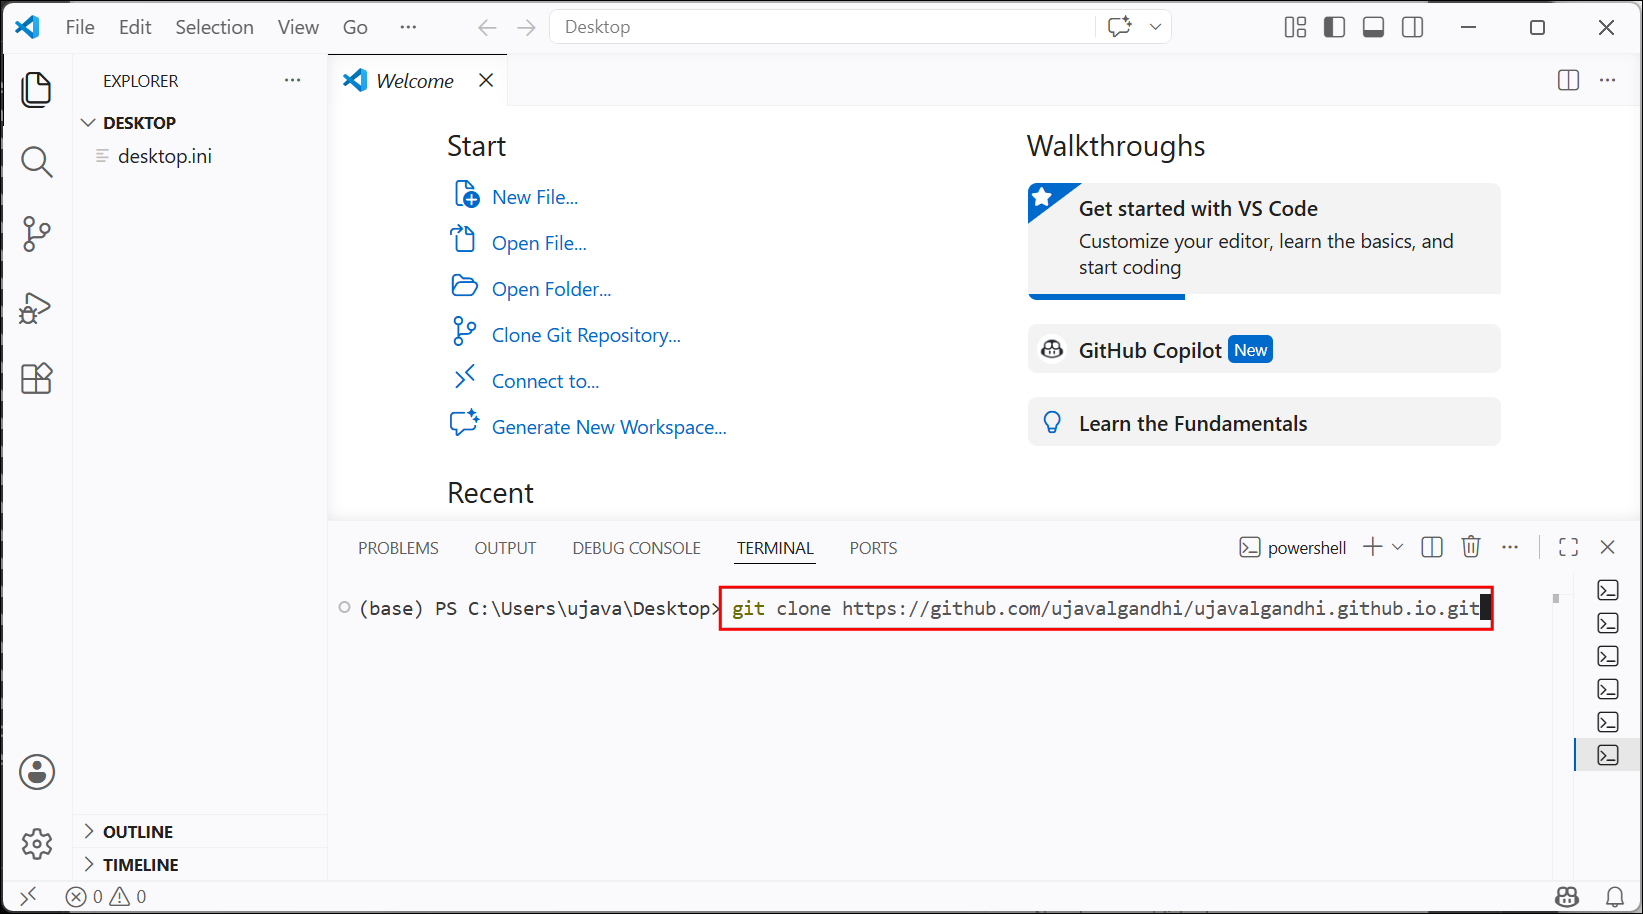
- This will copy the repository to your computer. Use the
cd(Change Directory) command to go to the folder with the newly cloned repository.
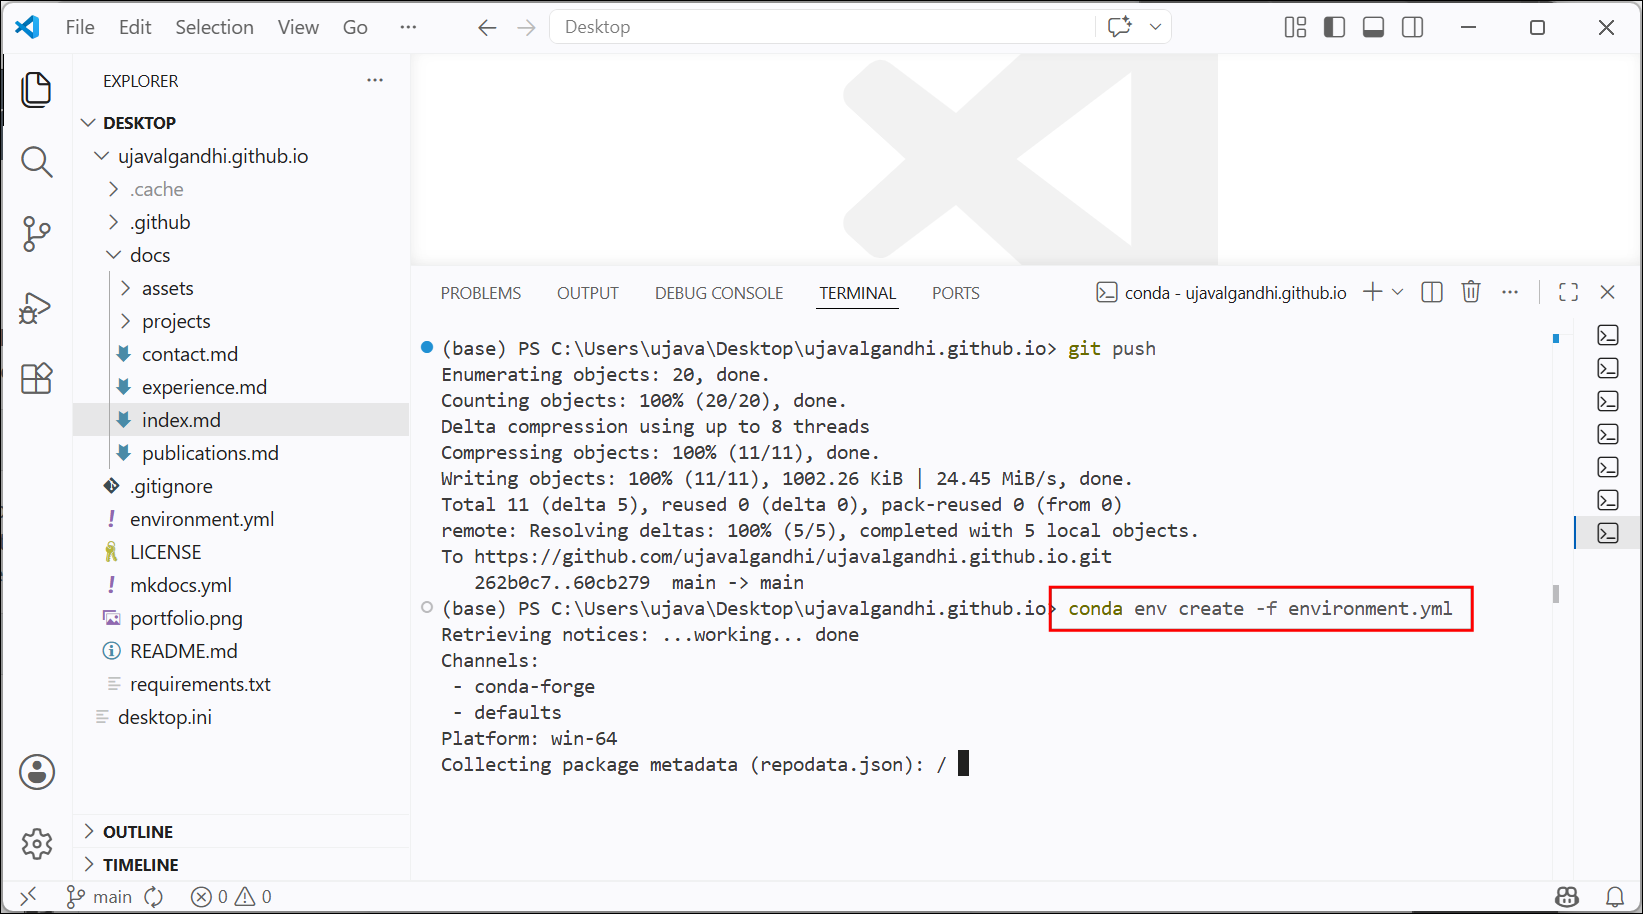
- Next we create a new conda environment and install the required
packages. Run the following commands to create a new environment using
this file. This will create a new conda environment named
portfolioand install the required packages.
conda create --name portfolio -y
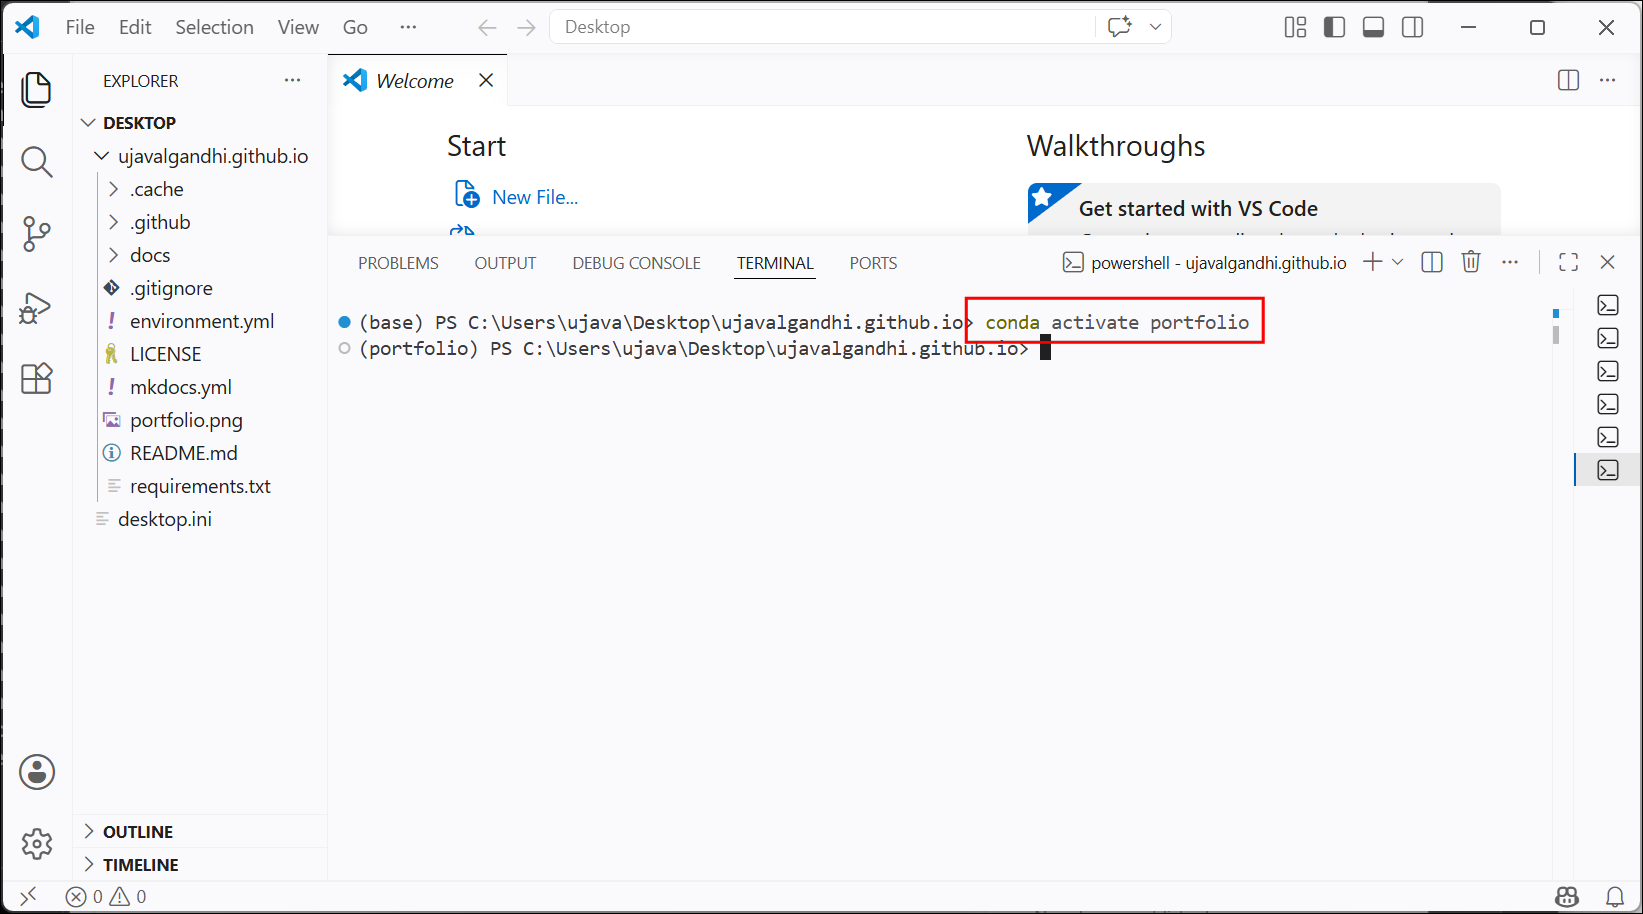
conda activate portfolio
conda install -c conda-forge pip -y
pip install mkdocs-material mkdocs-jupyterIf you get an error during the pip install command,
prefix python -m before the command
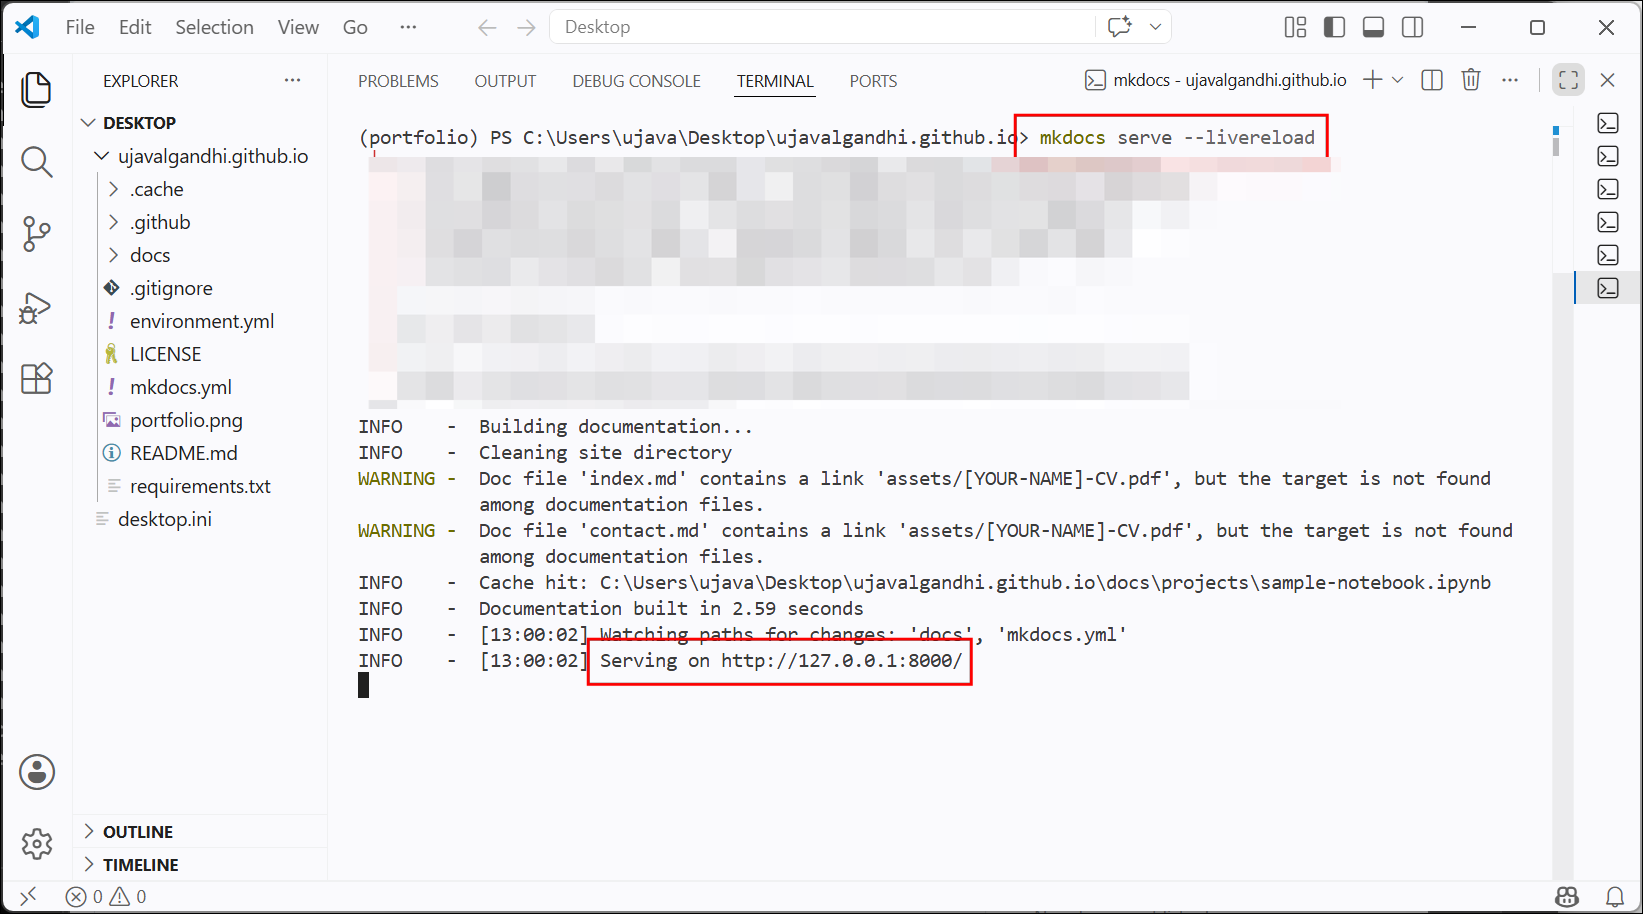
- Once the installation is successful, Next, we start a local MkDocs
server which will build the portfolio website from the source content.
The
--livereloadoption tells the server to watch the files in the repository and automatically rebuild the site whenever we update any content.
A warning maybe displayed about the MkDocs 2.0 version. You can ignore it.
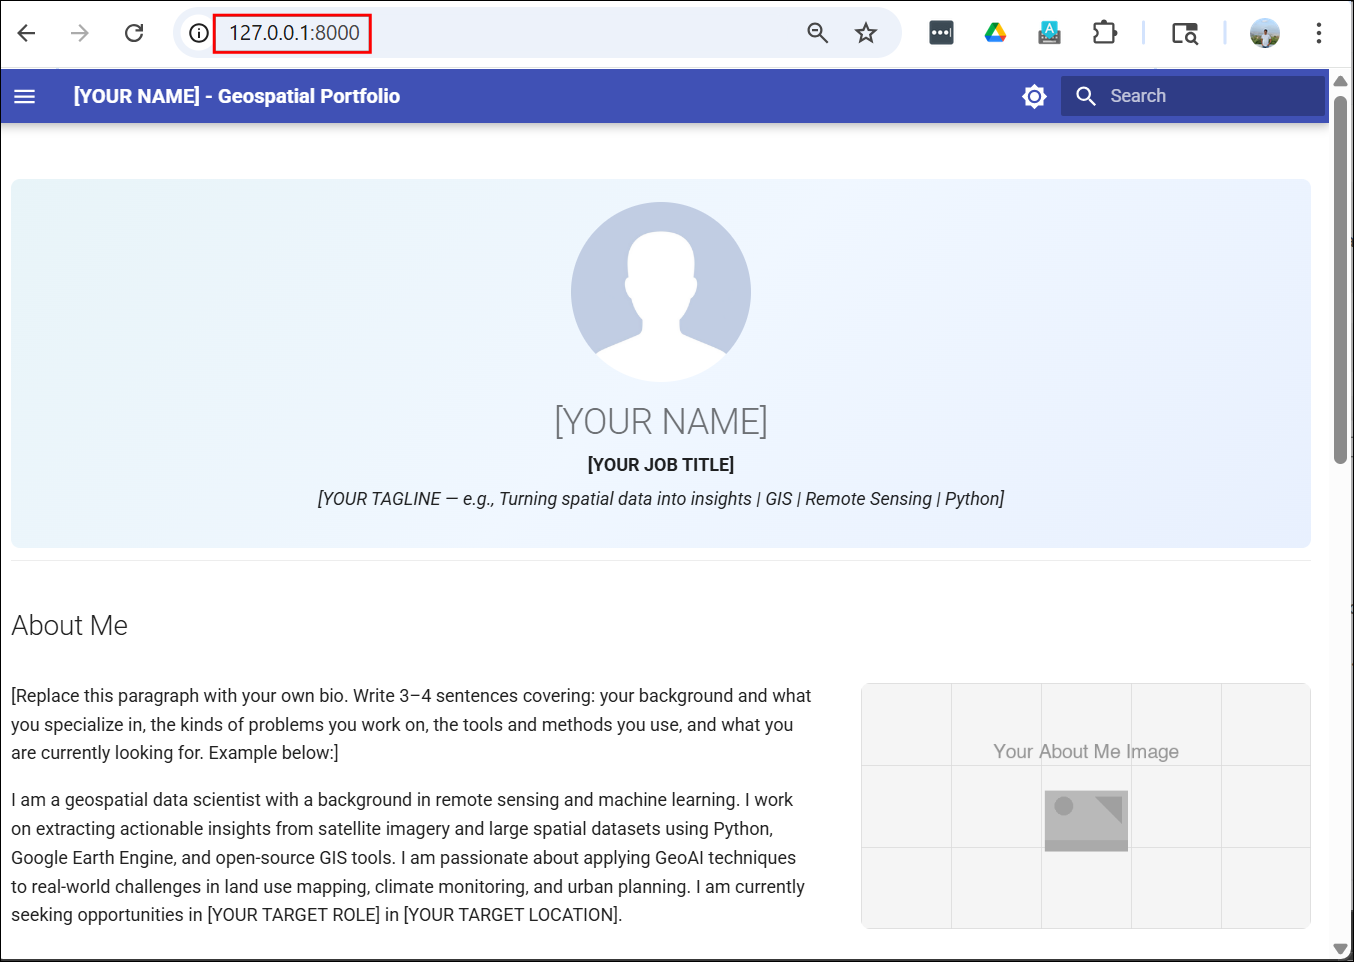
- Once the server has started, open your browser and go to http://127.0.0.1:8000. You will see the portfolio website.
- Your local development environment is now setup. Keep the server running so you will be able to preview changes as you edit the content. Click the Hide Panel button to close the Terminal window. If you want to see it, you can open it from View → Terminal
3. Introduction to Markdown
Markdown is a simple formatting language to create structured
documents. It allows you to write plain-text documents with simple
markups that is both human and machine-readable. It is a widely used
standard for creating documents, websites, and prompts for AI models. We
will now practice writing Markdown by editing the README.md
file in your repository.
- Expand your repository’s folder in Visual Studio Code’s
Explorer. Click on the
README.mdfile.

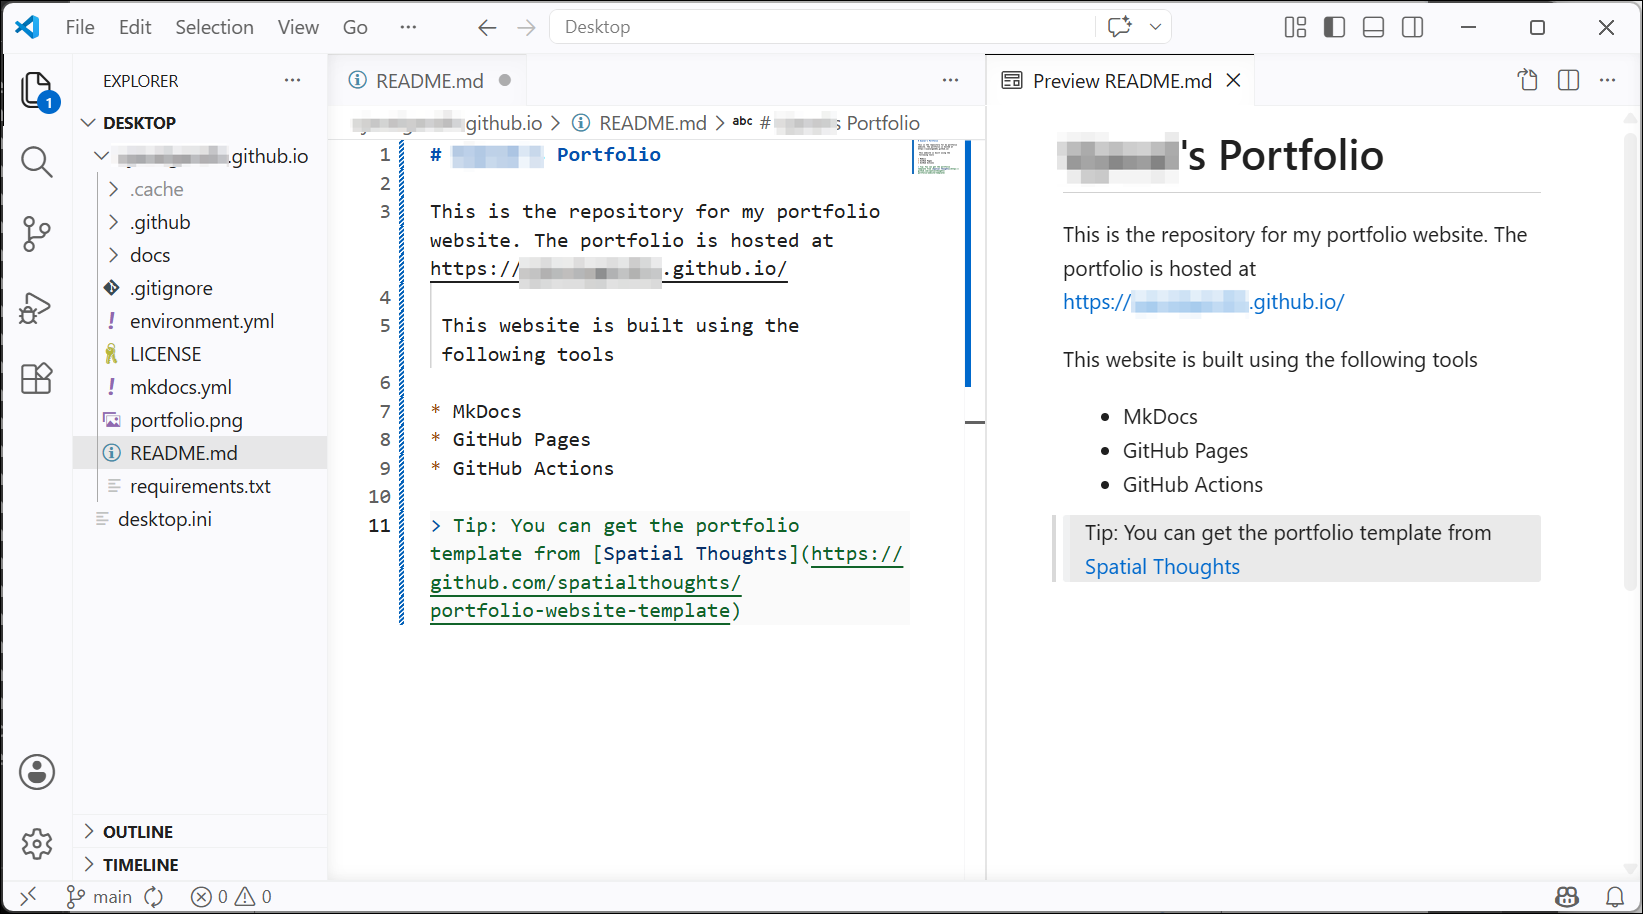
- Delete the existing text and enter new text about your repository in the Markdown format. Below is the sample text you can use. You can use the Open Preview to the Side button to see the rendered version of your text.
You can see Github’s Markdown Guide for help with syntax.
# [YOUR NAME]'s Portfolio

This is the repository for my portfolio website. The portfolio is hosted at https://<your-username>.github.io/

 This website is built using the following tools

* MkDocs
* GitHub Pages
* GitHub Actions

> Tip: You can get the portfolio template from [Spatial Thoughts](https://github.com/spatialthoughts/portfolio-website-template)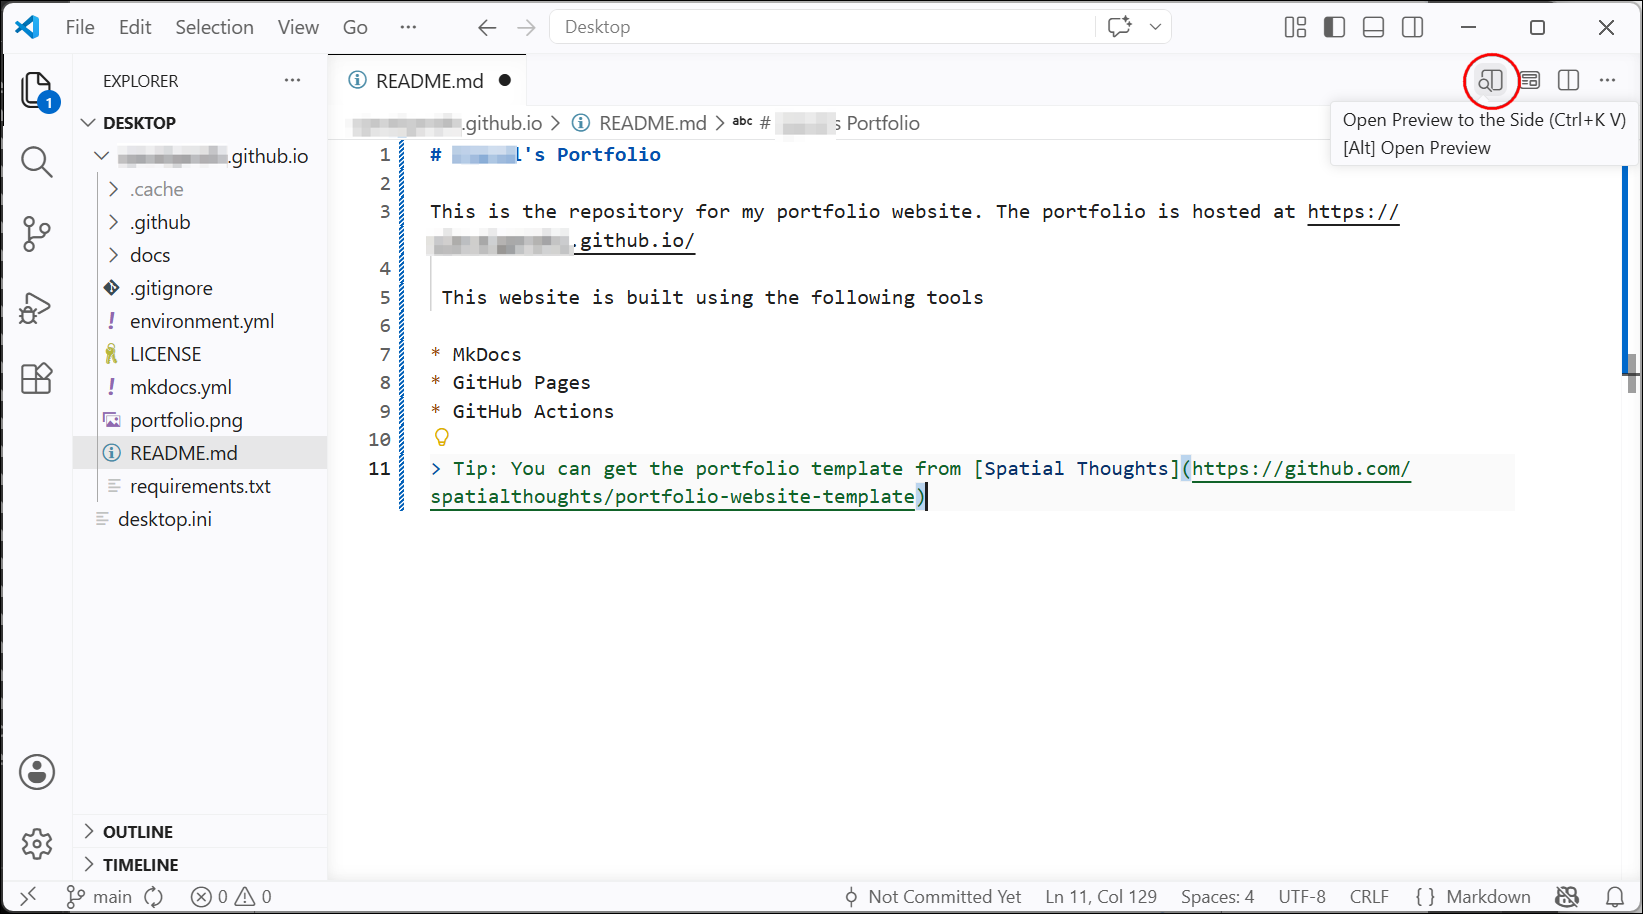
- Check the preview and fix any formatting issues.
- Once you are done, save the changes from File → Save.
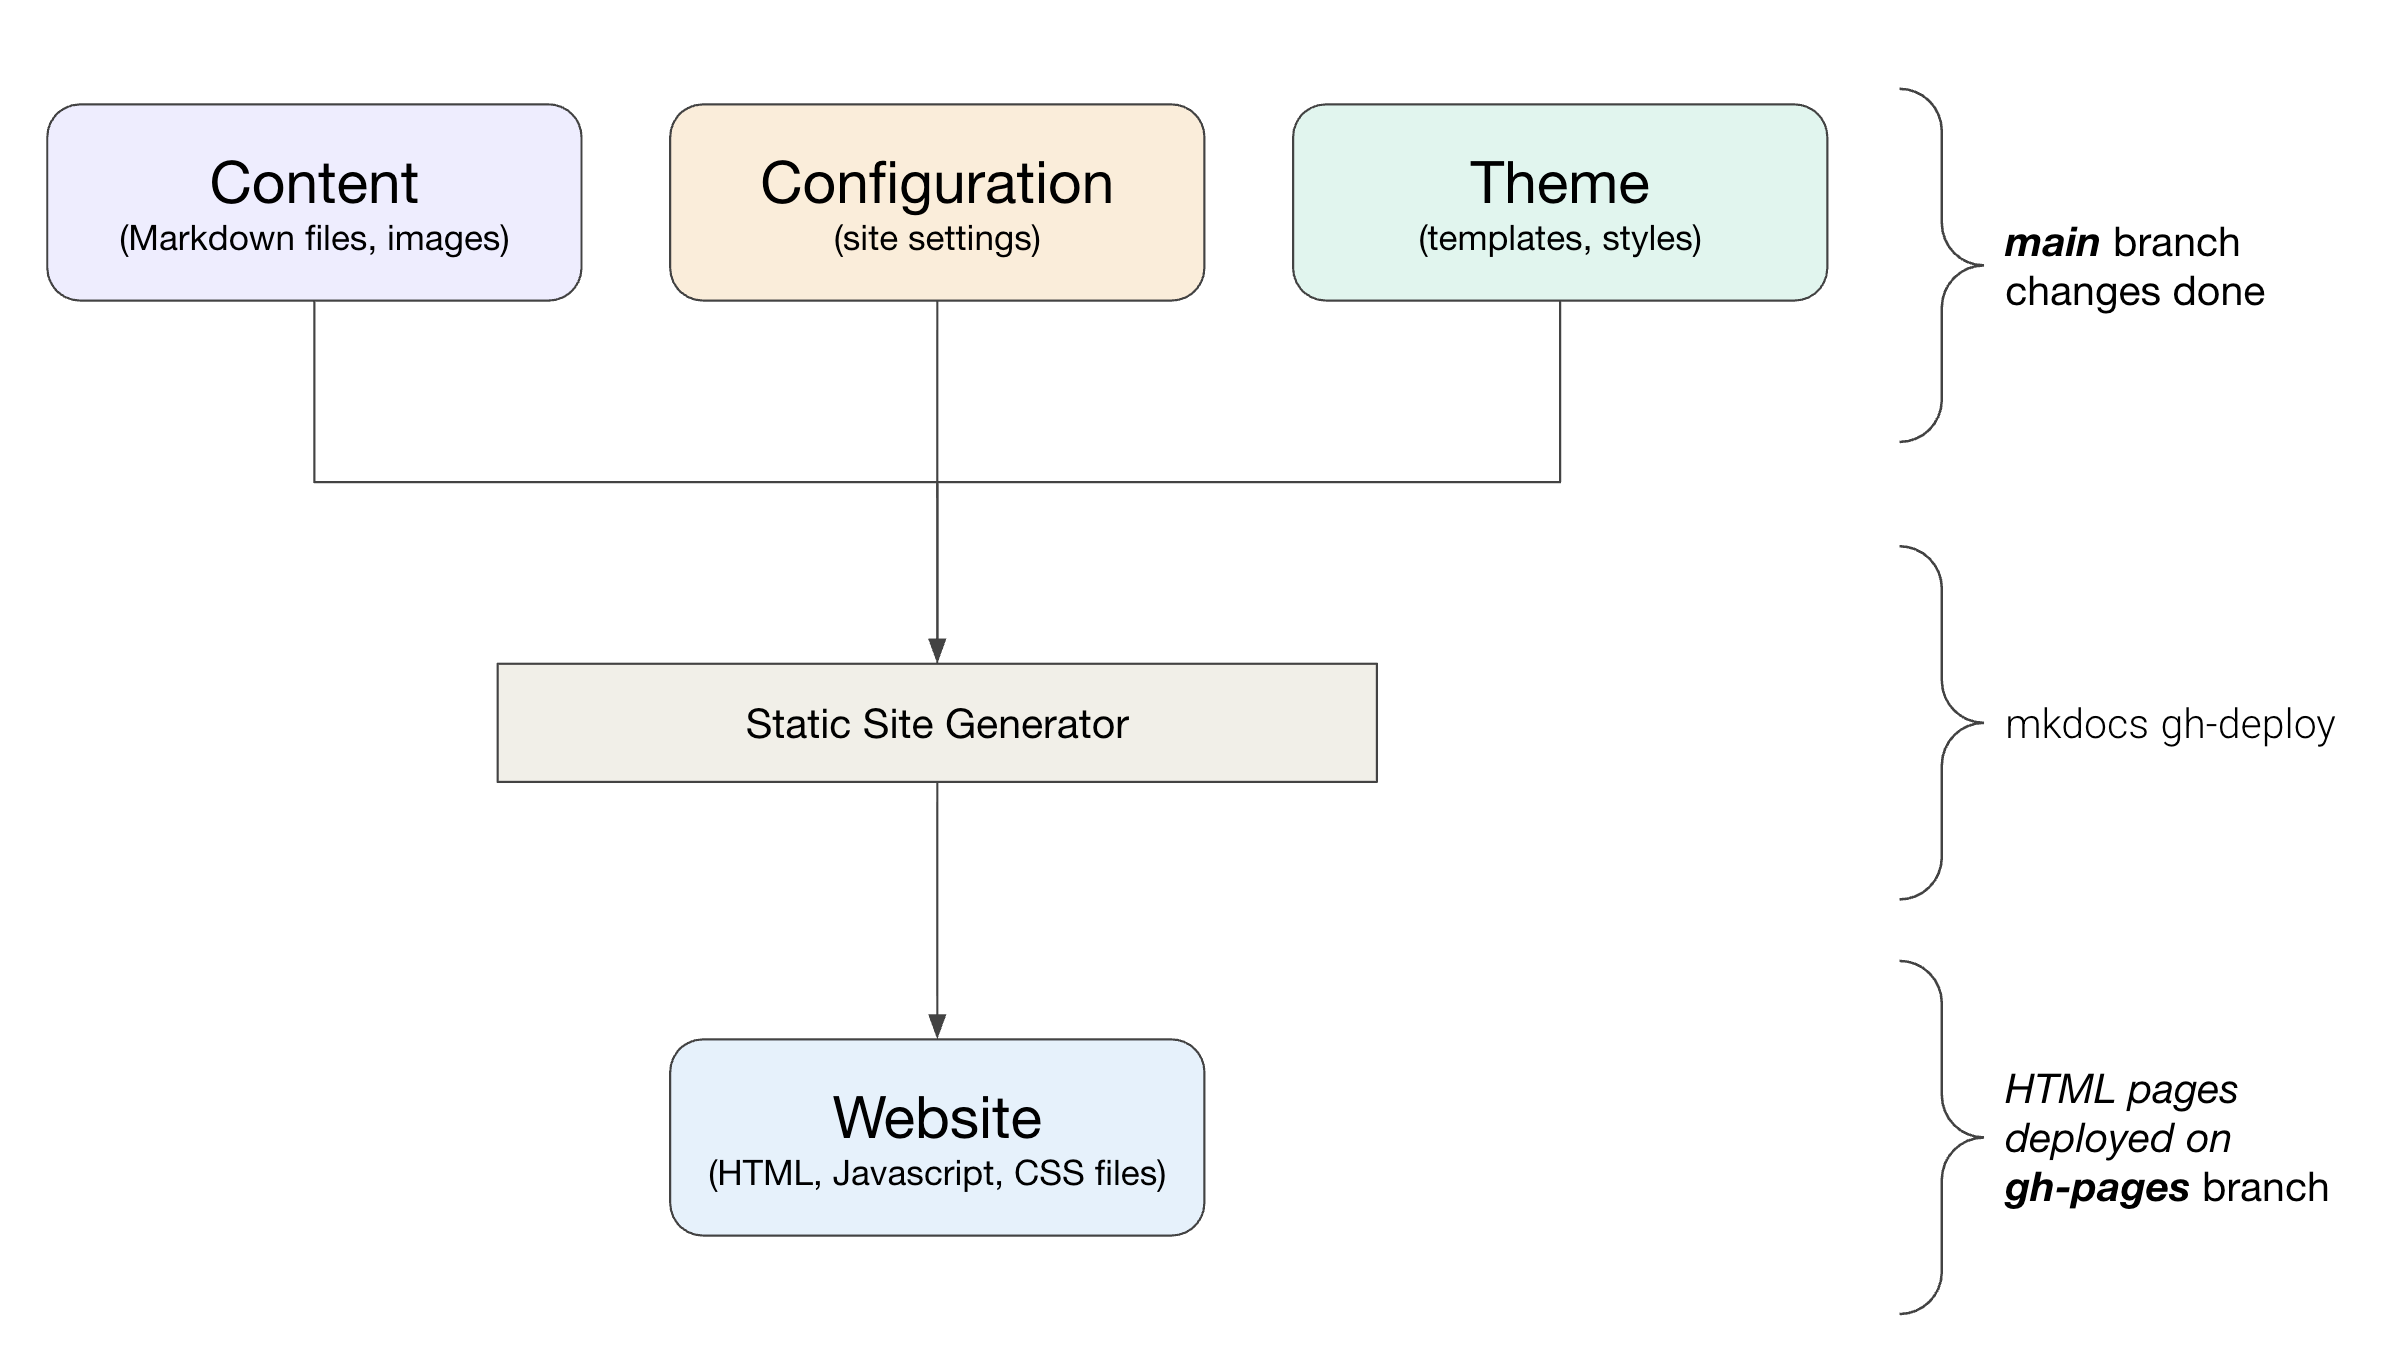
4. Introduction to MkDocs
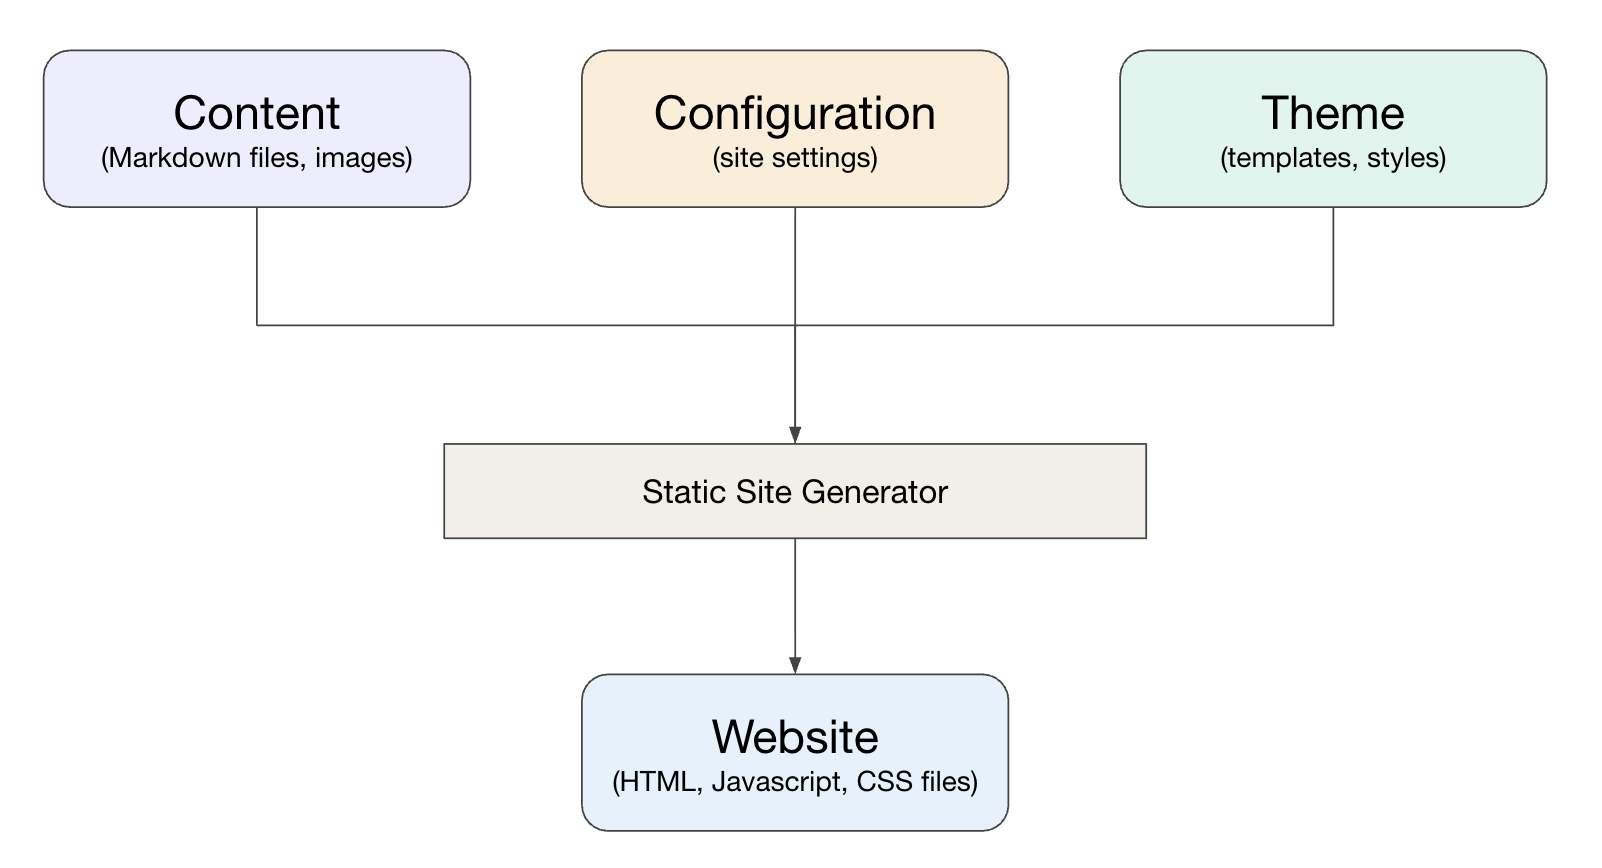
MkDocs is a Python-based static site generator focused on building project documentation sites. The template we are using is setup to use MkDocs to create the portfolio website using the following components.
- Content: Each page is a Markdown (
.md) file in thedocs/folder. - Configuration: All configuration lives in a single
mkdocs.ymlfile. The site name, navigation etc. are defined in a single place. - Theme: The template uses the popular Material for MkDocs which supports responsive design with search, dark mode, and more.
5. Publishing Your Portfolio Site
We will now edit the content files using a code editor, preview the updated portfolio and then push the changes to GitHub.
5.1 Updating the Site Configuration
MkDocs uses a central configuration file named
mkdocs.yml. This file is in the YAML format
(.yml). You can learn about all available settings at MkDocs
Configuration page. We will edit this file with the main
configuration settings now.
- From your GitHub repository folder, locate the
mkdocs.ymlfile. Click on the filename to edit it.Update the placeholders with your name and information. At the least, you should update thesite_name,site_description,site_author,site_url,copyrightandextra.socialvalues.
5.2 Editing and Committing Changes
All the content pages as in the Markdown format (.md). We can edit these files and preview the resulting site. Once we are happy with the changes, we will commit and push these changes to GitHub.
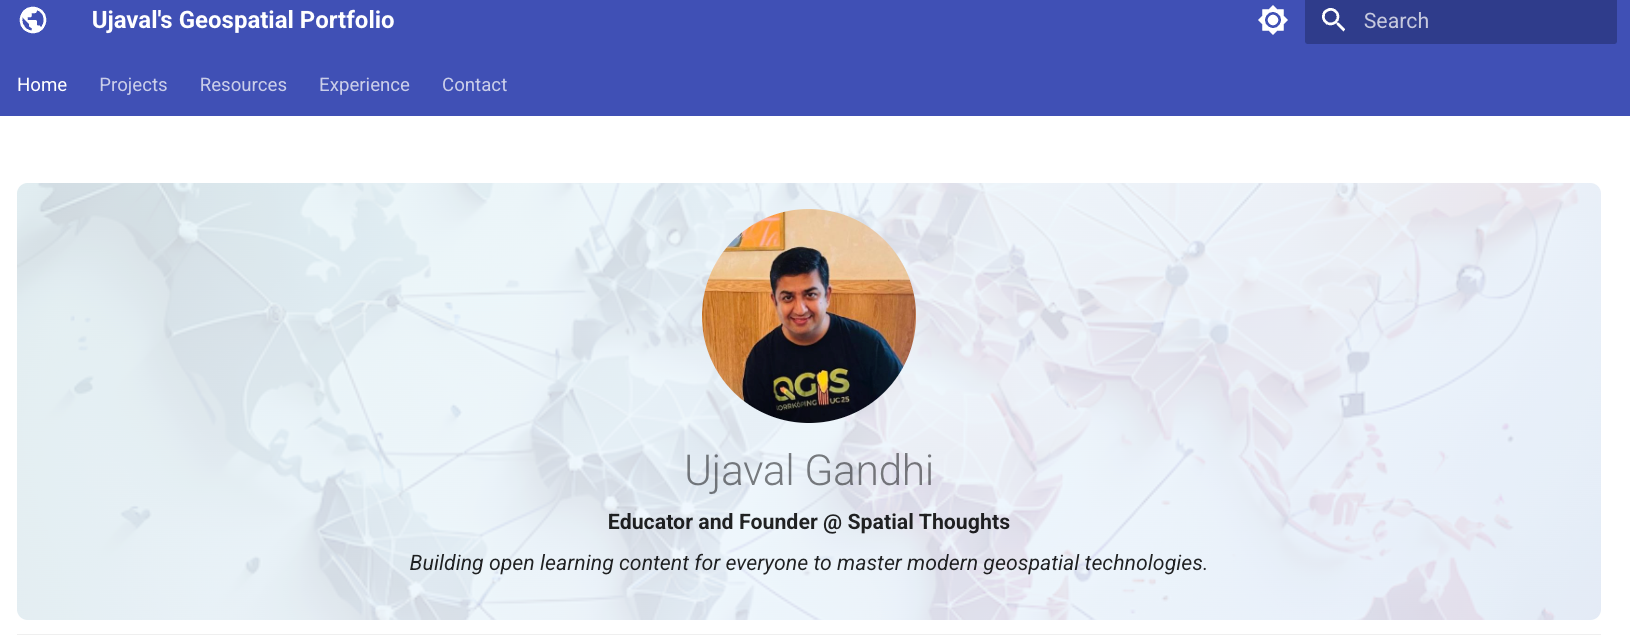
1.We will start by updating the homepage of the site which is built
from the index.md file. The homepage requires a profile
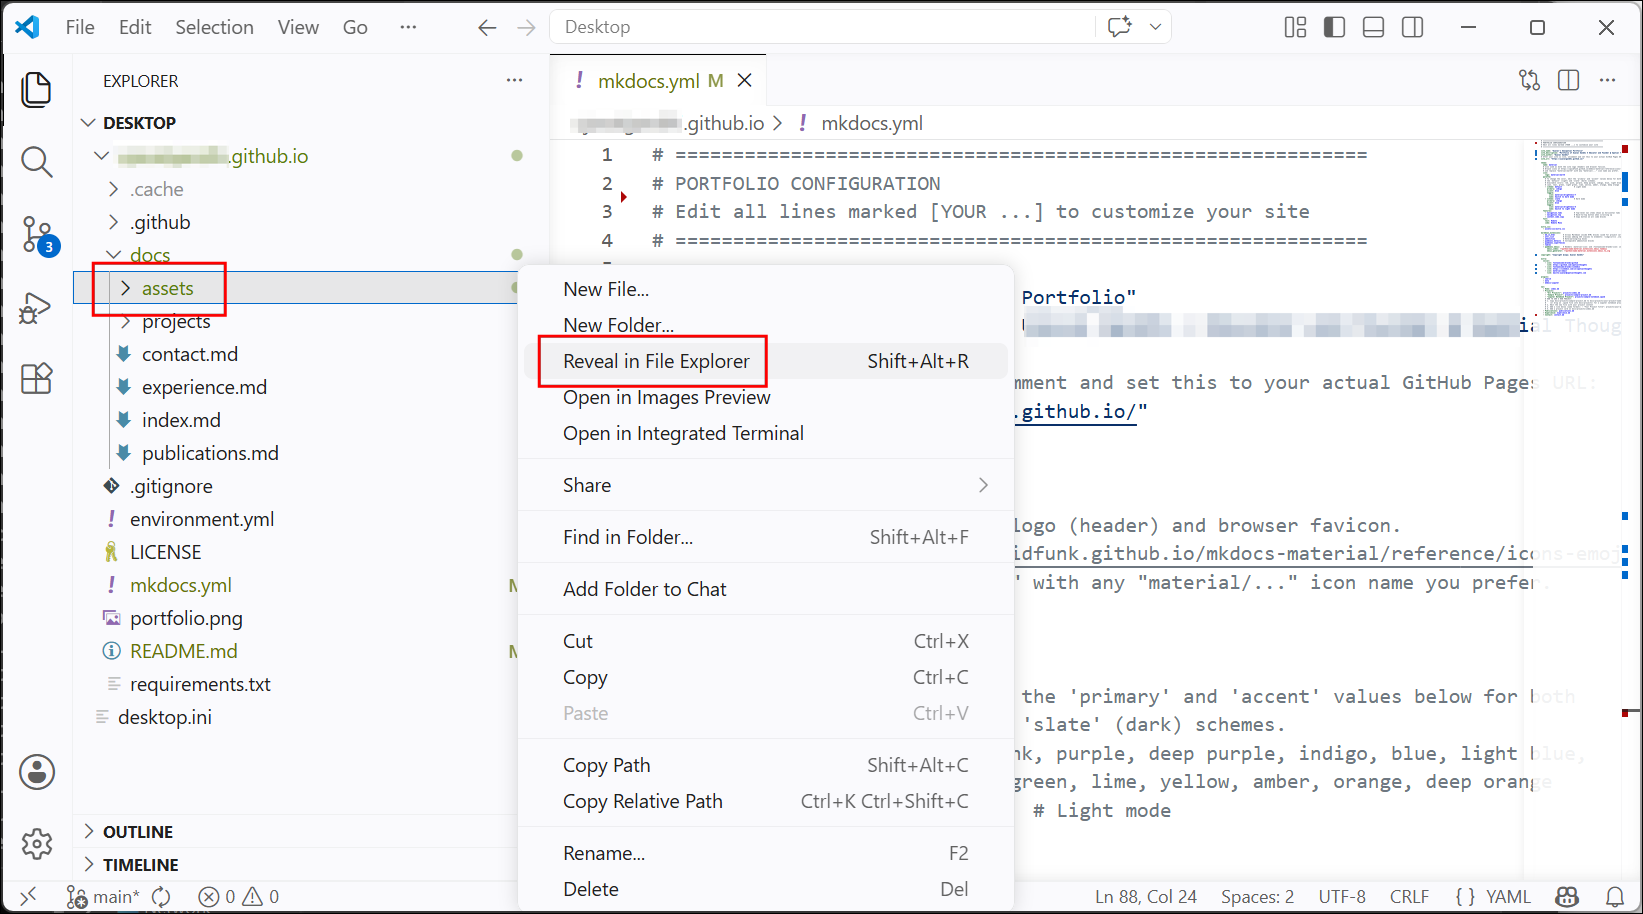
picture and an about me picture. We will first upload these image. Go to
the docs/assets/ folder, right-click and select Reveal
in File Explorer.
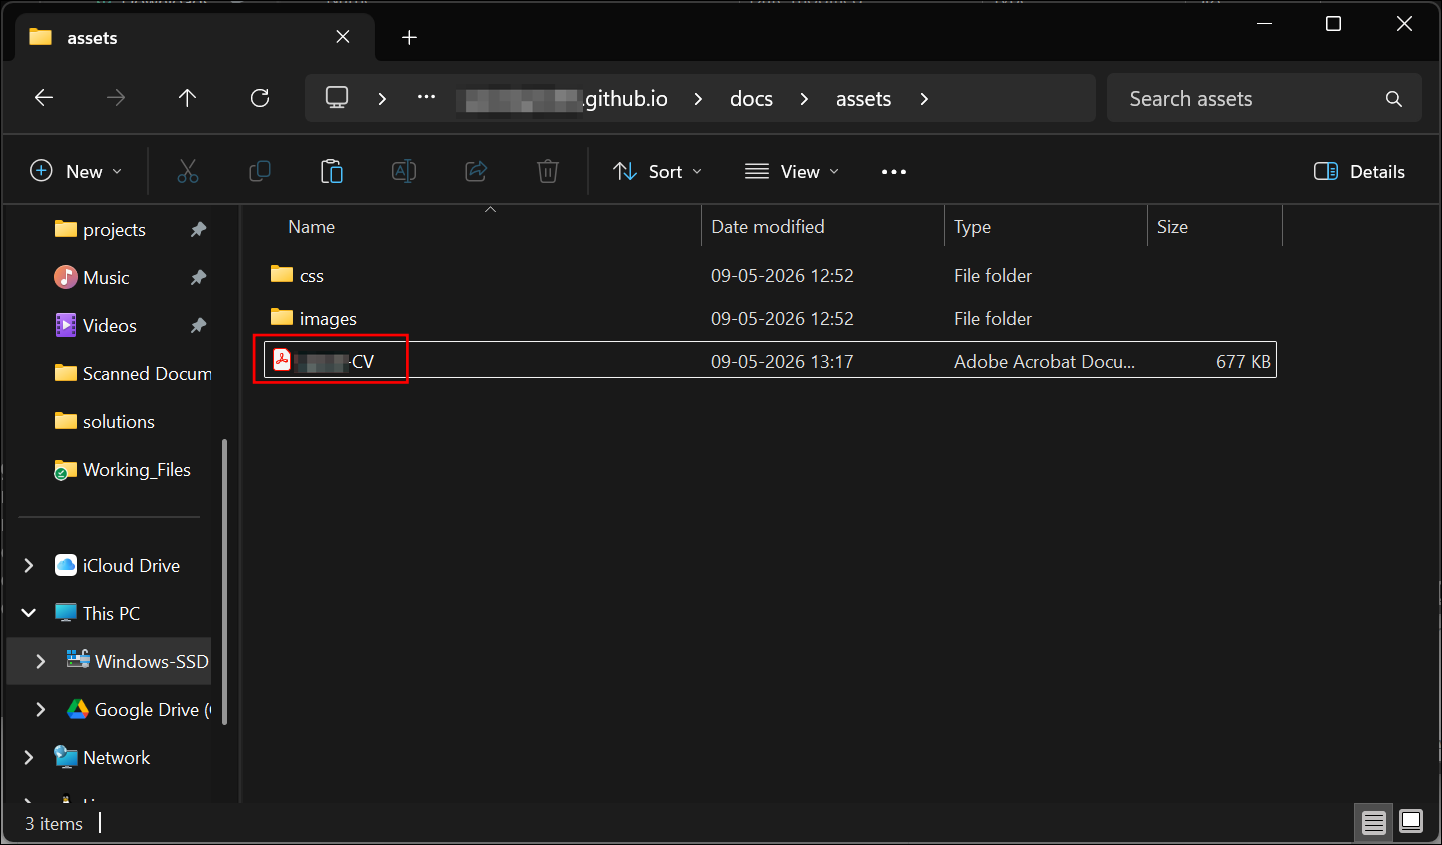
- In the
docs/assets/folder, copy your CV. You can name your file<your name>-CV.pdf(If your name is John, name the fileJohn-CV.pdf).
GitHub has a limit of 25MB per file. Ensure your CV file is smaller than the limit. You can use a tool such as Smallpdf to compress your file.
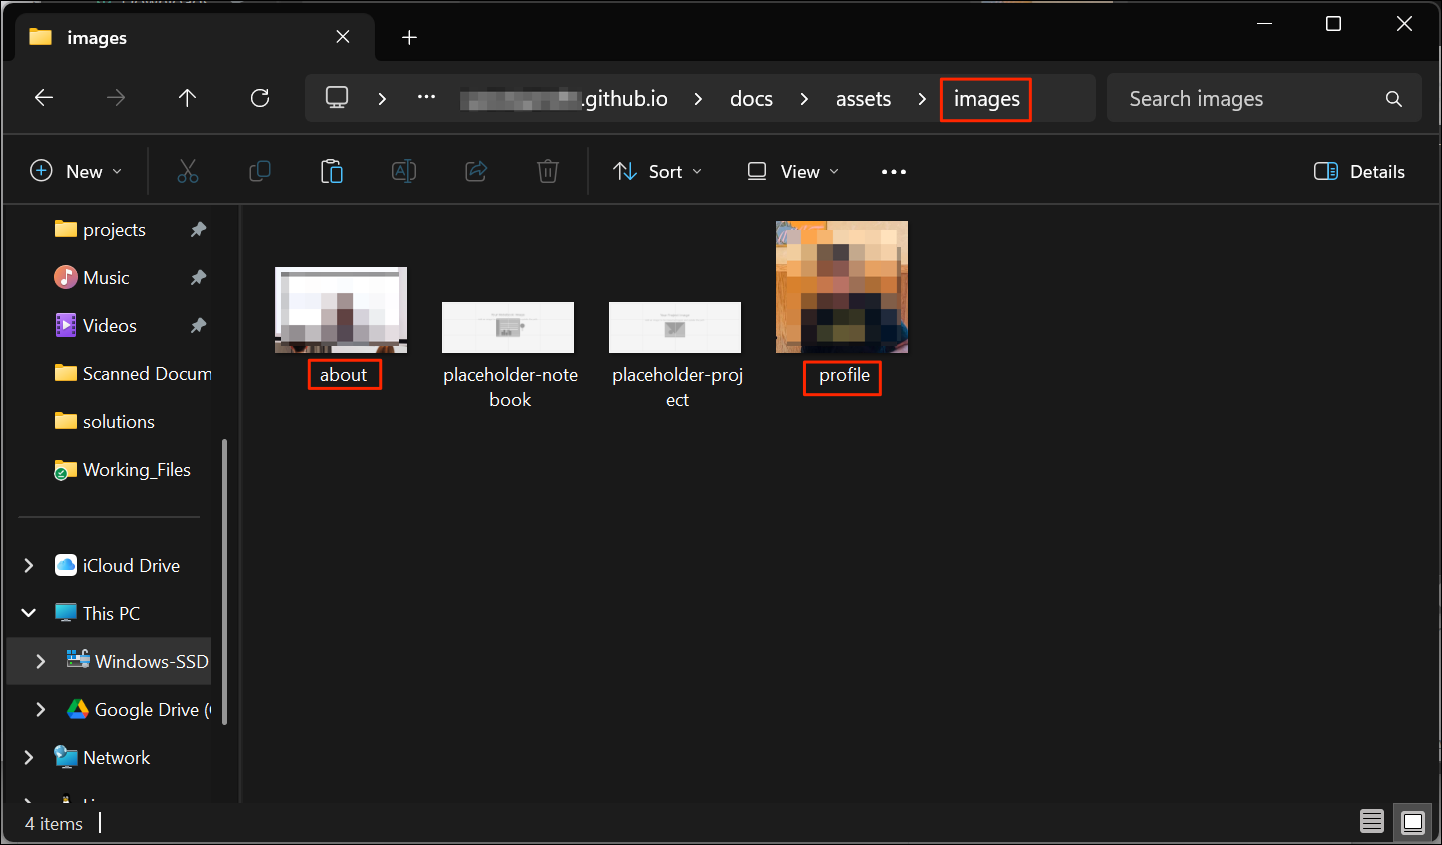
- Next, replace the placeholder images in the
docs/assets/images/folder with your own. Copy your profile photo namedprofile.png(case sensitive). Similarly, copy your about me picture namedabout.png.
Ensure your photos are not too large. These photos are loaded every time someone visits your homepage. To ensure optimal experience, ensure the pictures are not too large. Use Resize image tool on your computer to reduce the size of the images to a maximum of 500px.
- Now we will update the Markdown file for the homepage. Locate the
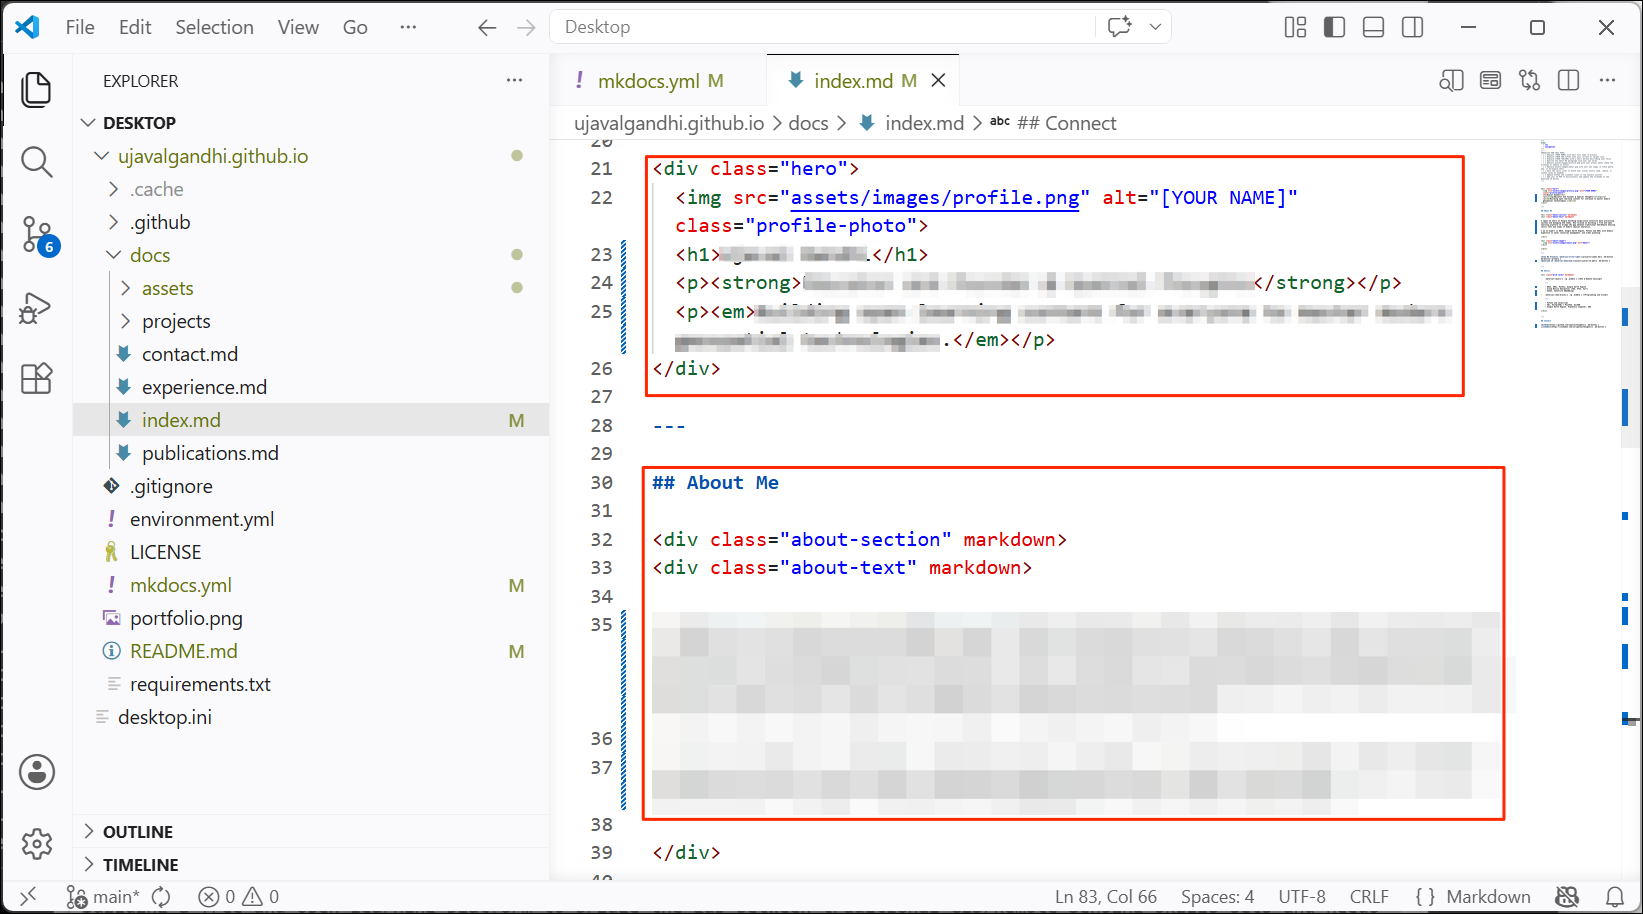
index.mdfile in thedocs/folder. Click to open it.
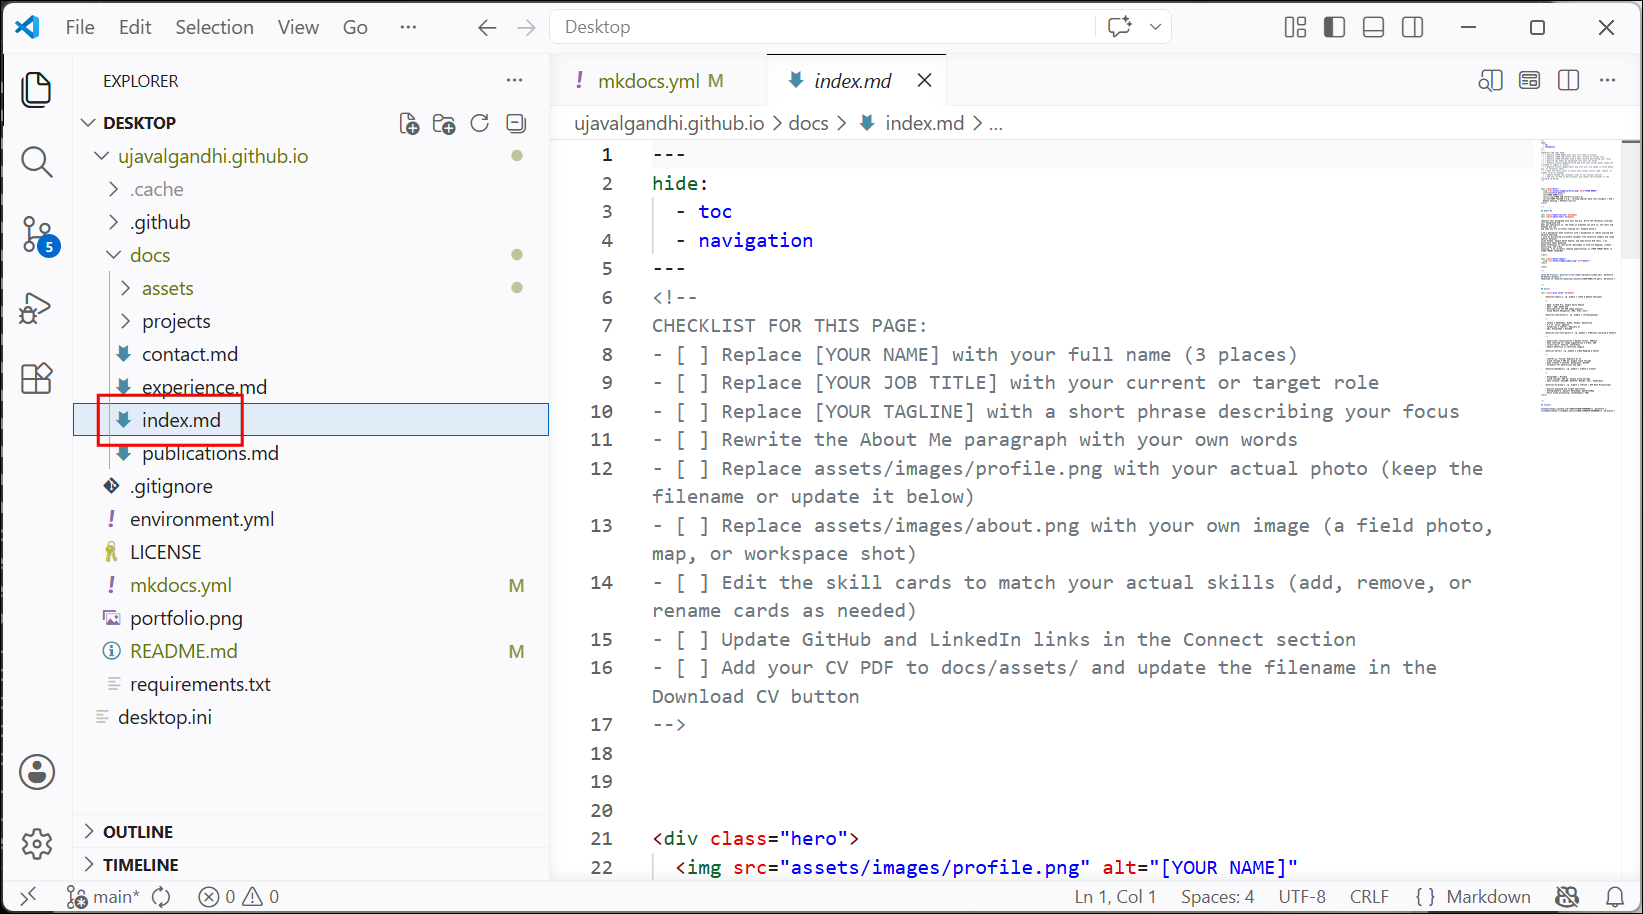
- In the editor, update the placeholders
[YOUR NAME],[YOUR JOB TITLE],[YOUR TAGLINE]with your information. In the About Me section, replace the paragraph with your bio. If your uploaded images have different names, make sure to update them as well. Scroll down and update the Skills and Connect sections. You can delete cards and links which are not relevant for you. Once done, save your changes.
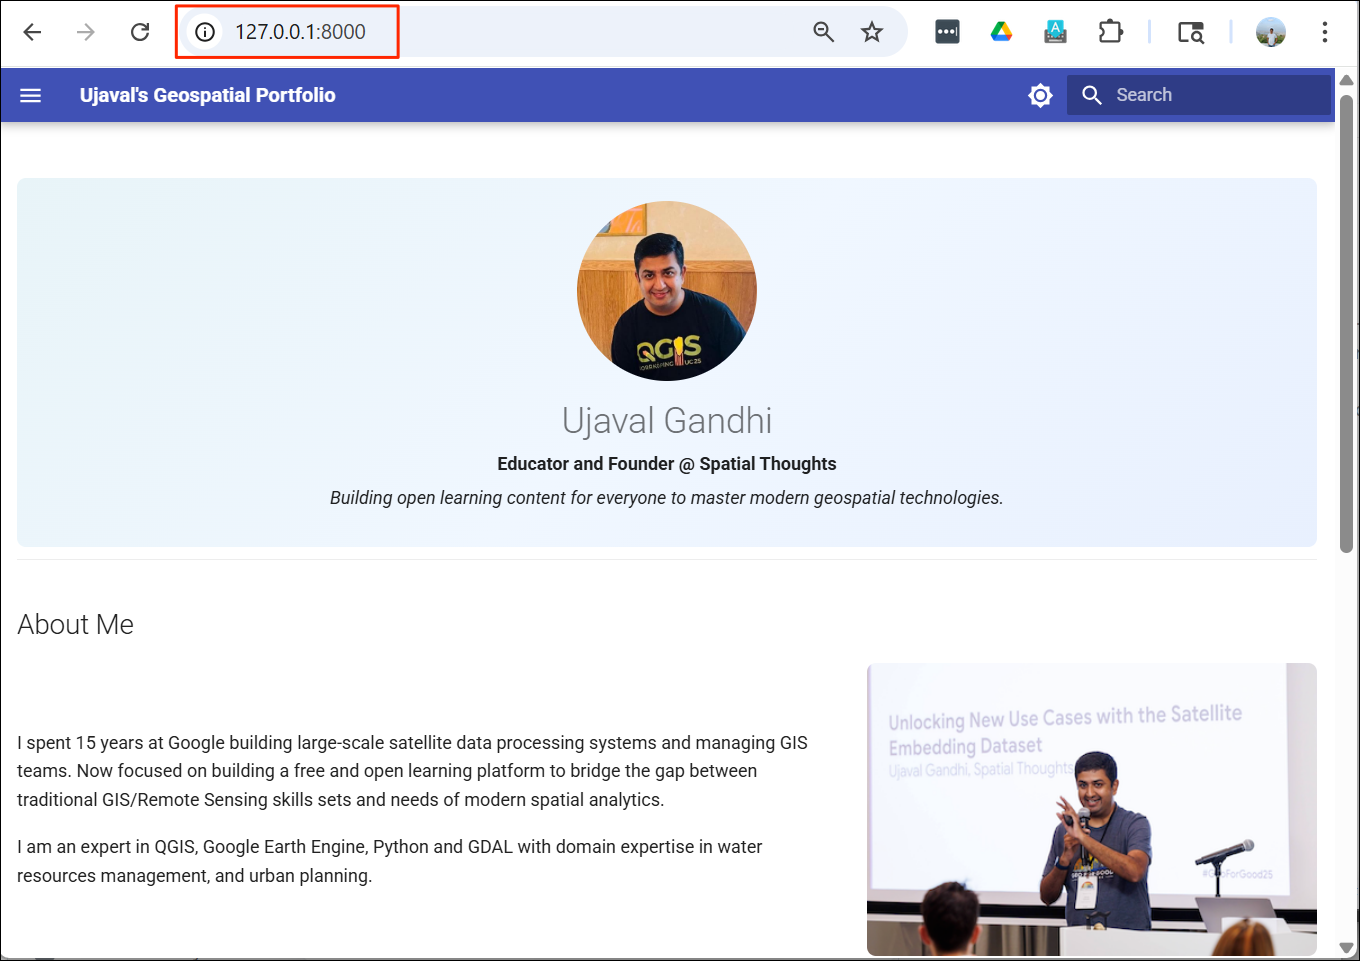
- Your homepage is now ready. Head over to the browser tab connected
to the local development server. You should see the homepage with your
pictures and information. If you see any formatting errors, you can go
back and update the
index.mdfile. If the images do not appear, ensure they are uploaded in the correct folder and the names match as specified in theindex.mdfile.
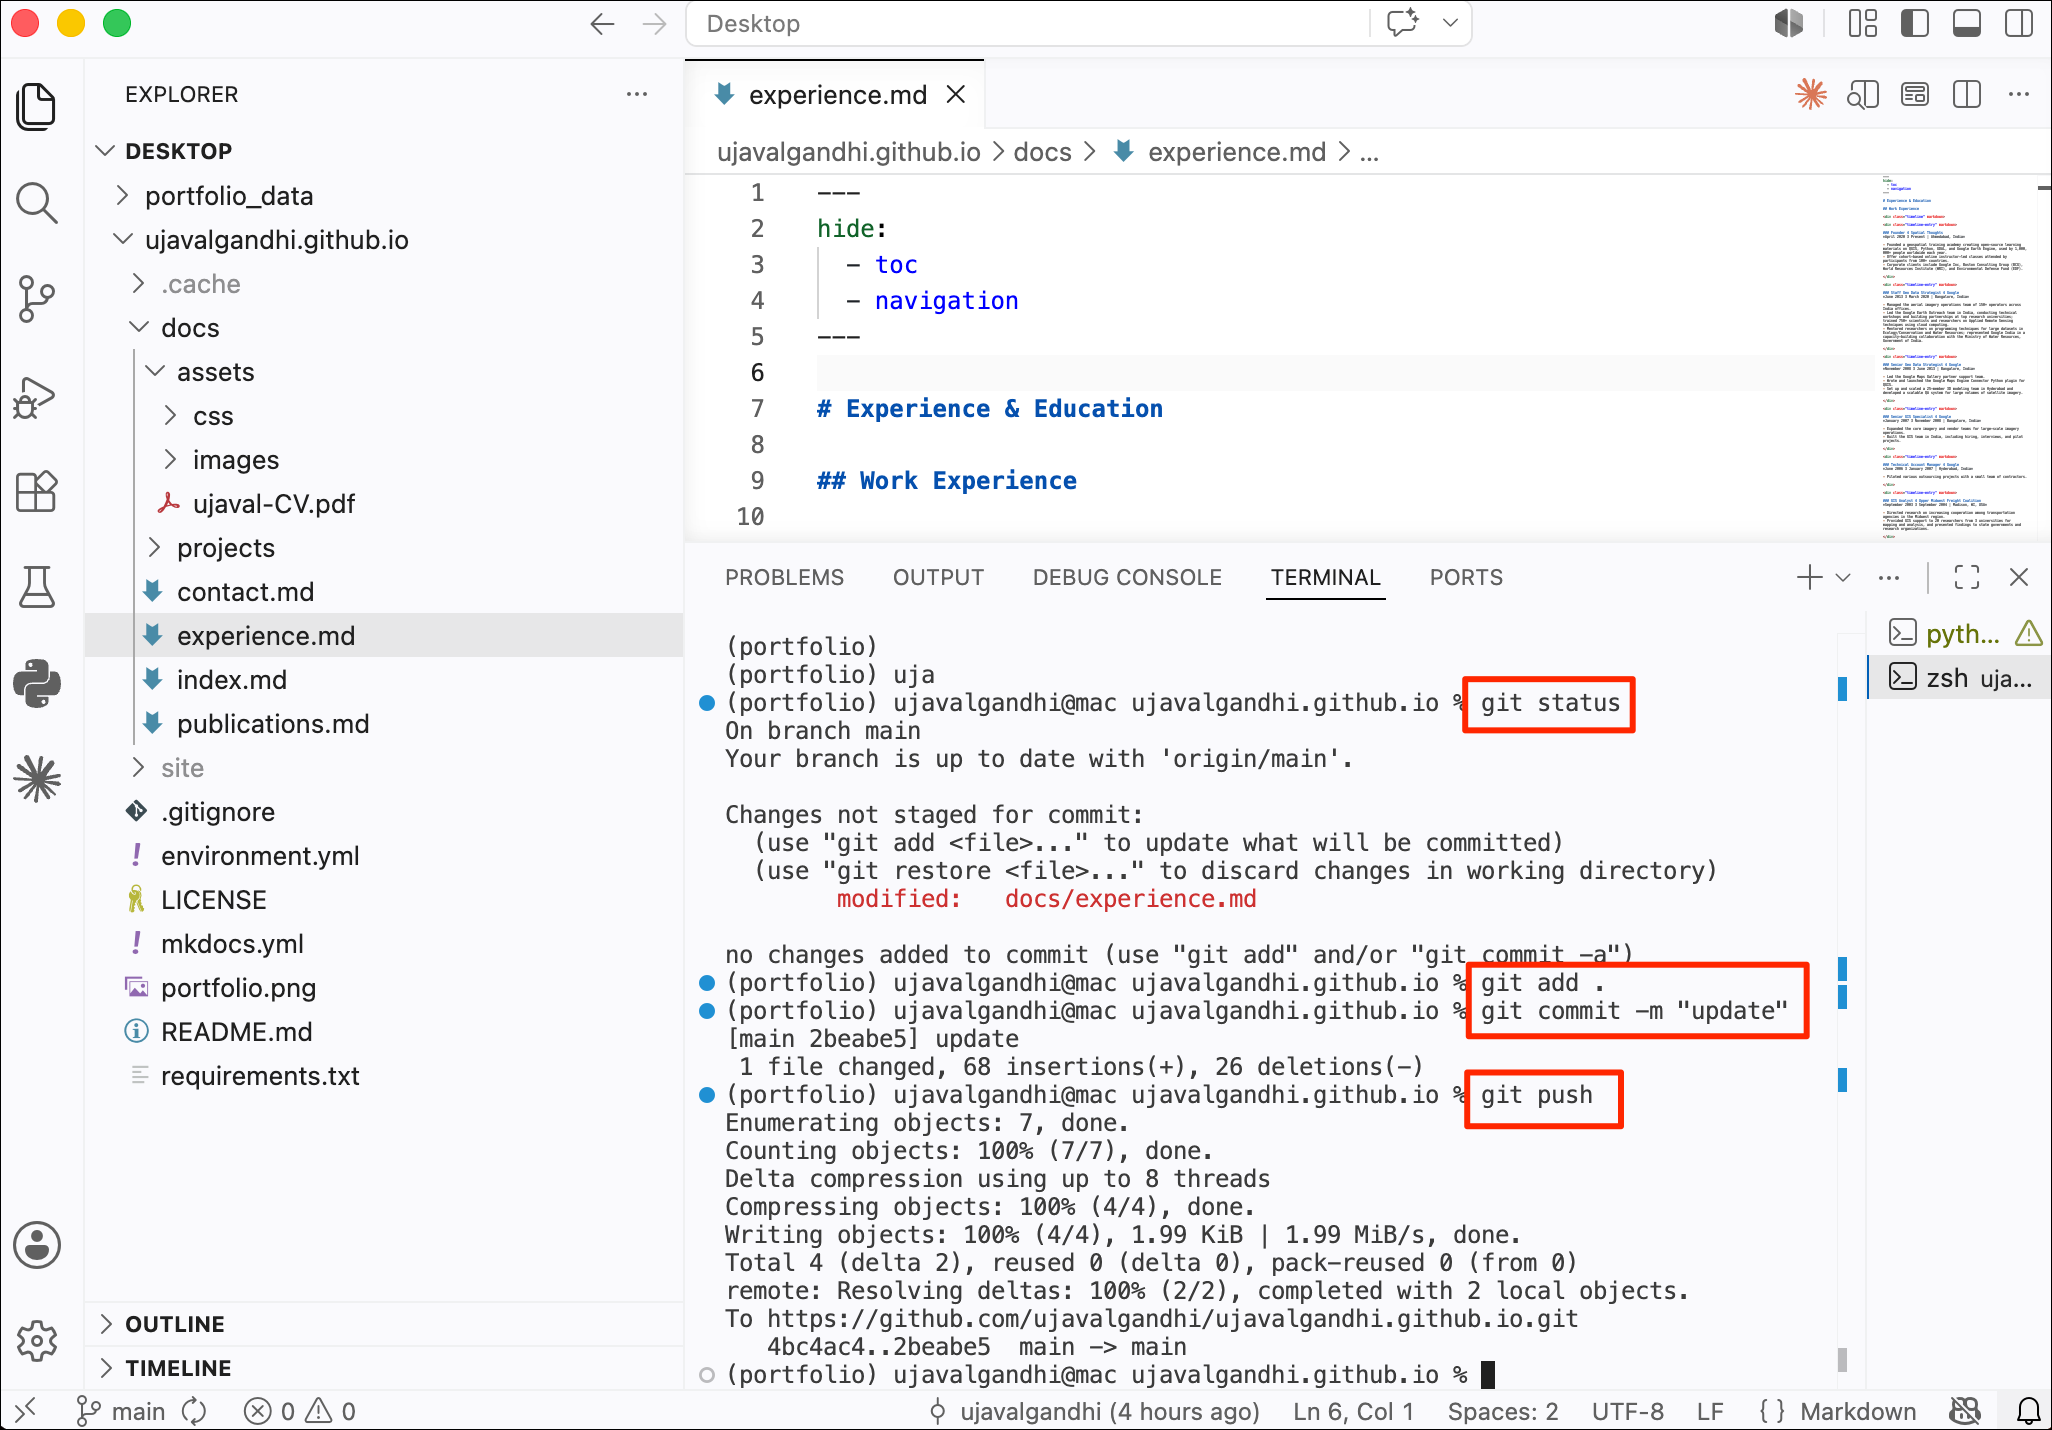
- We will now commit these changes and push them to GitHub. Go to View → Terminal. Click the + New Terminal button.
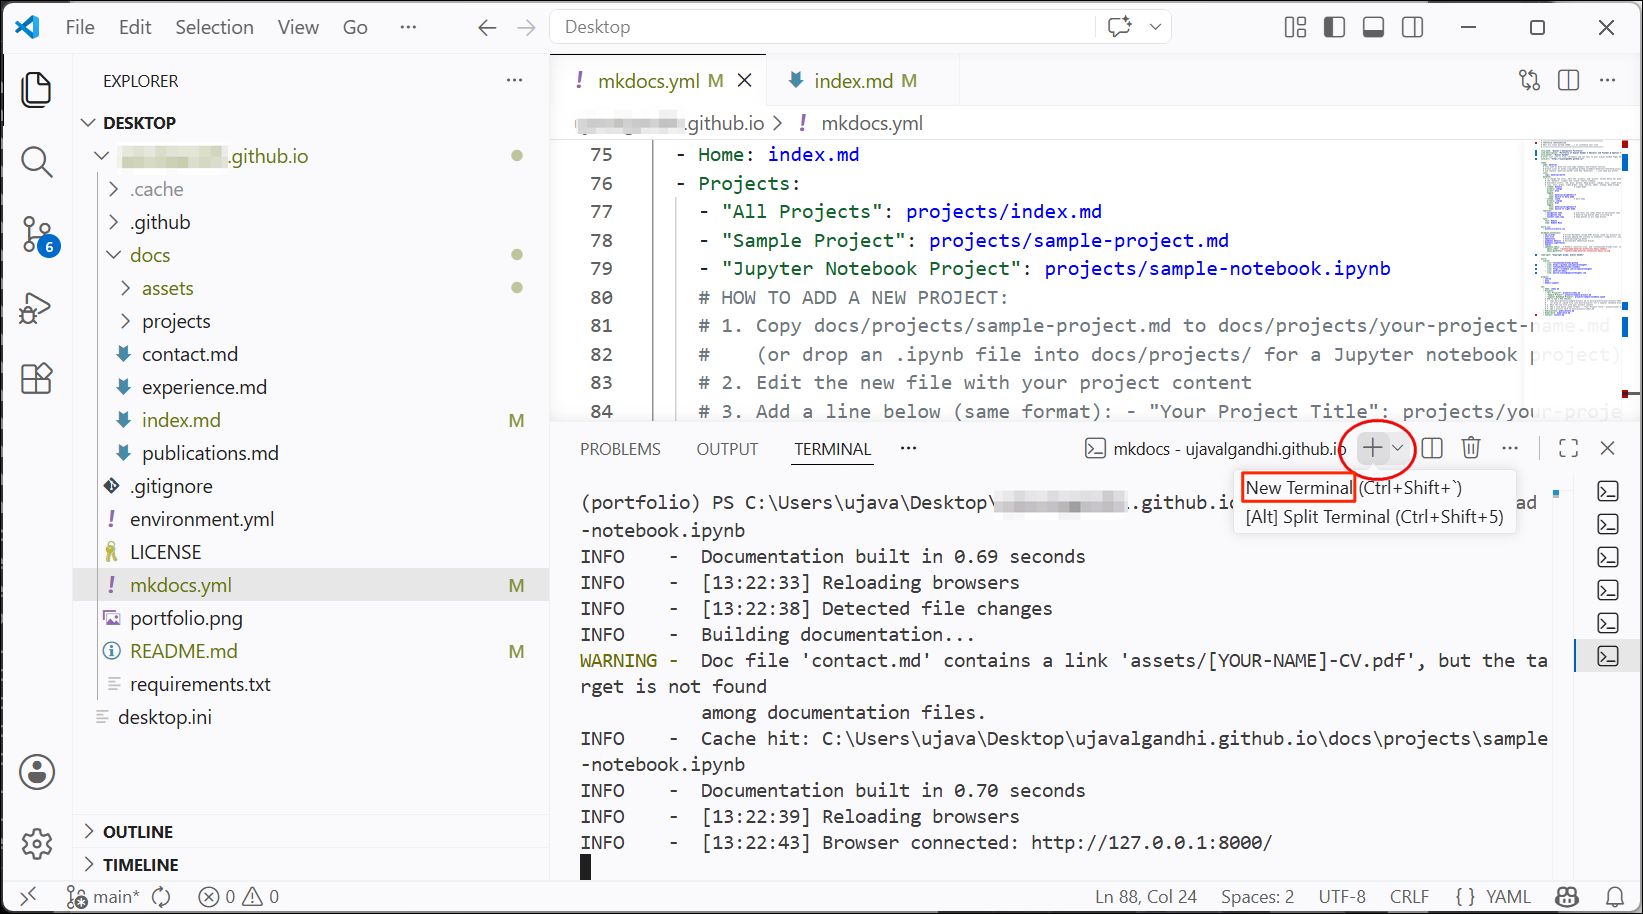
- Change the directory to the GitHub repository and enter the following command to see the status.
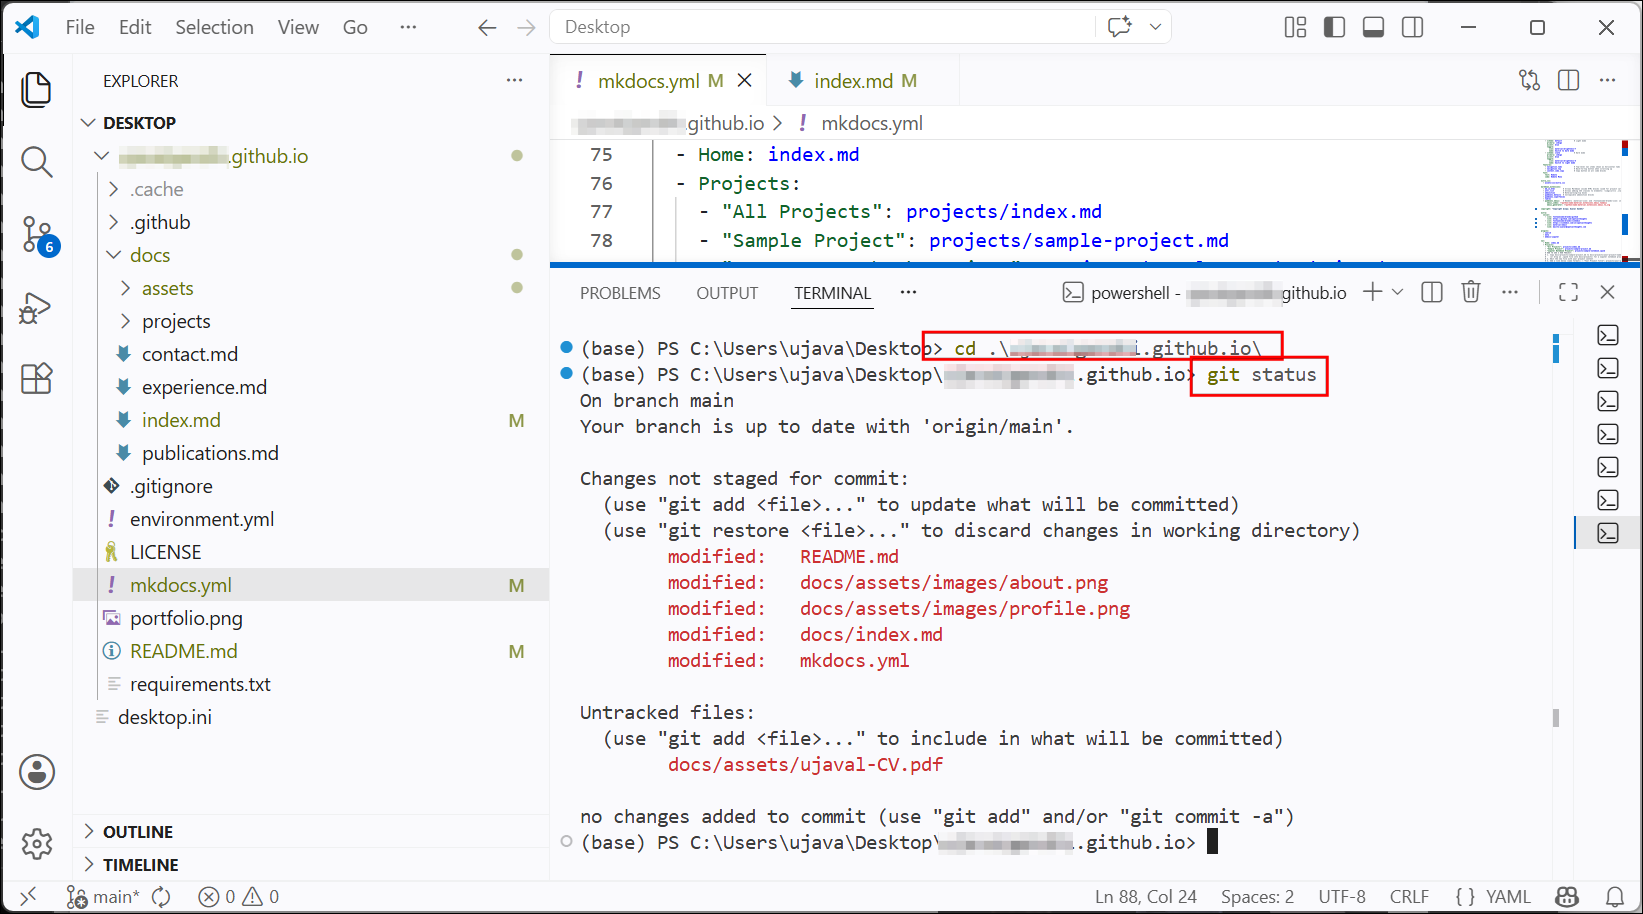
- We have some modifications to existing files and some new files that
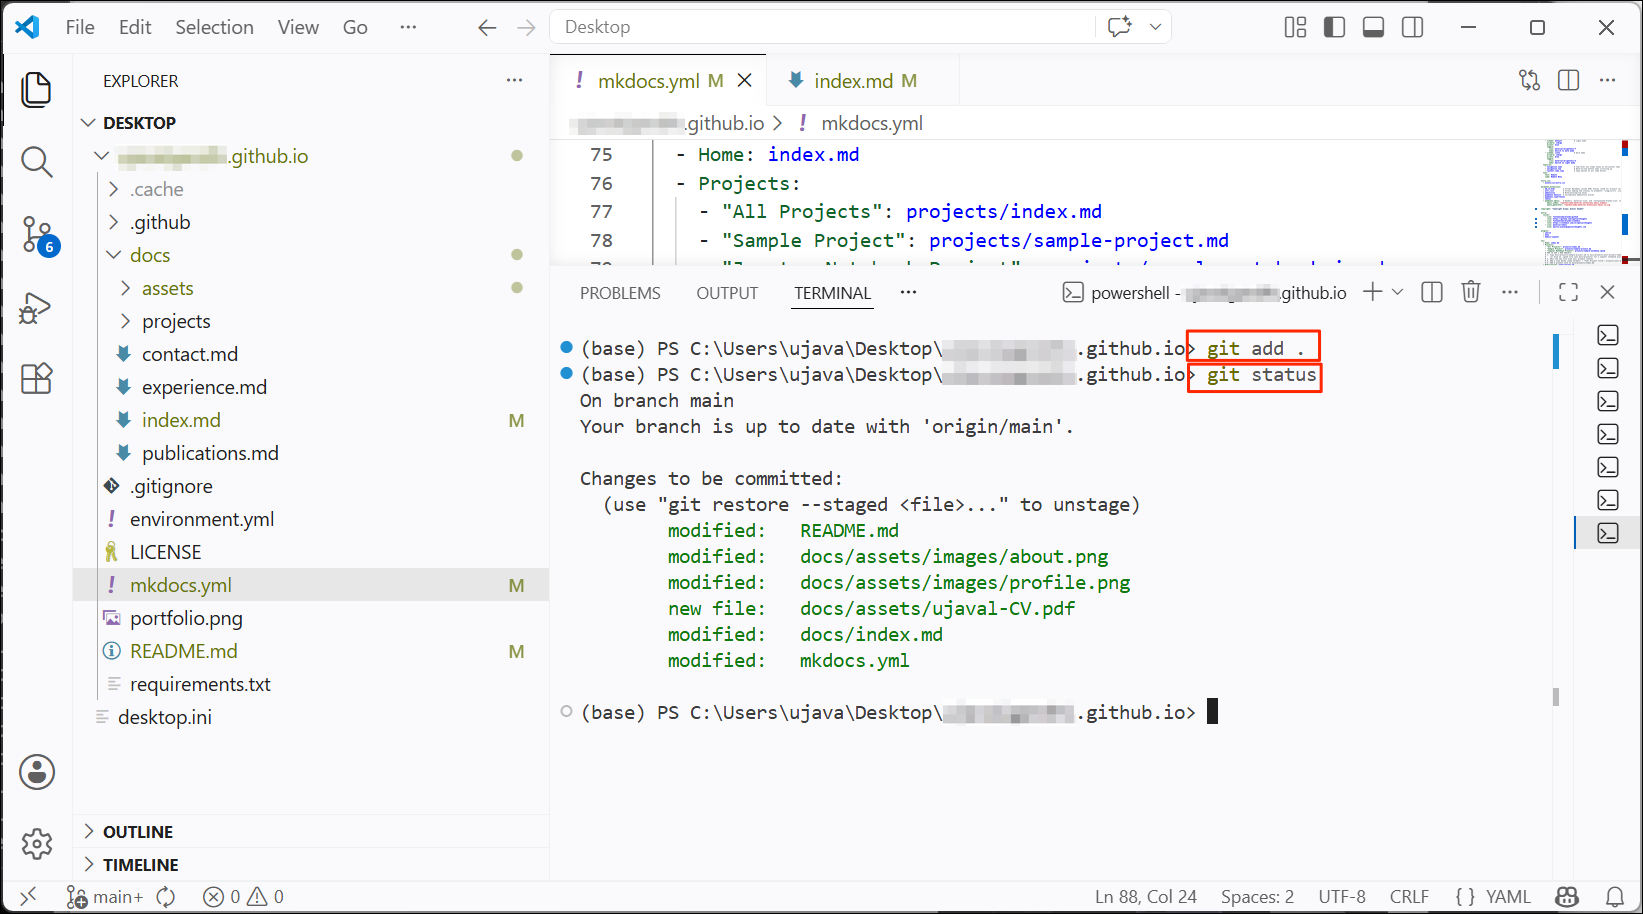
needs to be committed. We first use
git addcommand to move these changes to the staging area.git add .stages all changes in the current directory and its sub-directories.
- Now we commit these changes to the Git repository. The
-moption is to add a commit message that will appear in the Git history.
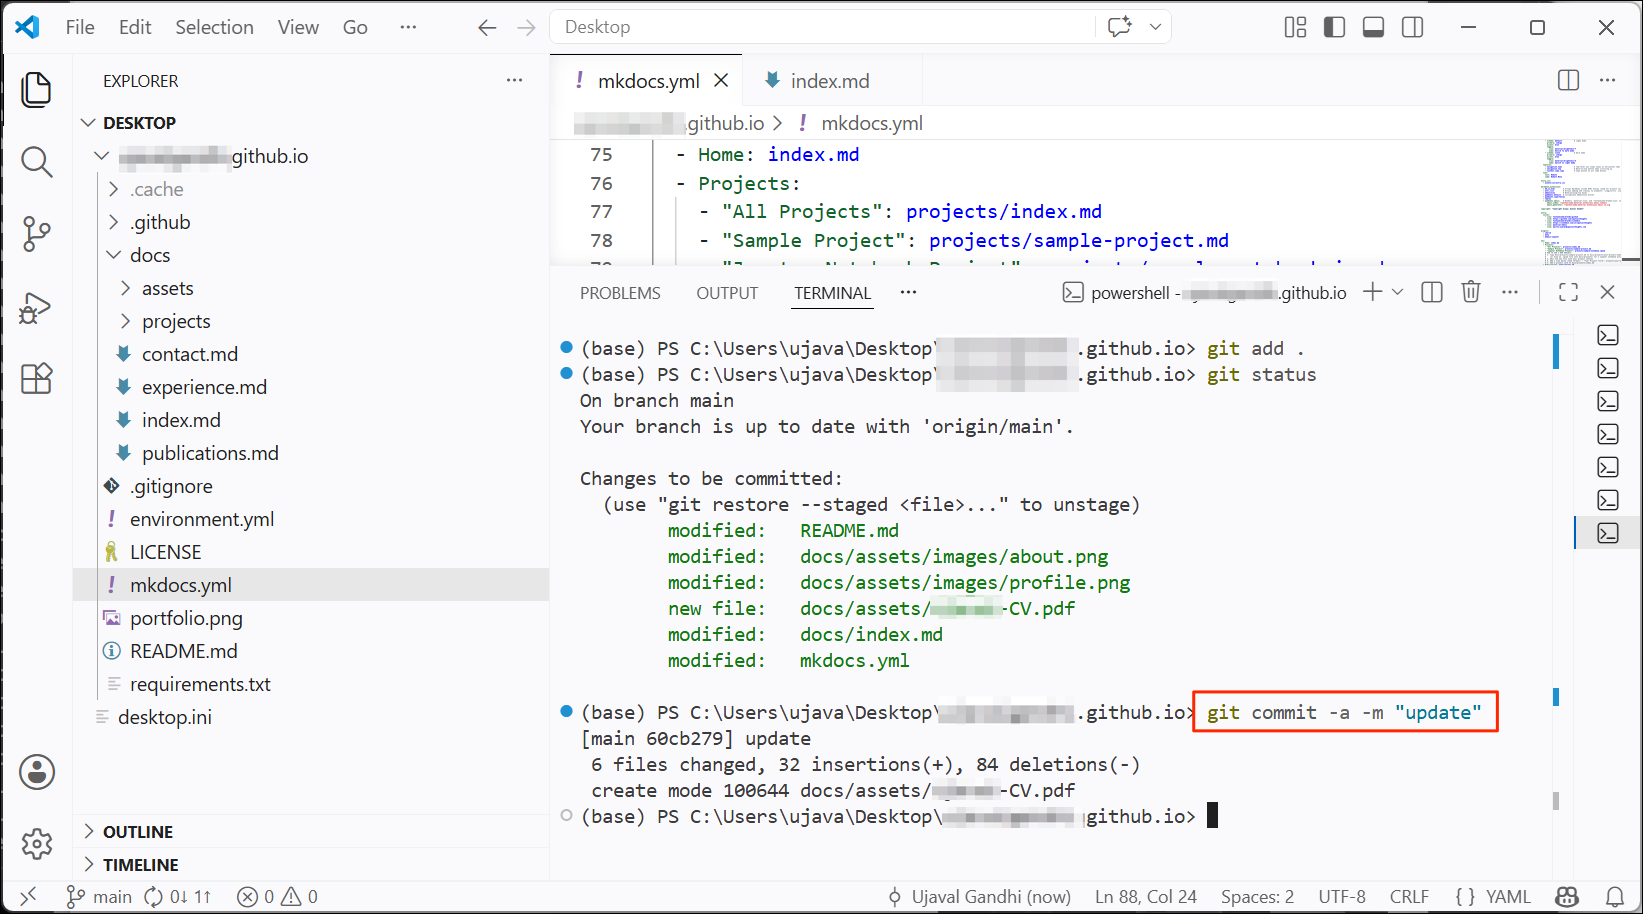
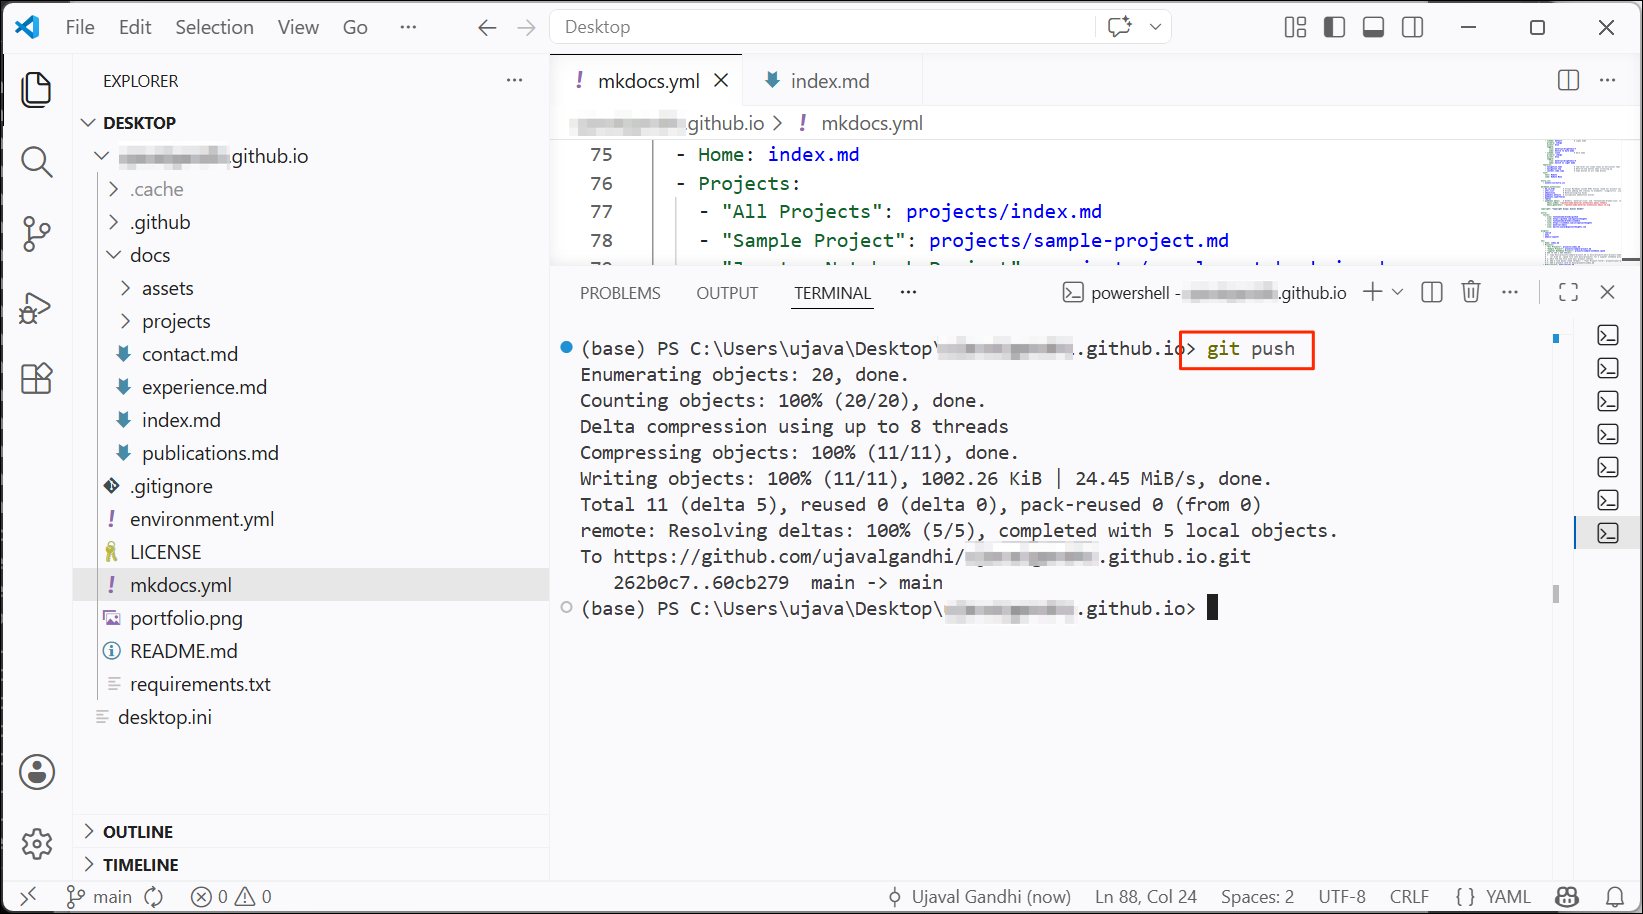
- Next, we push the locally committed changes to the GitHub repository.
If you get an error, make sure you have signed-in to your GitHub account using the GitHub CLI
5.3 Publishing on GitHub Pages
GitHub Pages is a static site
hosting service that turns your repository files into a live website.
You can enable Github Pages on your repository and configure it to
publish the content from a branch to your user site. MkDocs is setup to
create static HTML pages in a separate branch called
gh-pages. We will now create this branch, deploy the
content and setup GitHub Pages to serve from that branch.
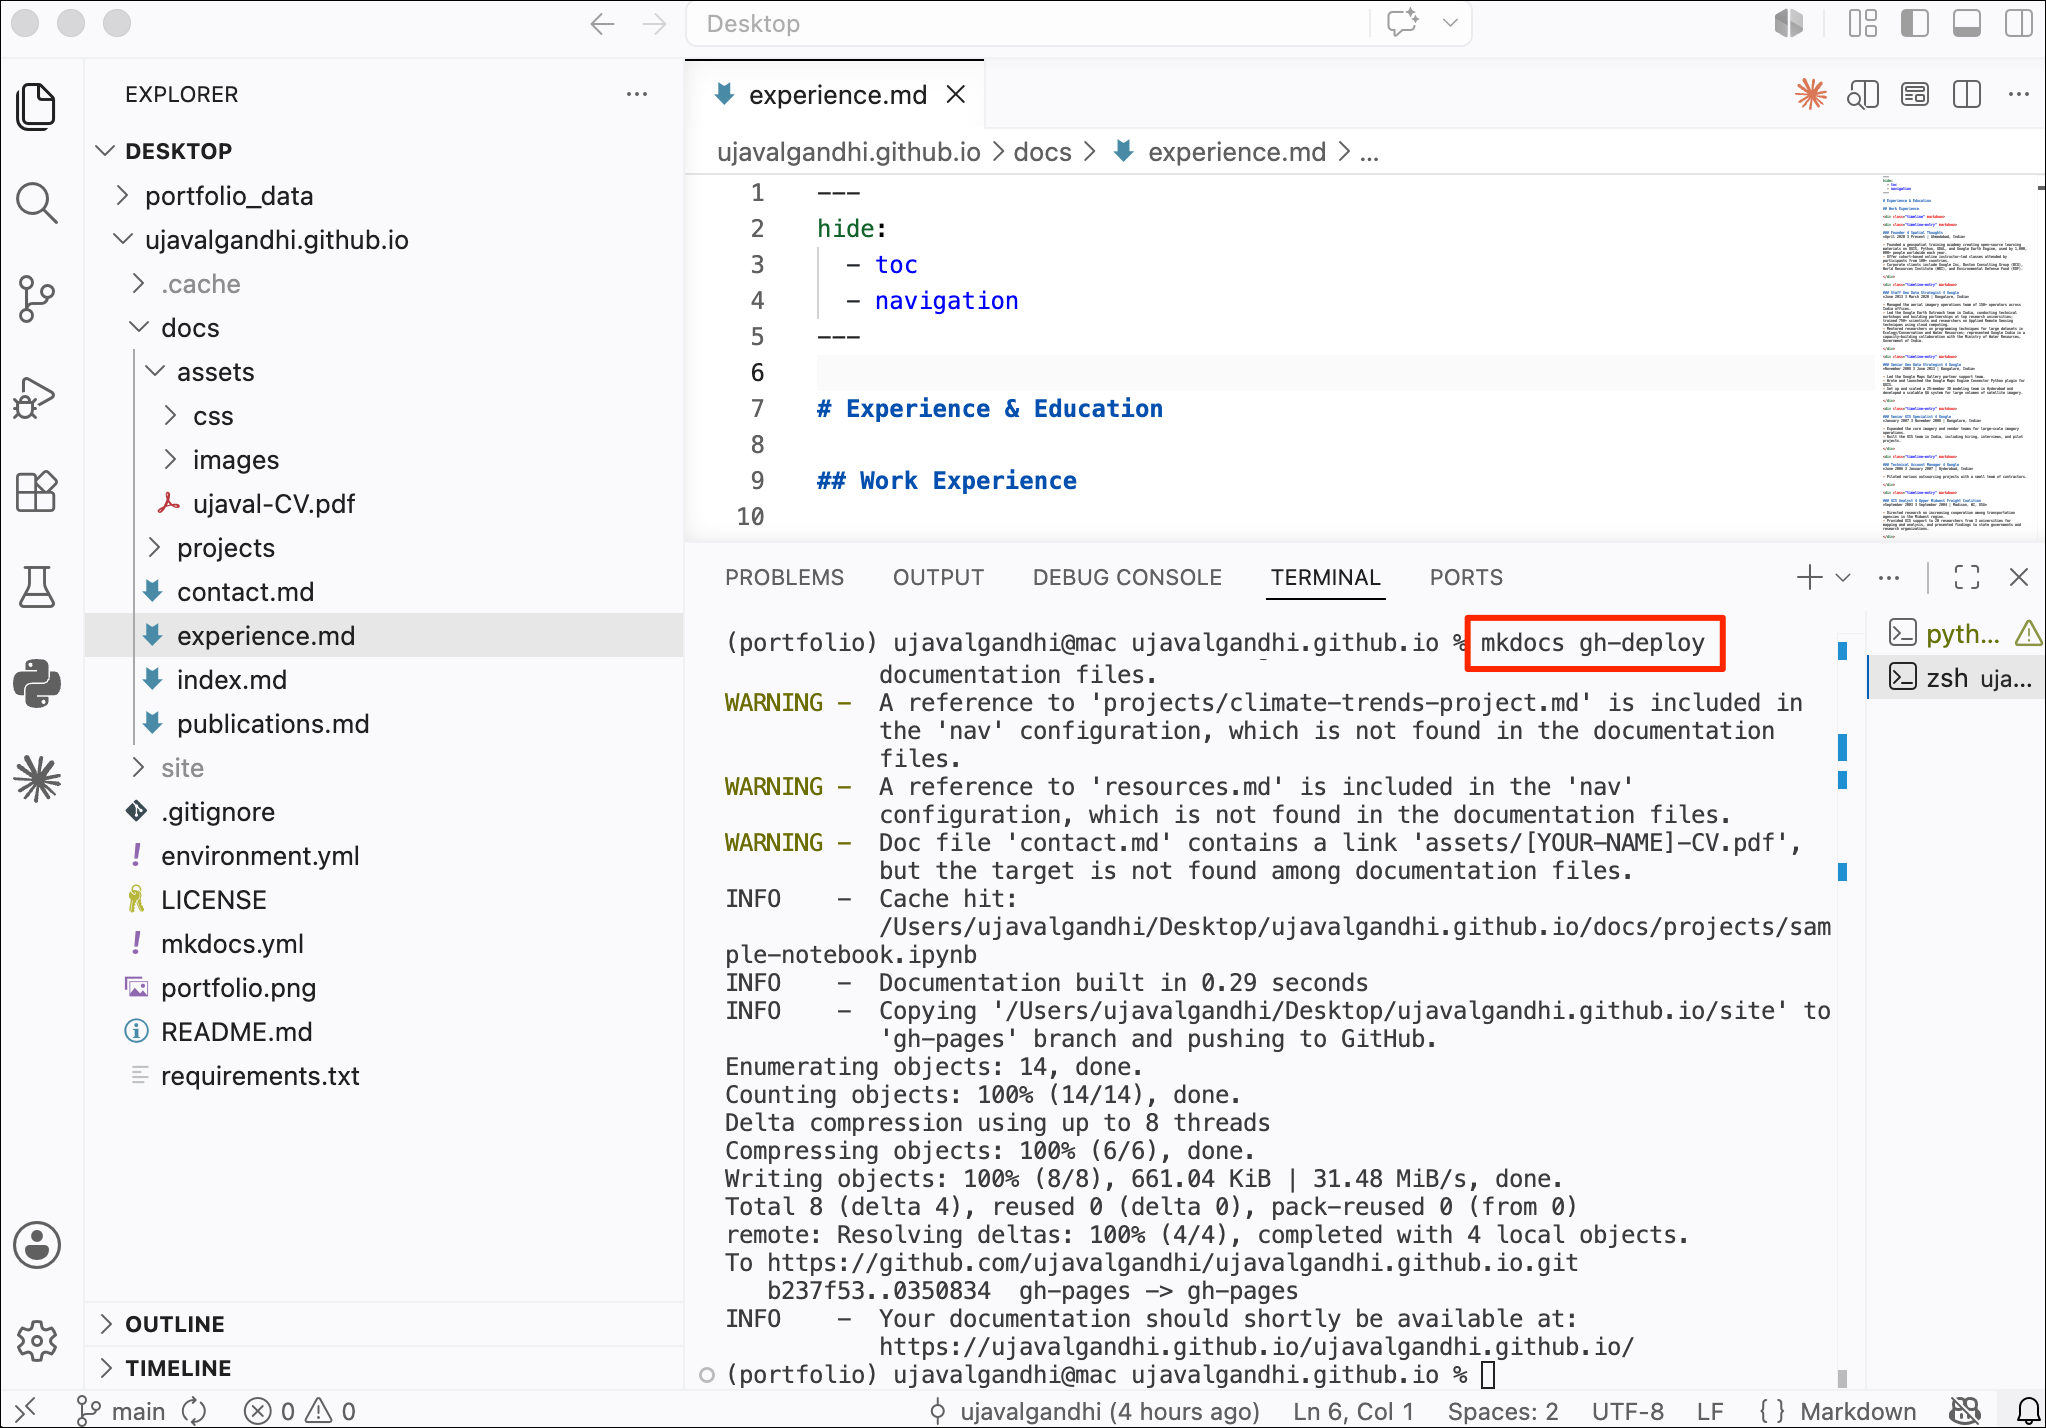
- After you have pushed your changes to the
mainbranch, activate the conda environment in the same Terminal window.
- Once the environment is activated run the following command that
will create the HTML pages and push them to a branch named
gh-pages.
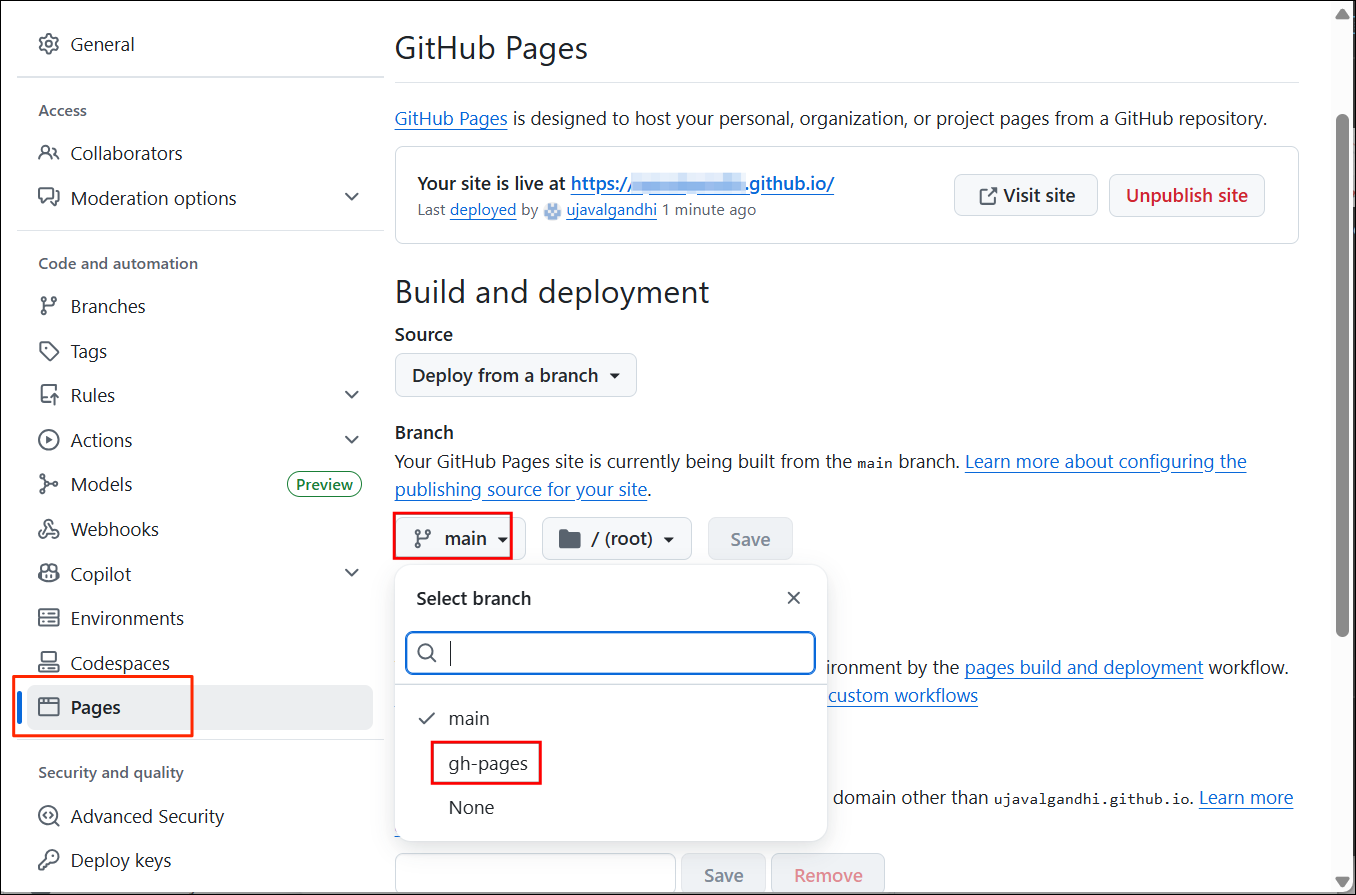
- Go to your portfolio repository on Github. Select the
gh-pagesbranch to see the website content pushed there. We will now setup GitHib Pages to serve this content.
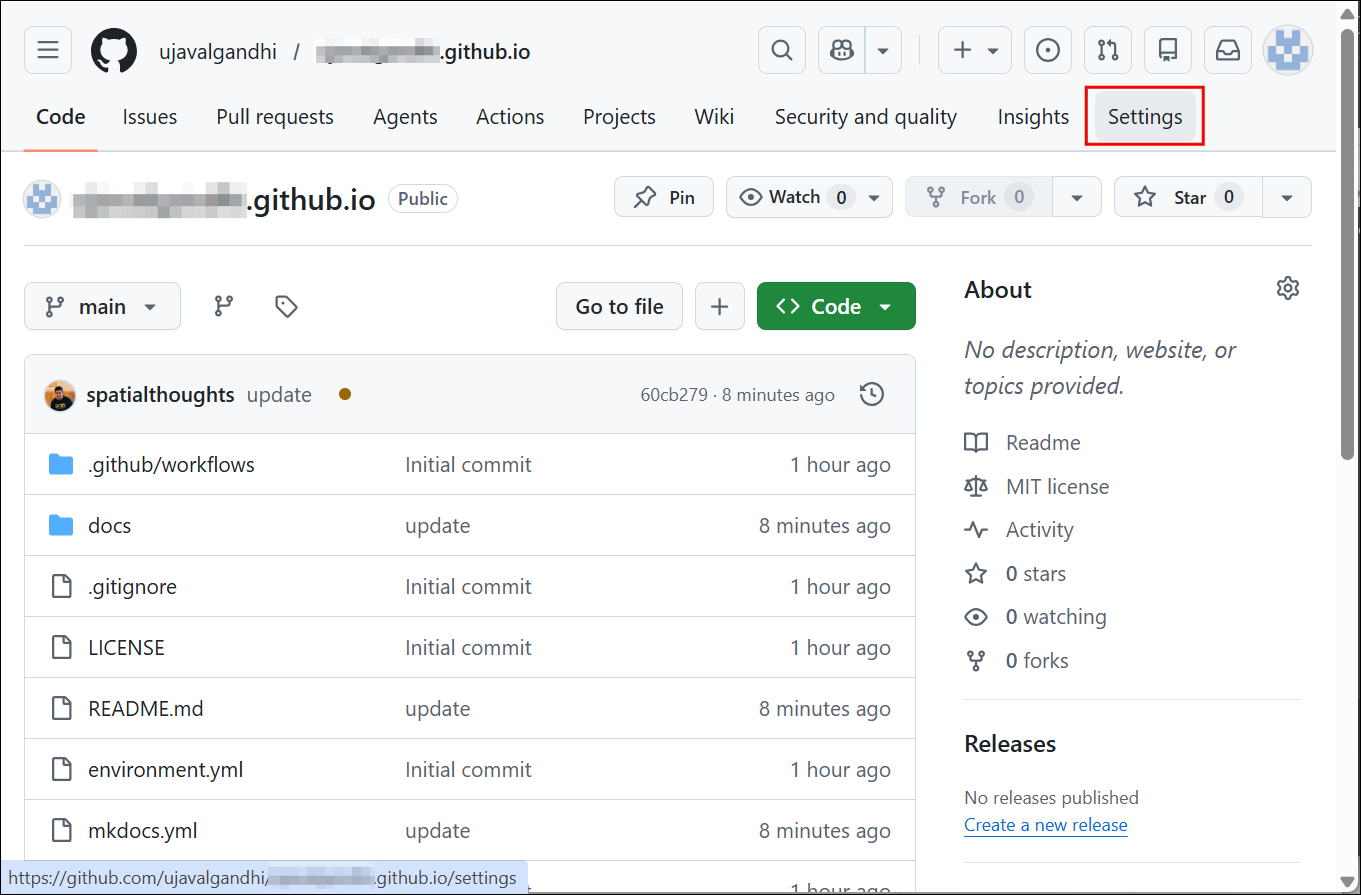
- Navigate to Settings → Pages.

- For user repositories named
<your-username>.github.io, GitHub Pages is enabled by default. If it is not enabled for your repository, select a branch under Deploy from a branch option.
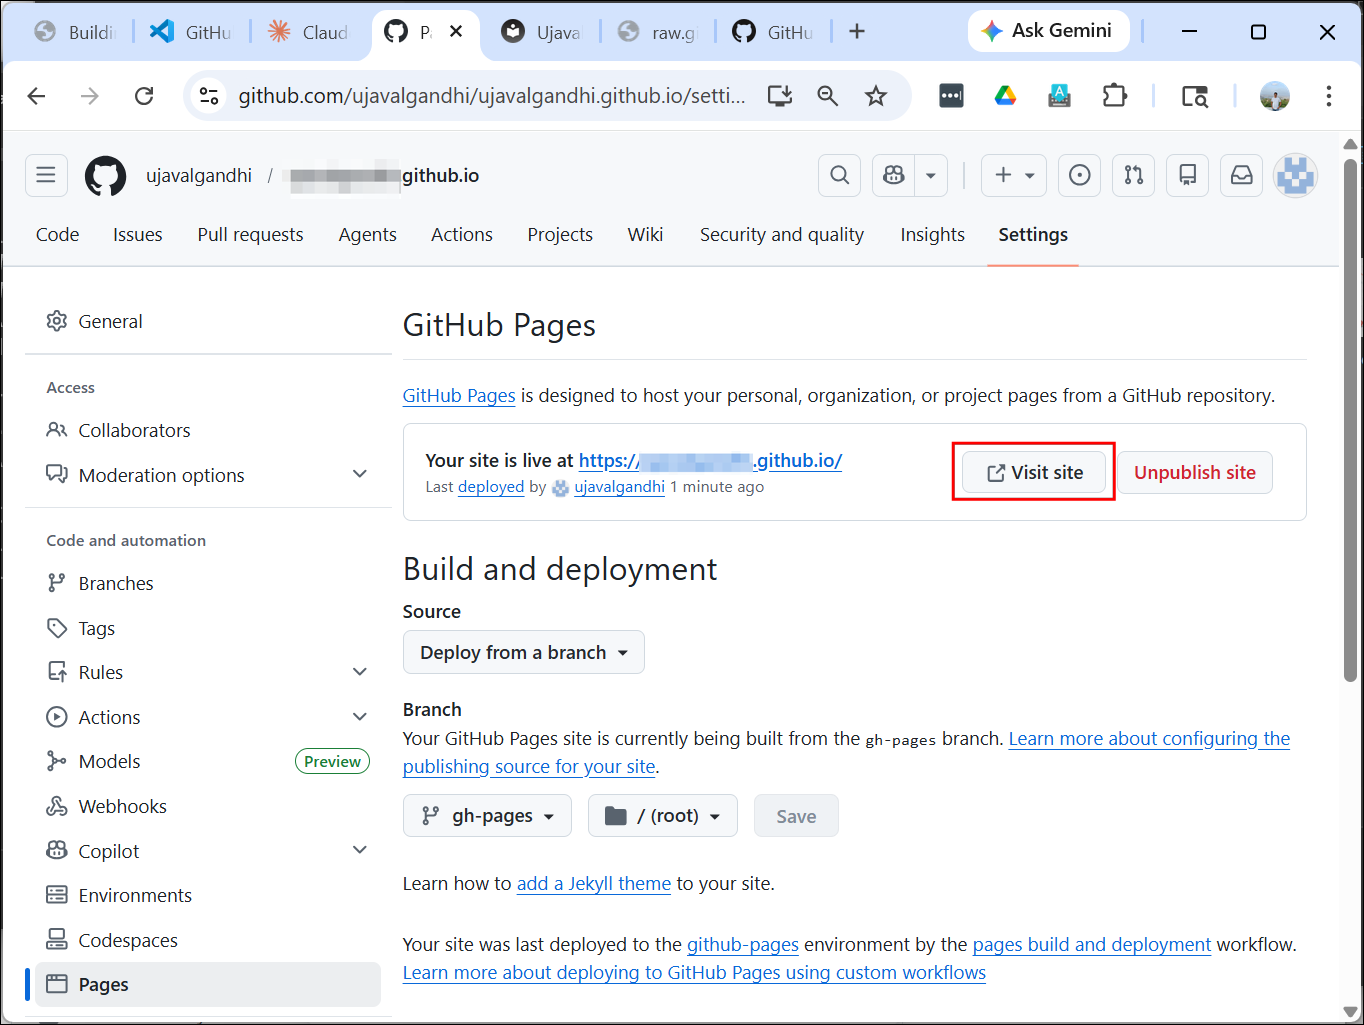
- Select
gh-pagesand click Save.

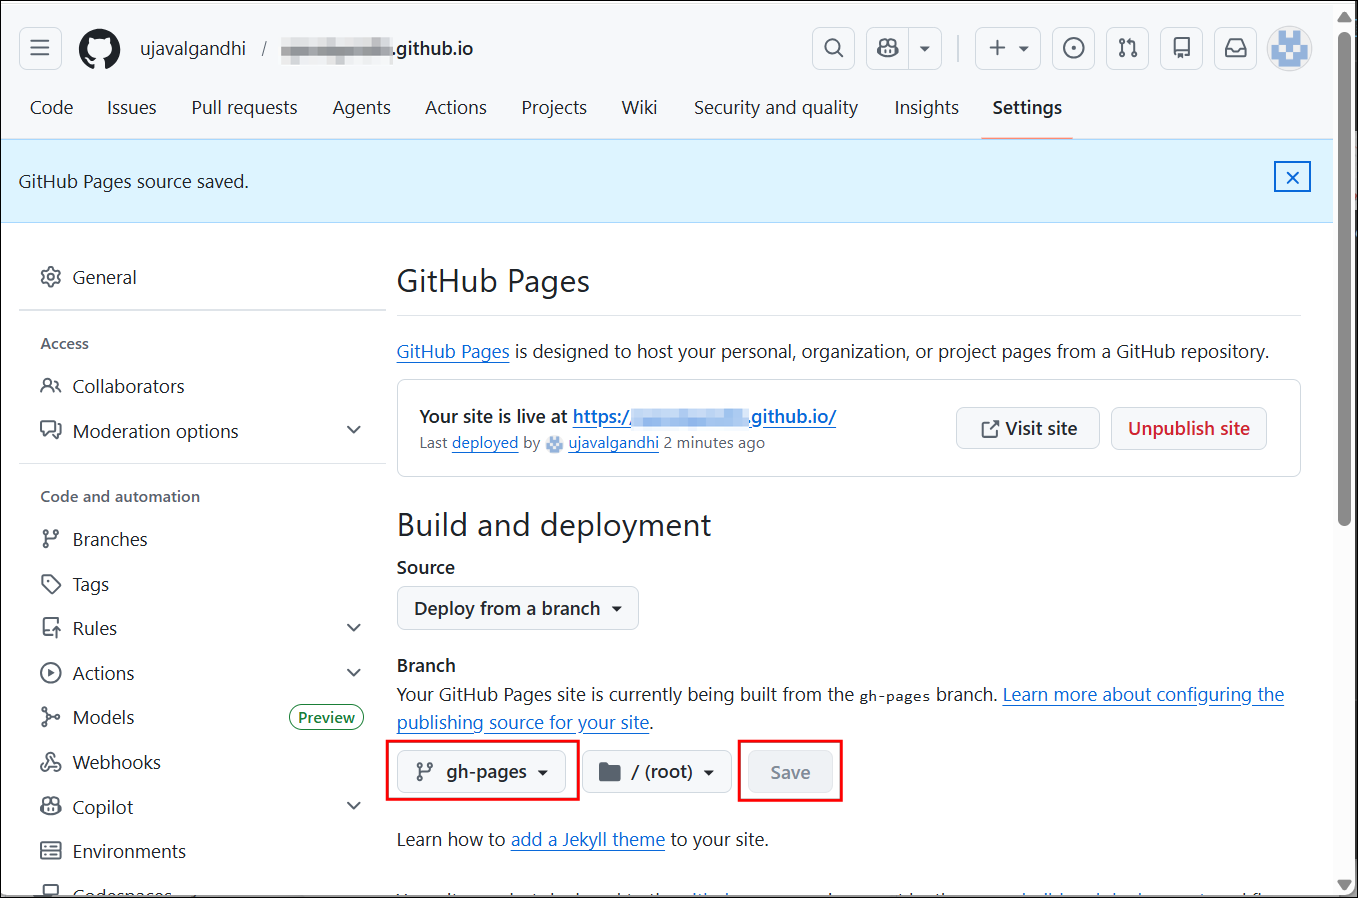
- The content will now be served as a static website on GitHub Pages. Wait for a minute for this process to finish and go to Settings → Pages and click on the Visit site button.

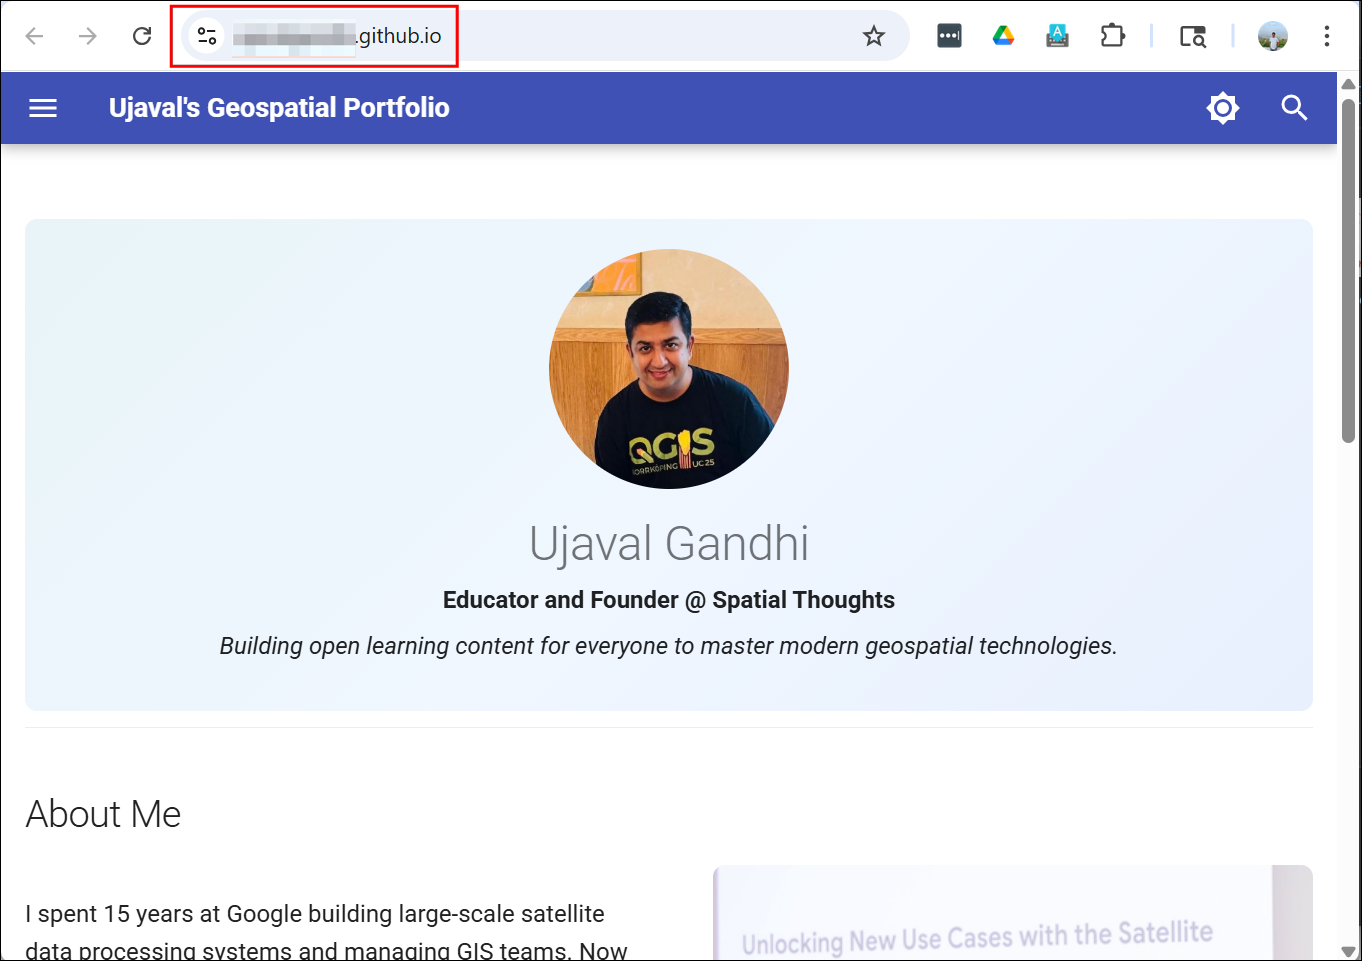
- You will now see the site deployed and accessible from a public URL
<your-username>.github.io.
This is a one-time configuration. Now your repository is set to
automatically build and deploy to GitHub Pages. Next time you update any
content in the main branch, run
mkdocs gh-deploy and the site will be updated.
6. Updating the Site Content
6.1 Updating Content Pages (LLM Assisted)
You are now familiar with the process of updating the content of a
page with Markdown text. You can update the contact.md,
experience.md and publications.md with
personalized content. Most of this content will already be present in
your CV, LinkedIN profile or Google Scholar. In this section, we will
learn how we can use LLM AI Assistants to automatically format existing
content to Markdown for easily updating your portfolio.
We recommend using Claude AI but you may use your favorite AI assistant.
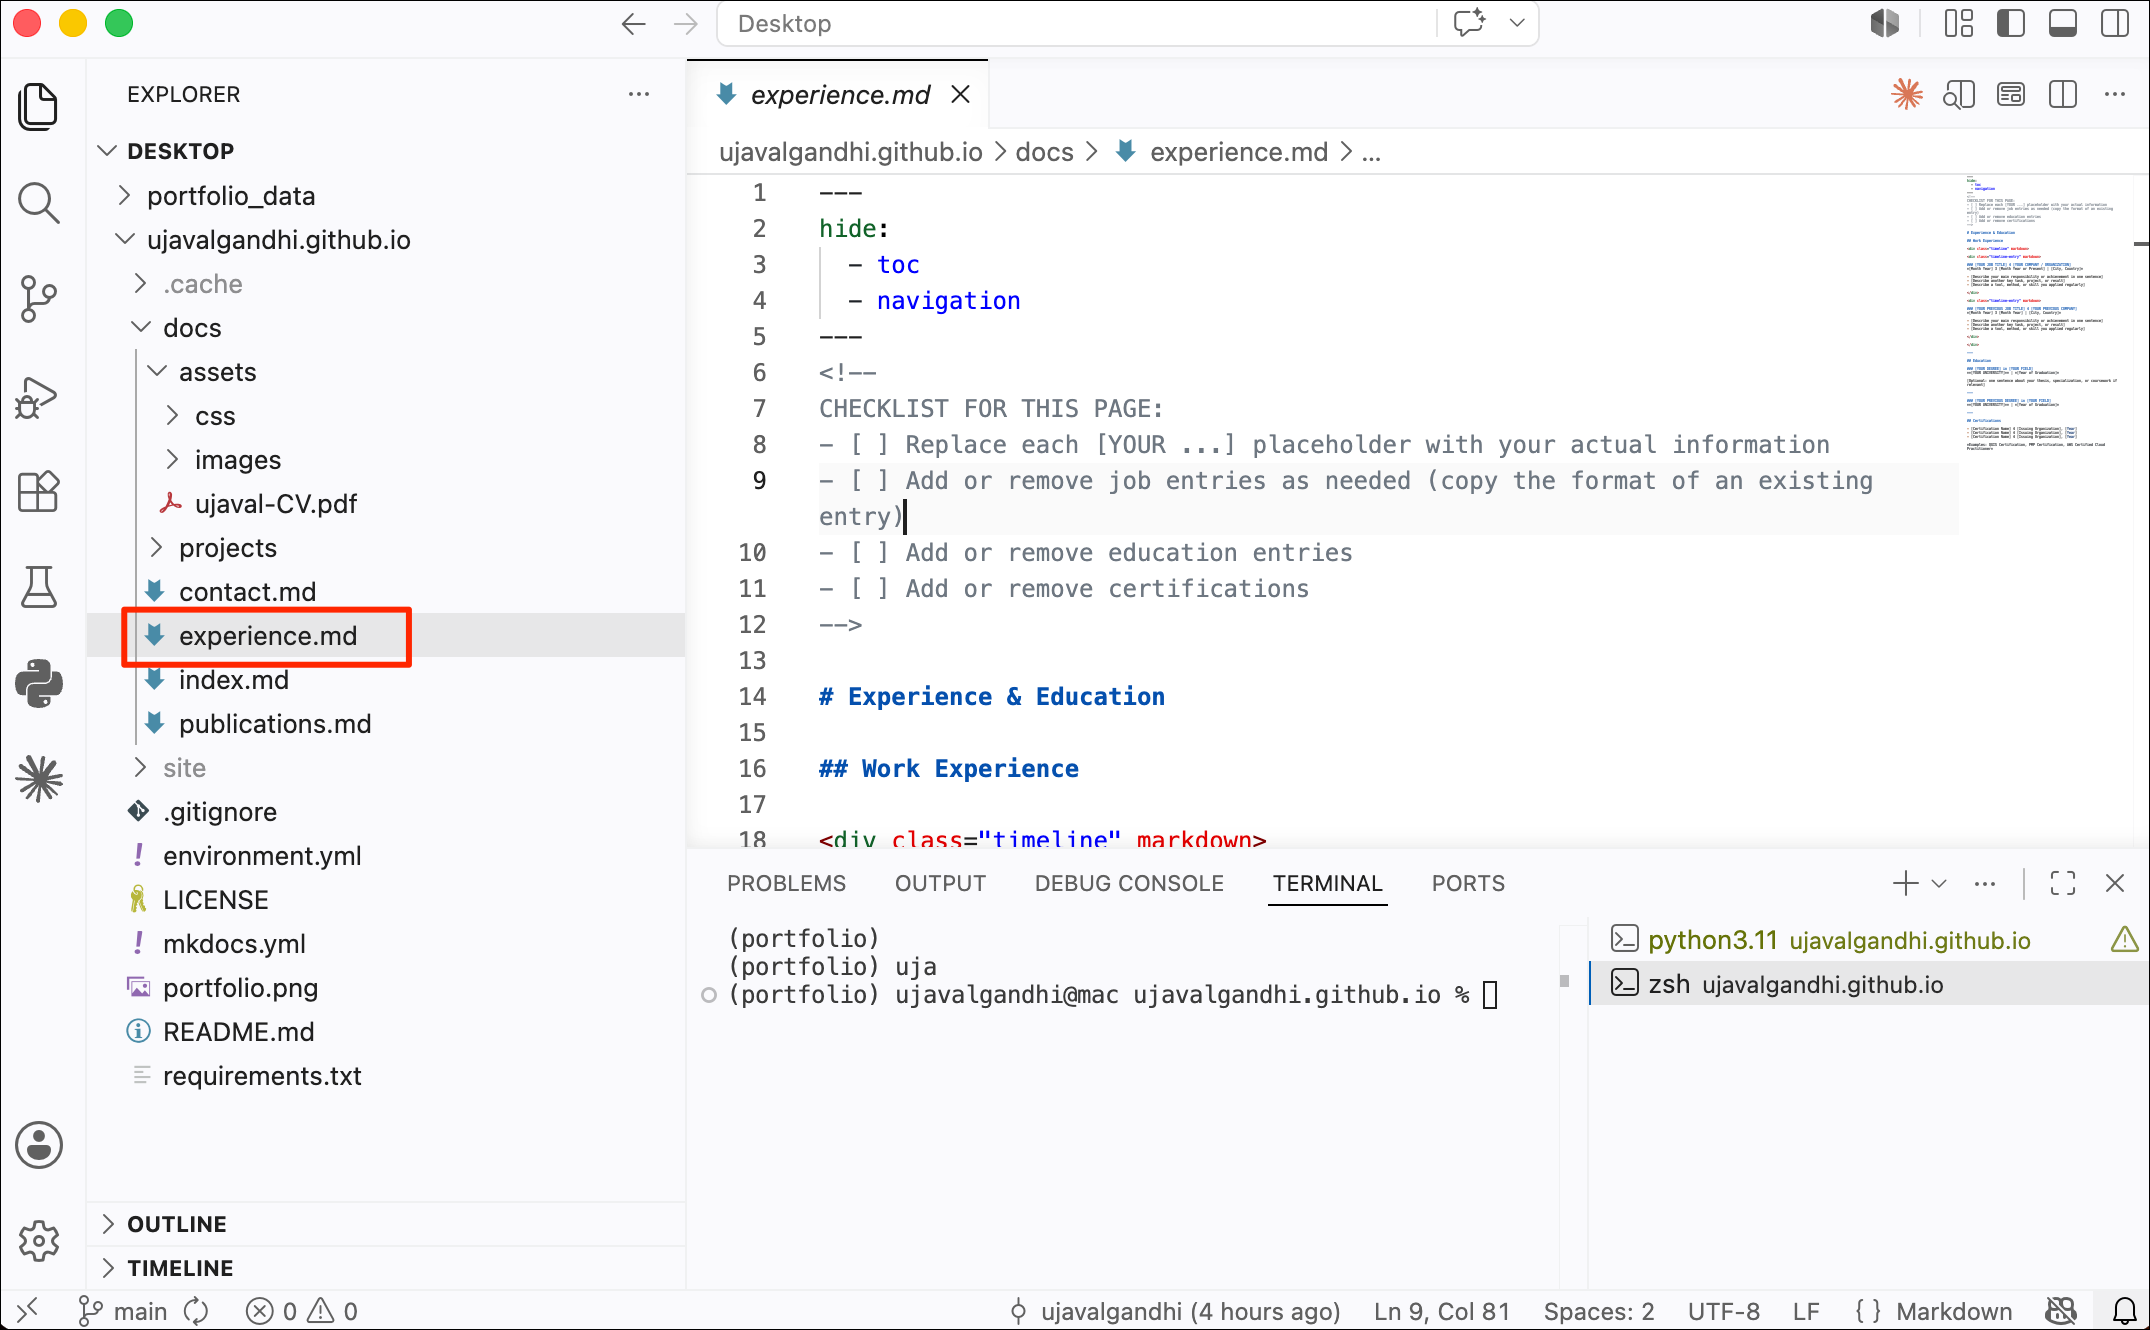
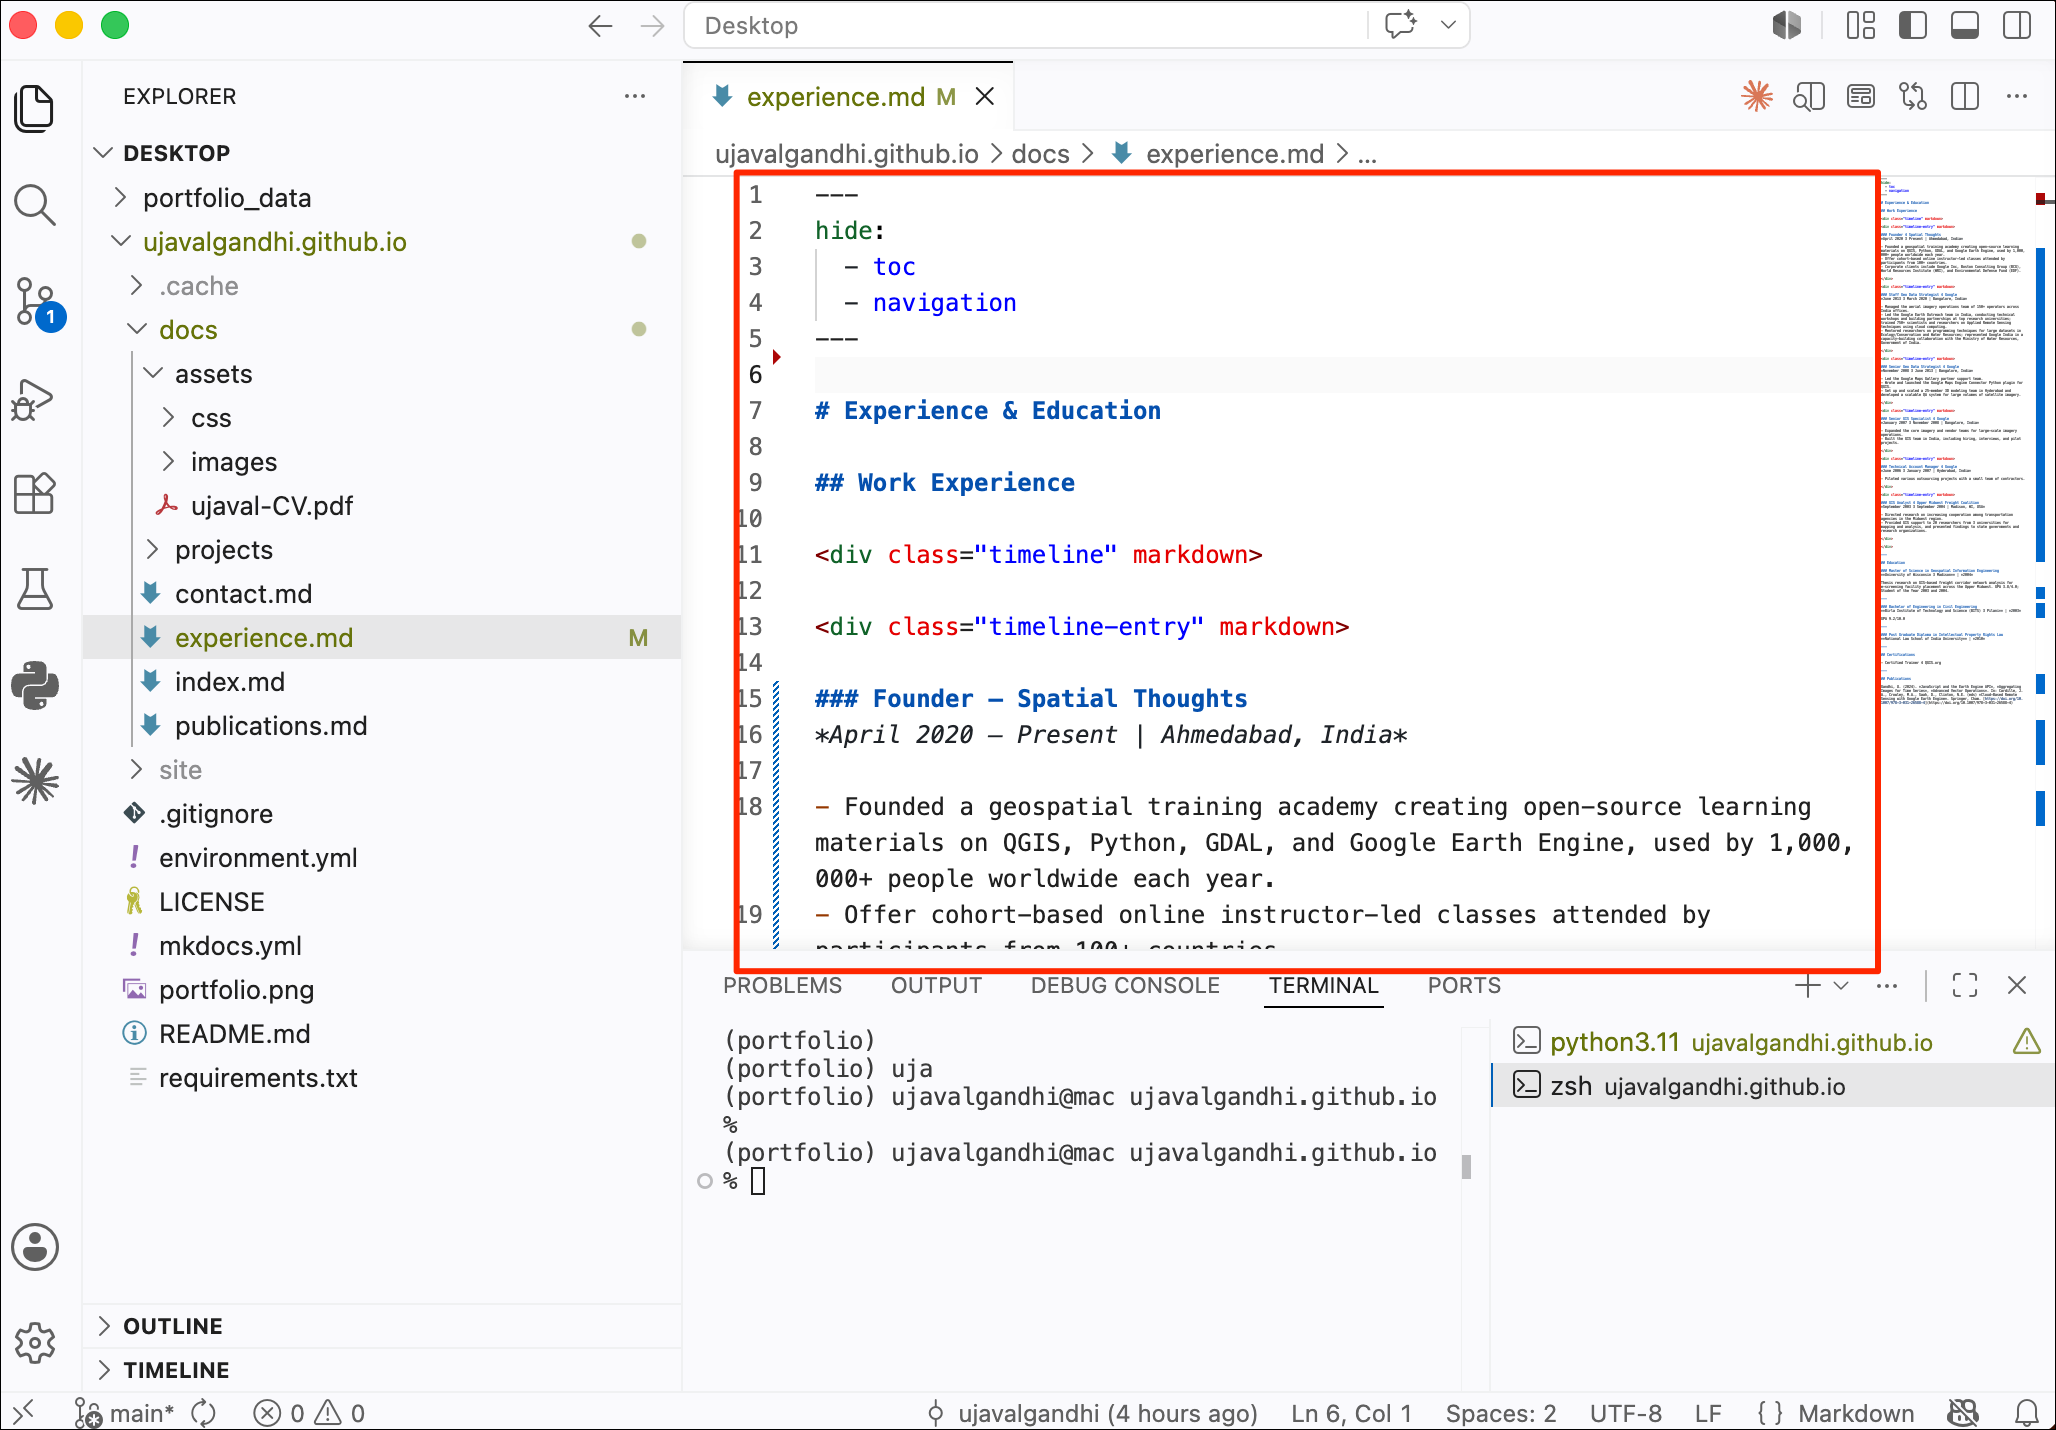
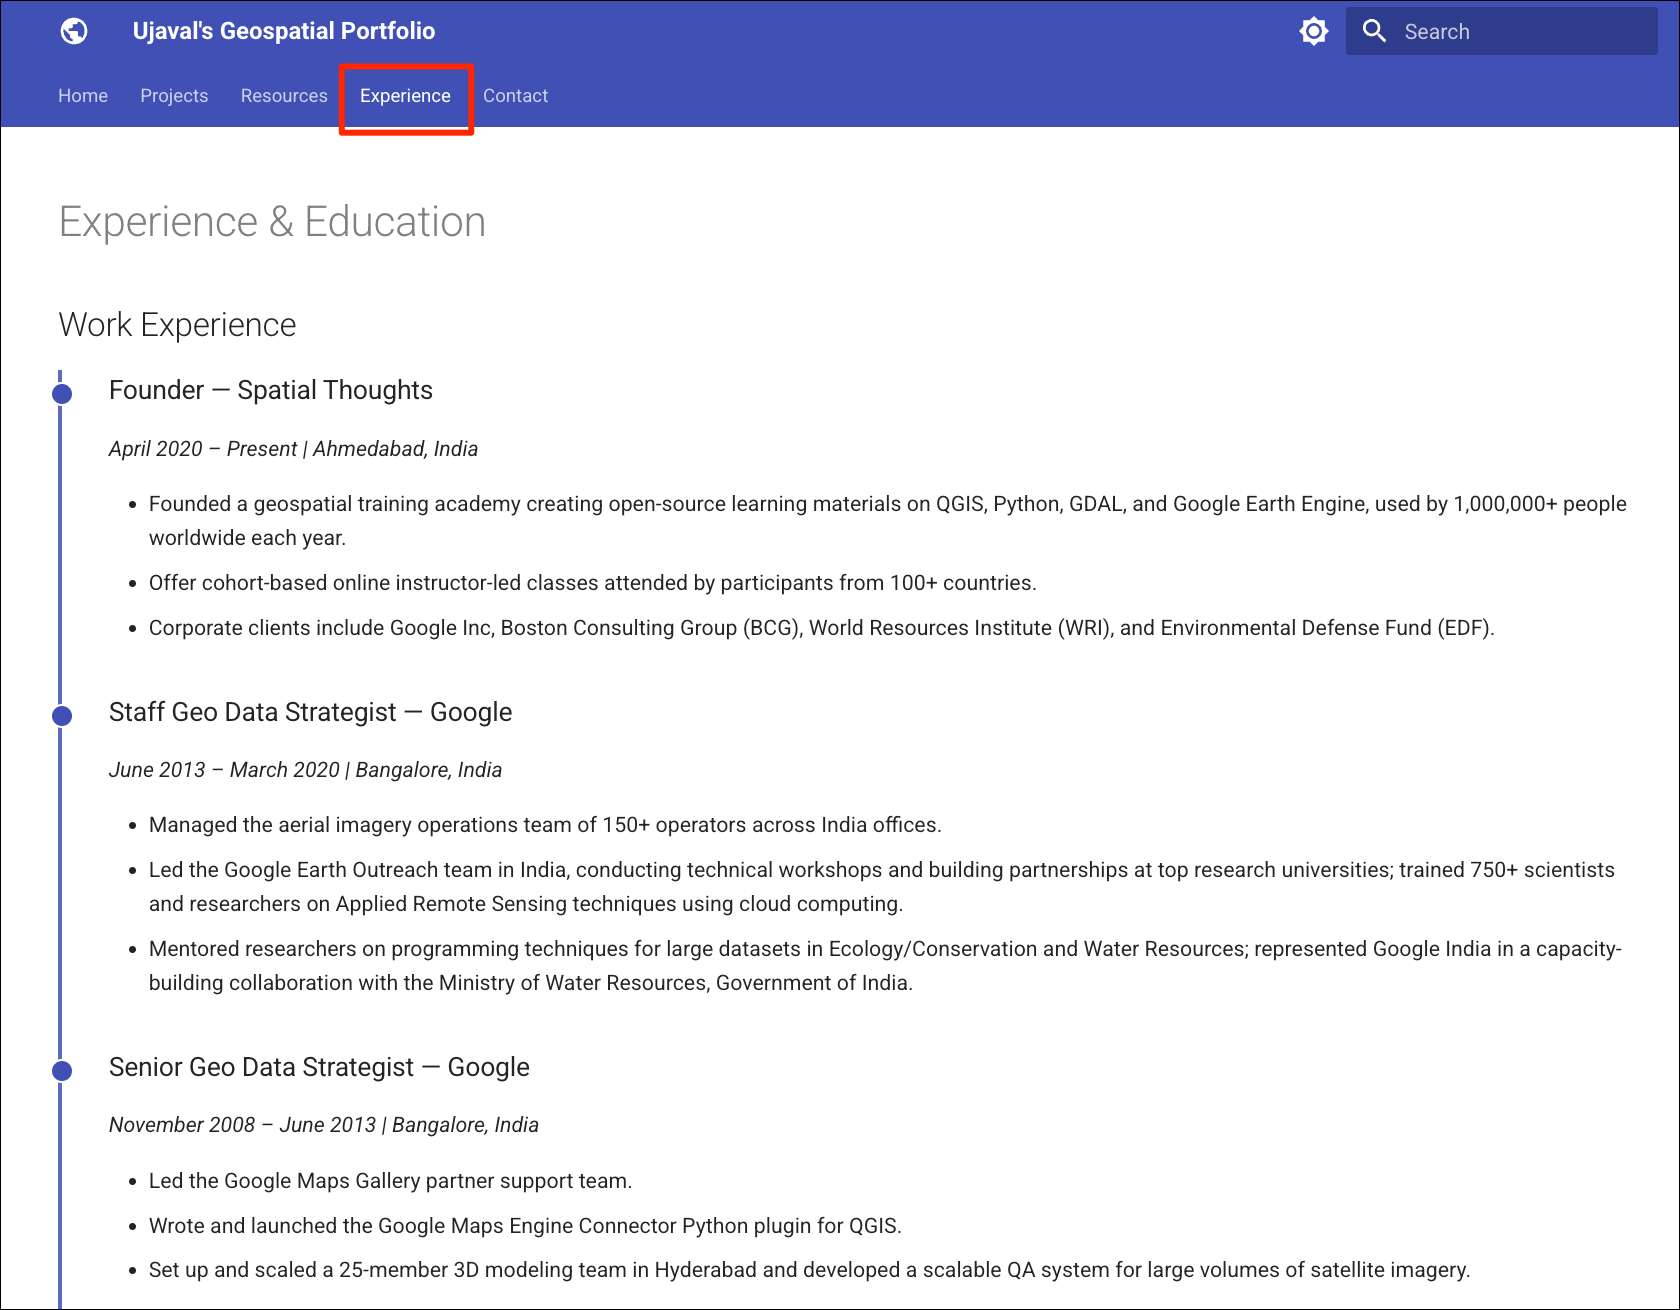
- Locate and open the
experience.mdfile in thedocs/folder. This file is for the page on your portfolio that lists your work experience, education, certifications etc. We will automatically create this content from your CV. Click on the file and open it.
- Go to Claude AI and start a new
chat. Attach your CV and enter a prompt like below. Copy content of the
experience.mdfile and include it in the prompt.
I want to use the information from my attached CV to update my online portfolio. See the Markdown text below for the required format. Format the content from my CV as Markdown that I can copy/paste to update that file.

<Paste the content of your experience.md file>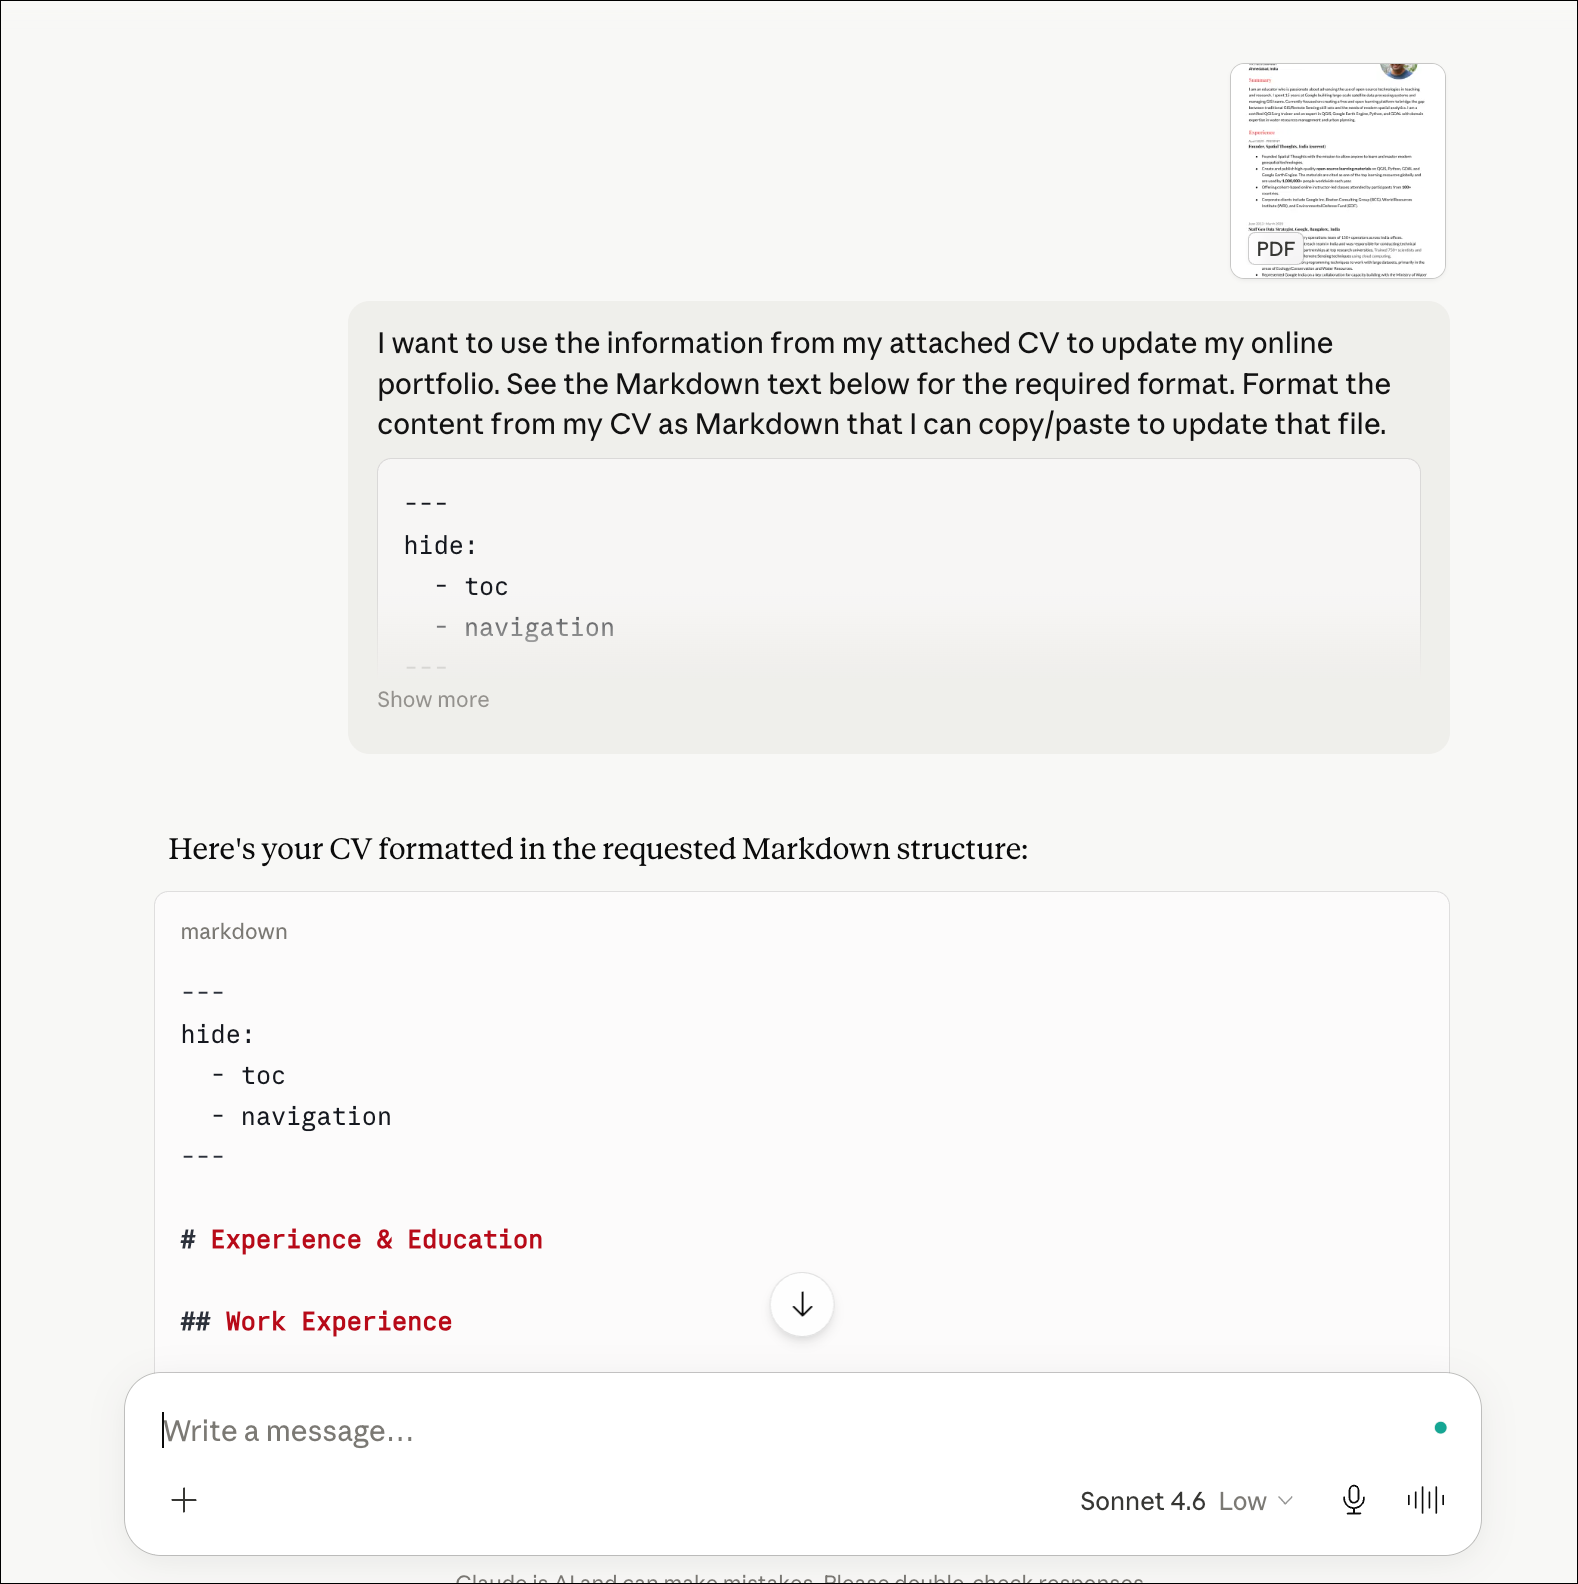
- Copy the LLM generated Markdown content and paste it as the content
of the
experience.mdpage and save it.
- Go to the browser tab connected to the local development server at http://127.0.0.1:8000/ and preview the content. Make edits in your editor as required.
- Once satisfied, commit the changes by running the following sequence of Git commands.
- Deploy the changes to your live portfolio.
You can repeat this process for the publication.md page
to pull your publications from your CV, ResearchGate or Google Scholar
profile.
6.2 Adding a New Page
The template provides you with a handful of pages pre-configured for
the website. It is quite easy to add new pages. Adding a new page is a
2-step process - you first create a new file with the content and then
update the mkdocs.yml file to add it to the navigation.
Let’s create a new page.
- Right-click the
docsfolder and select New File….
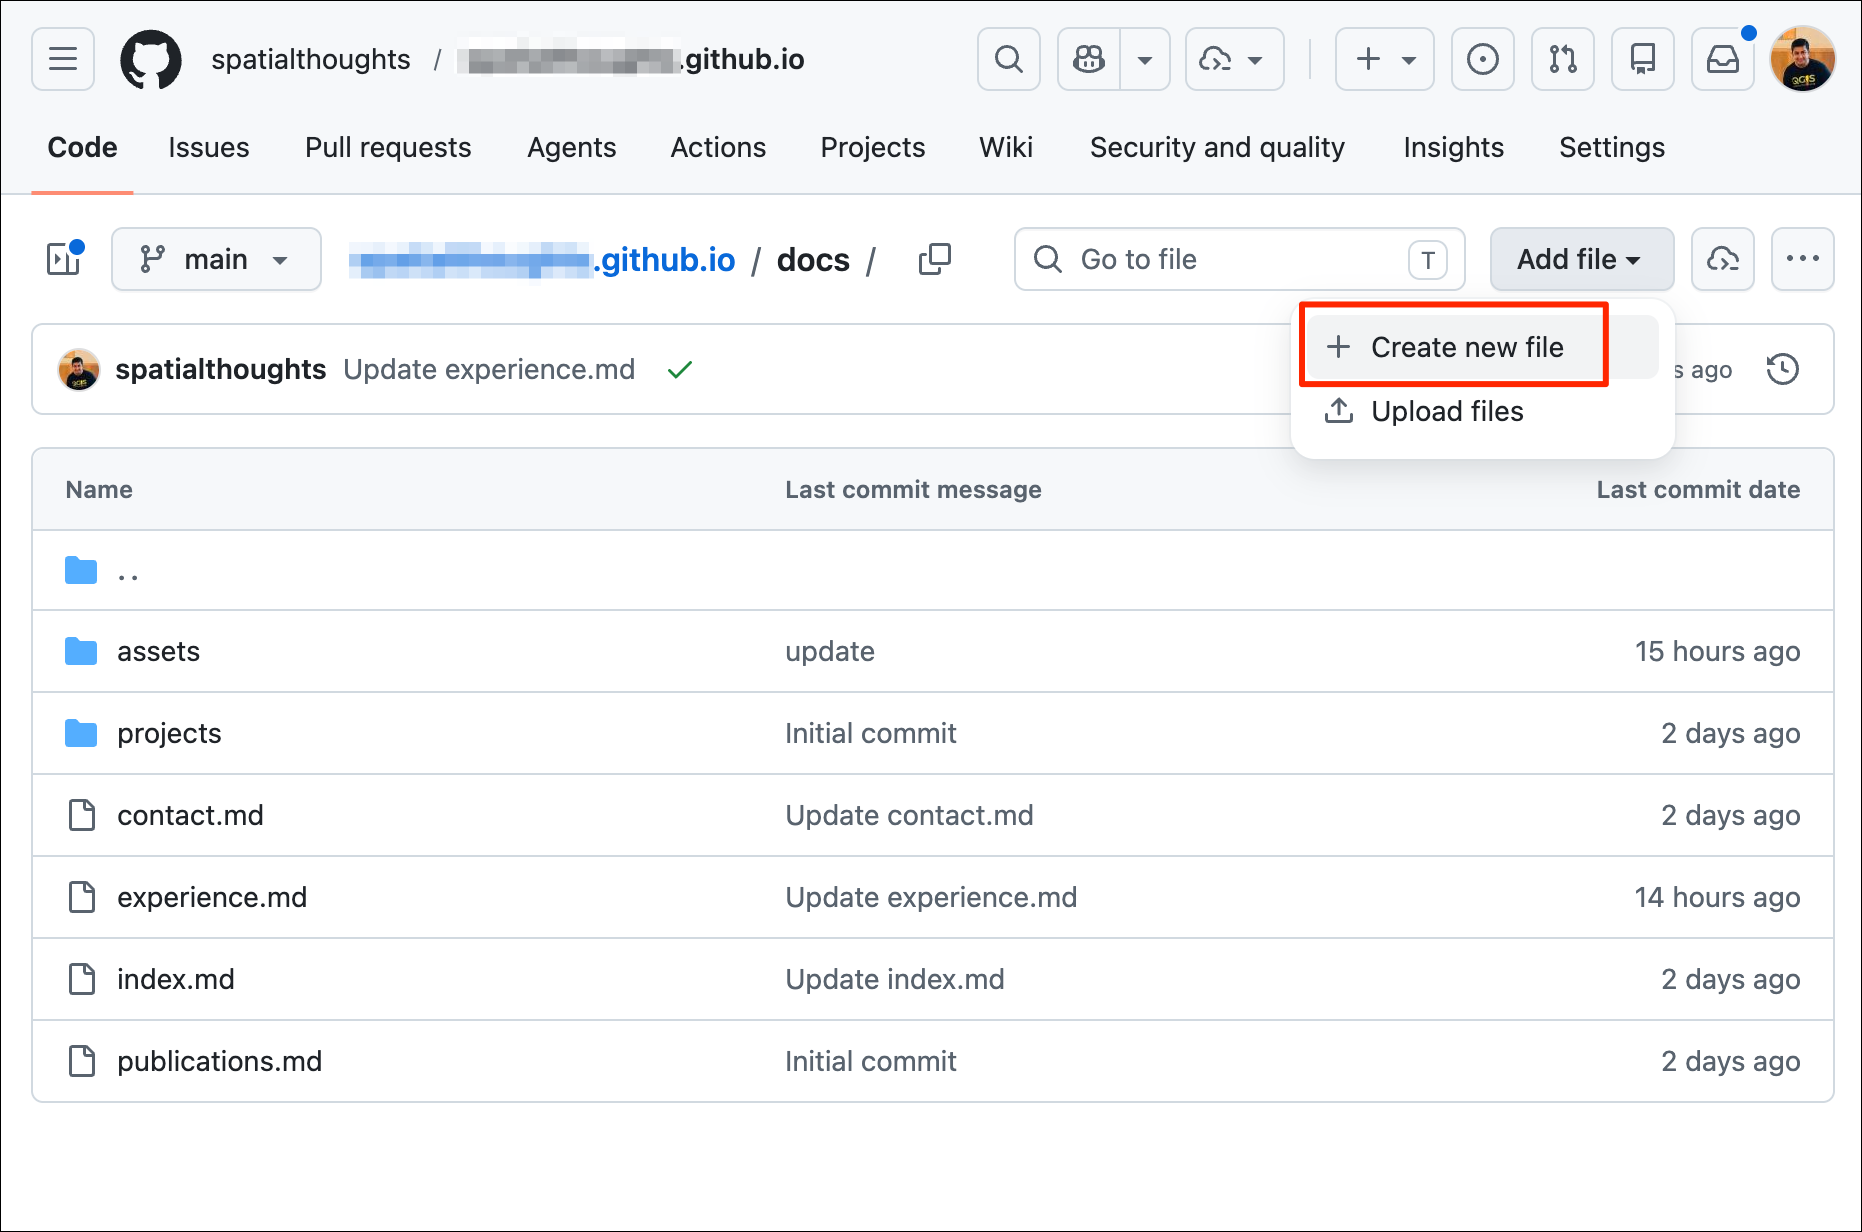
- You can name the page with the
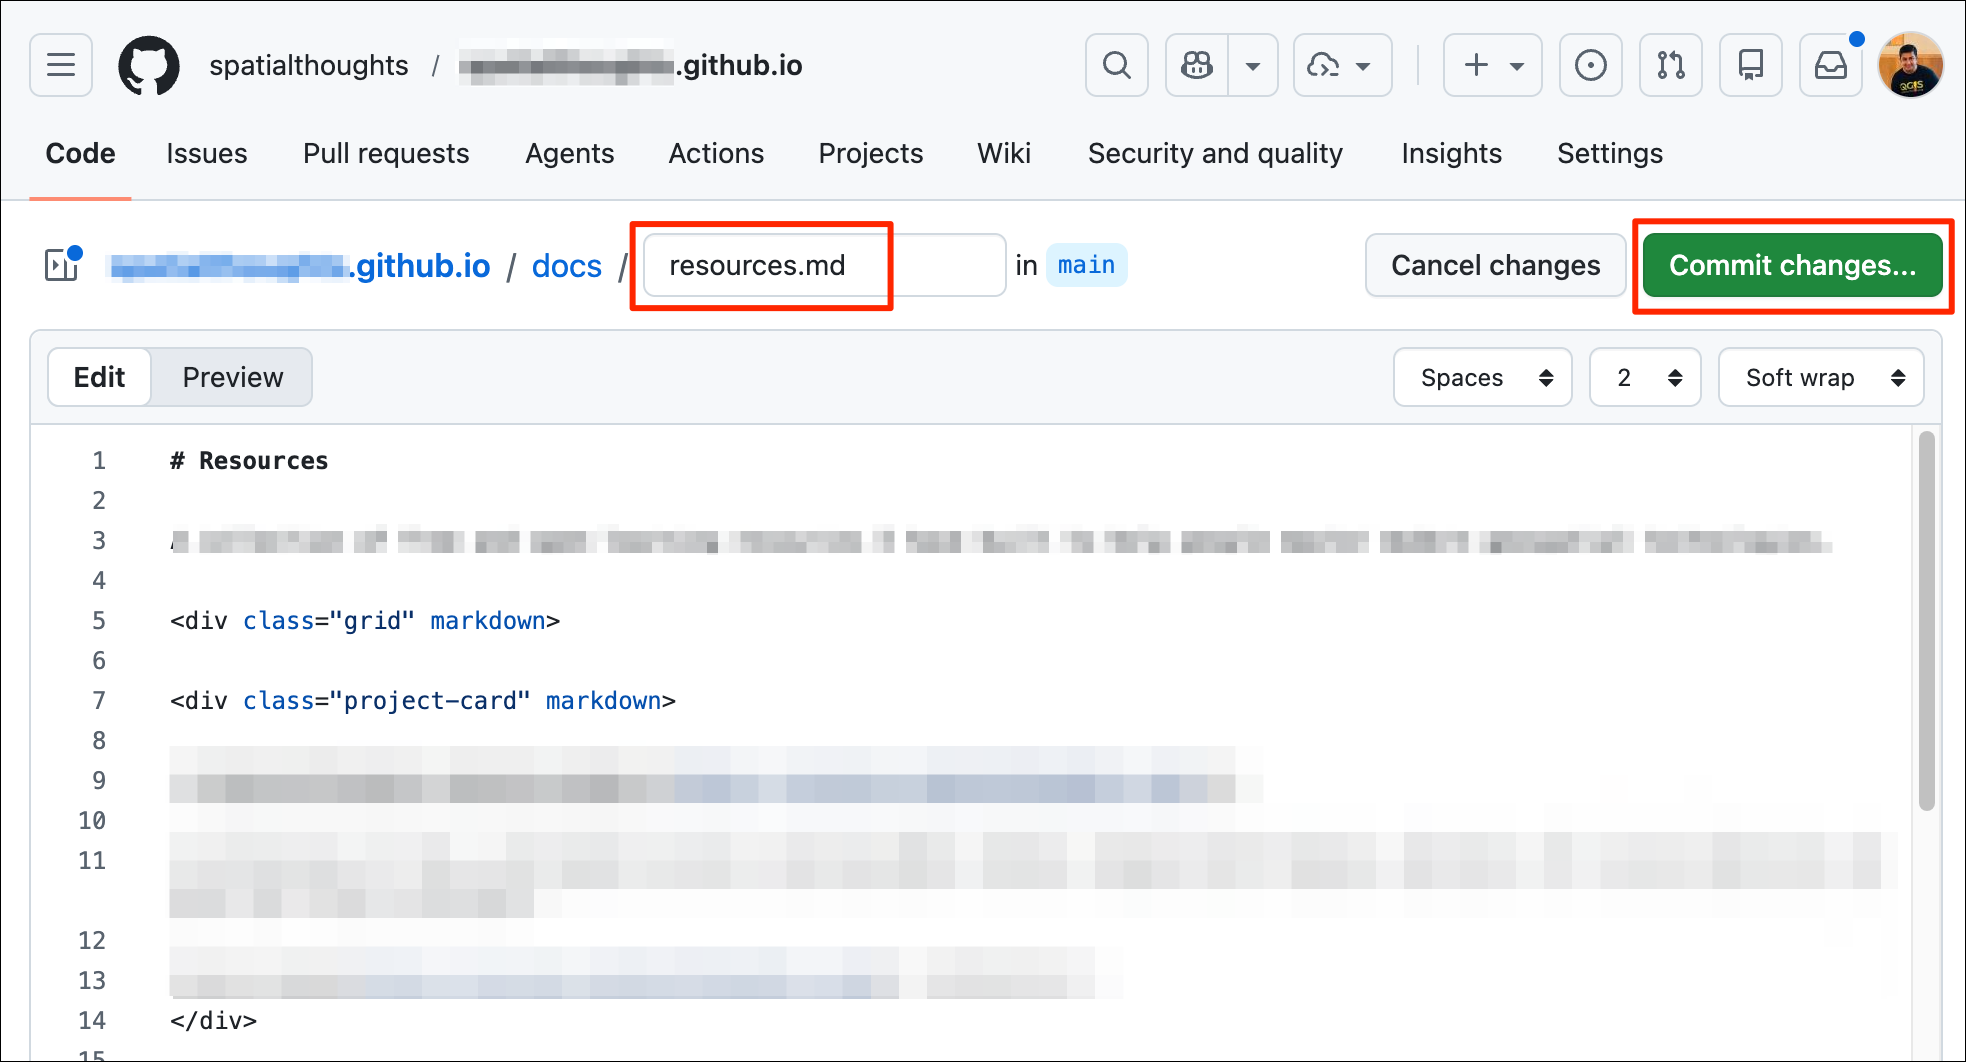
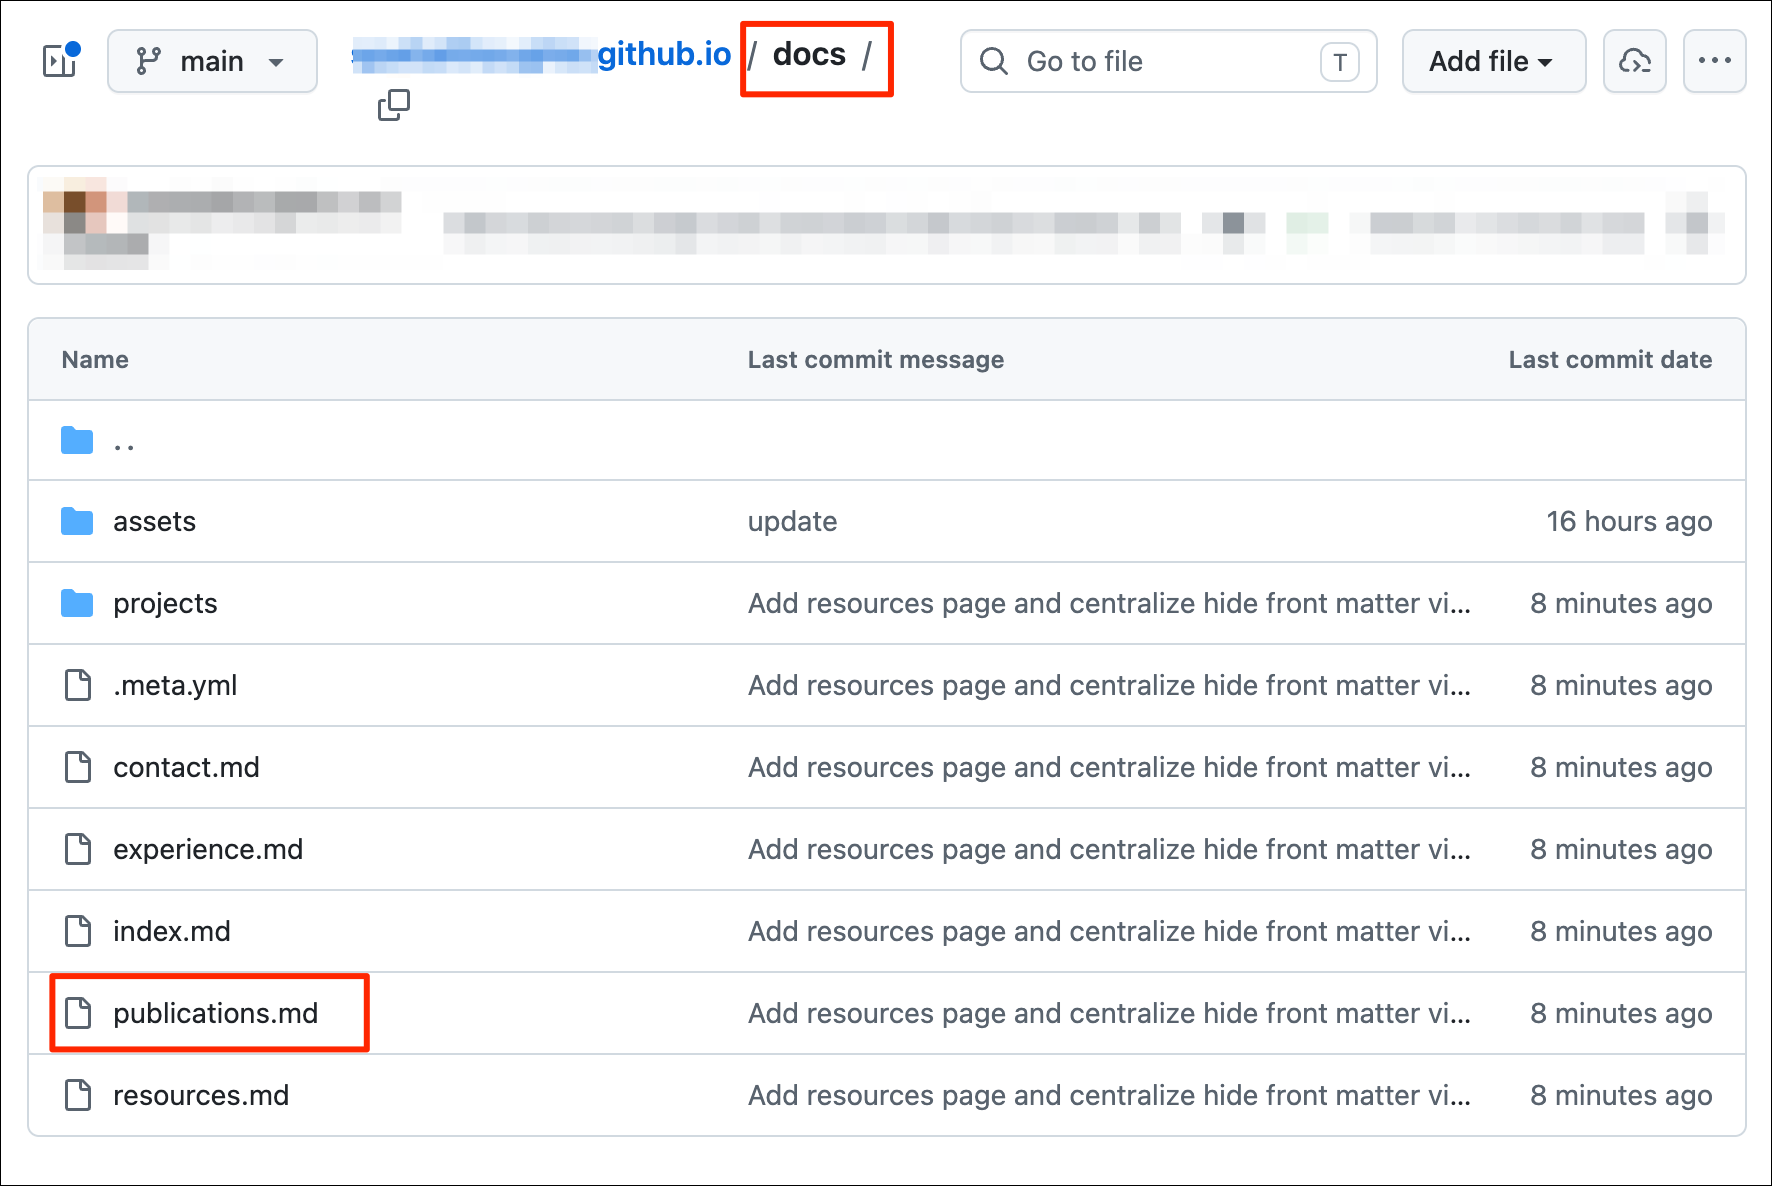
.mdextension. Here we are creating a new page that lists learning resources so we have named itresources.md. Add the content for the page in the Markdown format. Here we are using the Grids provided by the Material theme to organize the resources in a responsive layout. Save the file.
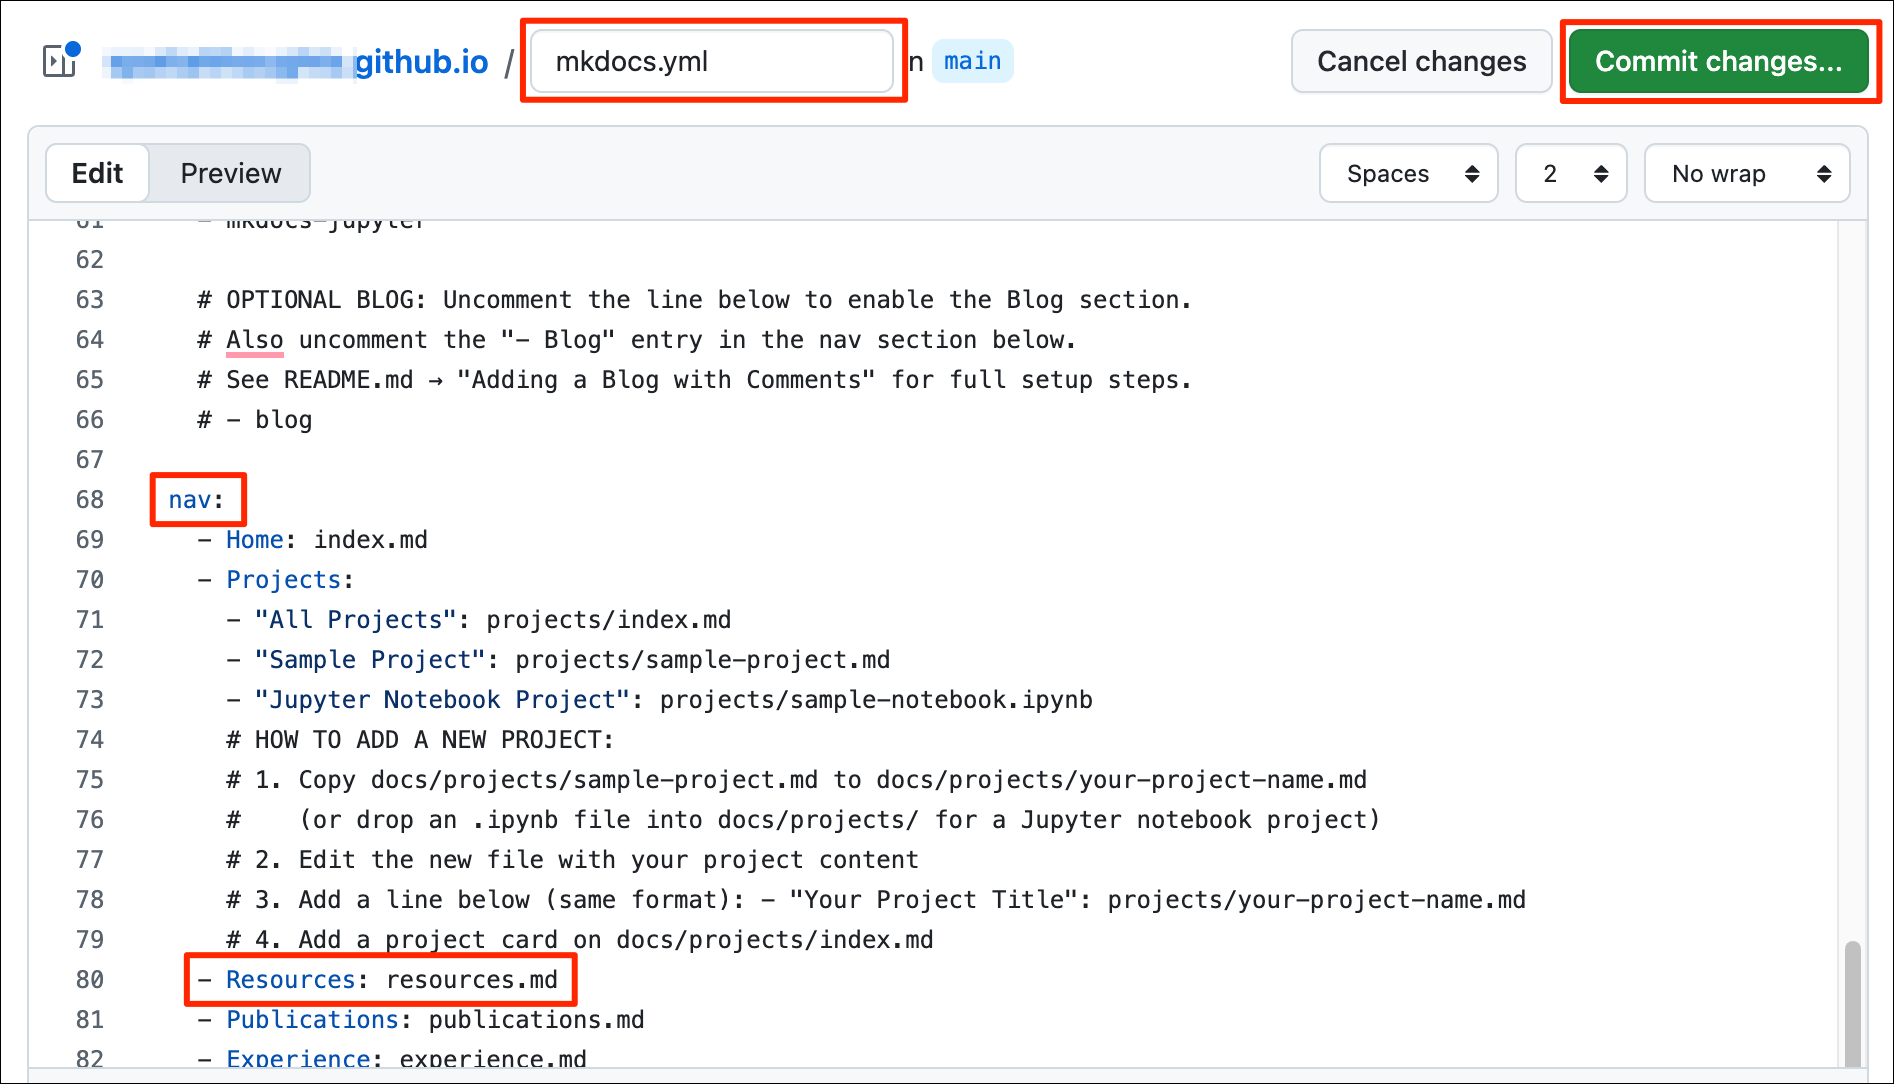
- Next go to the root of your repository and locate the
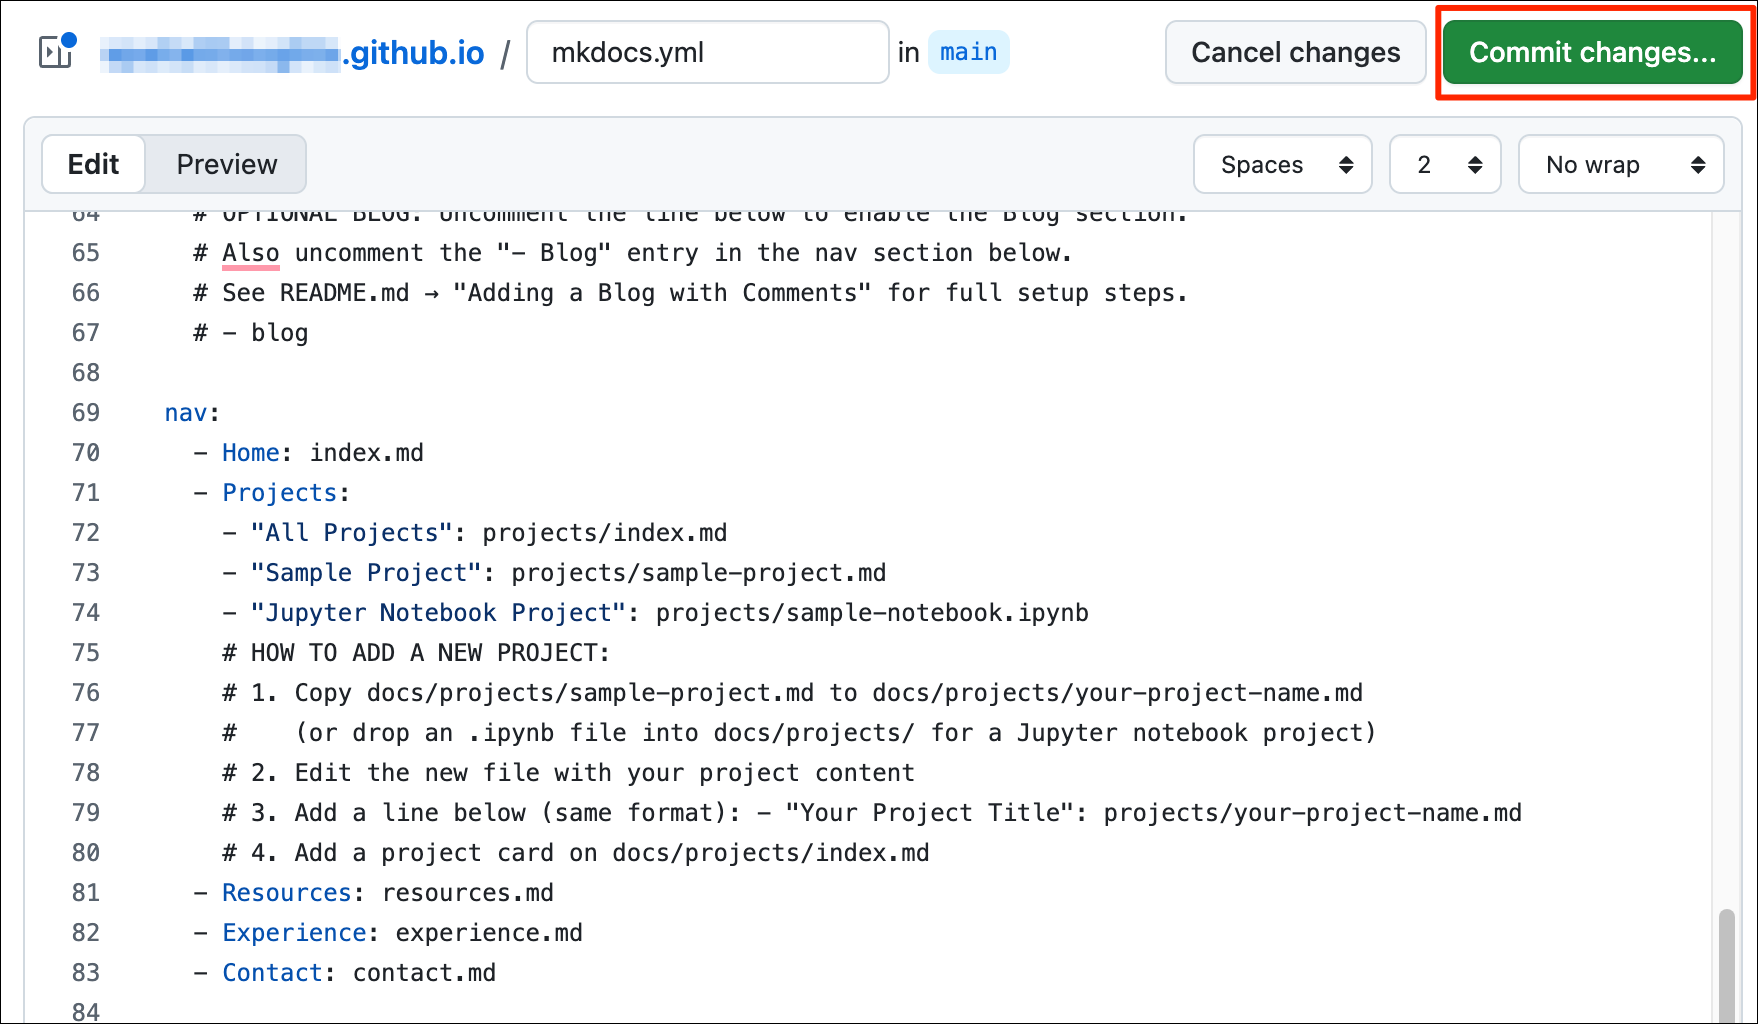
mkdocs.ymlfile. Open it for editing and scroll down to thenav:section. Add the newly created page to the navigation menu. Save the file.
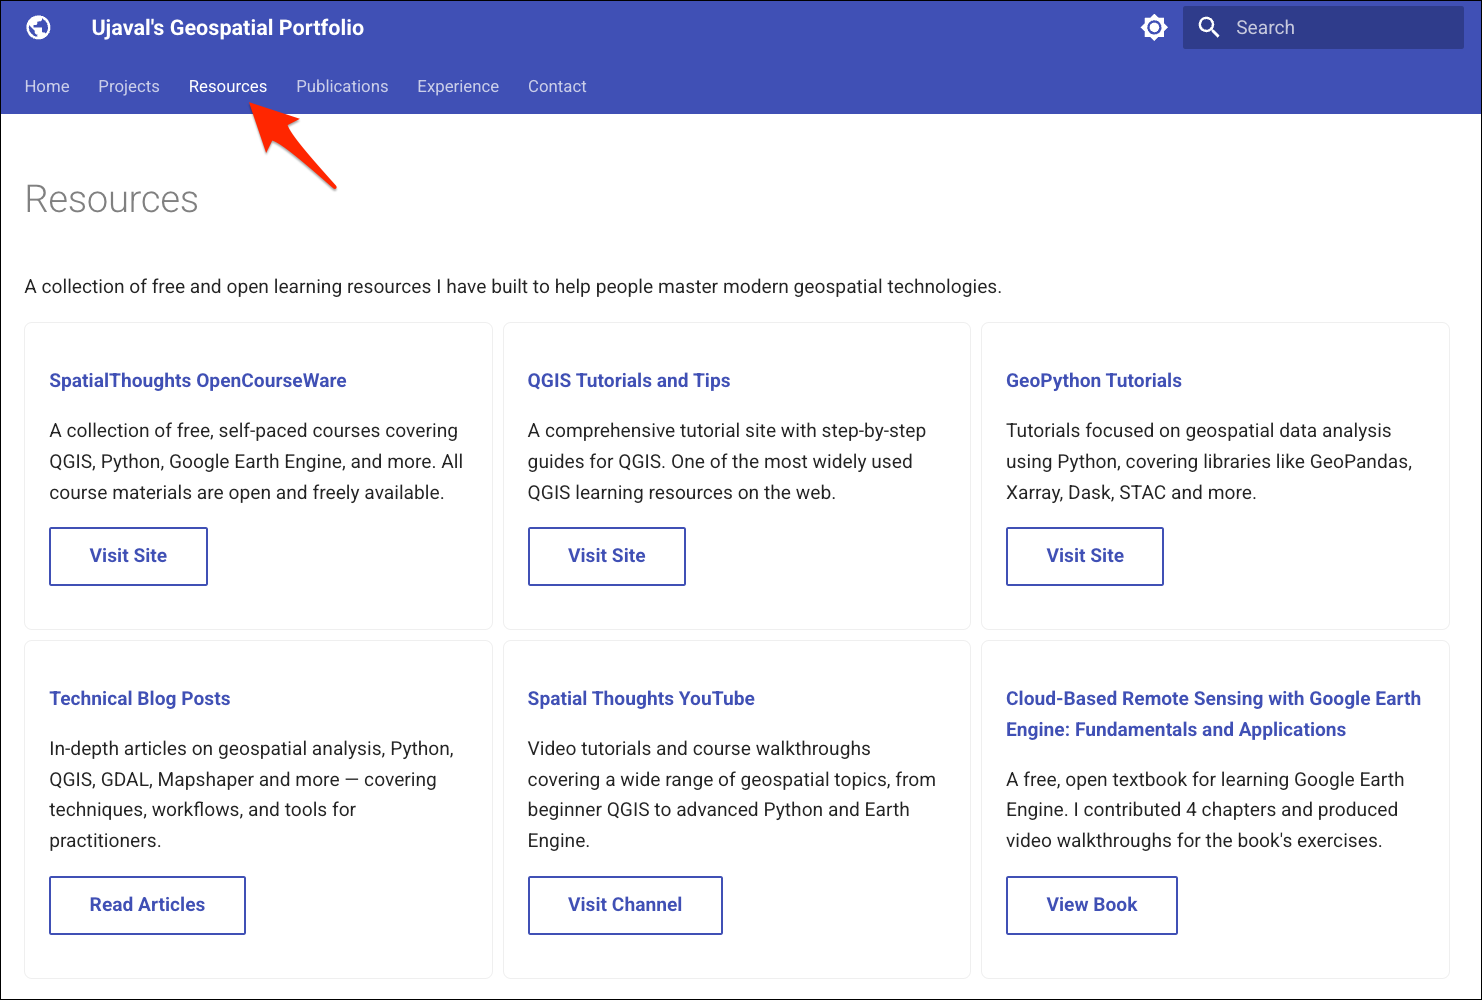
- Go to the browser tab connected to the local development server at http://127.0.0.1:8000/ and preview the content.
- Commit, push and deploy the changes.
git add .
git commit -m "update'
git push
mkdocs gh-deploy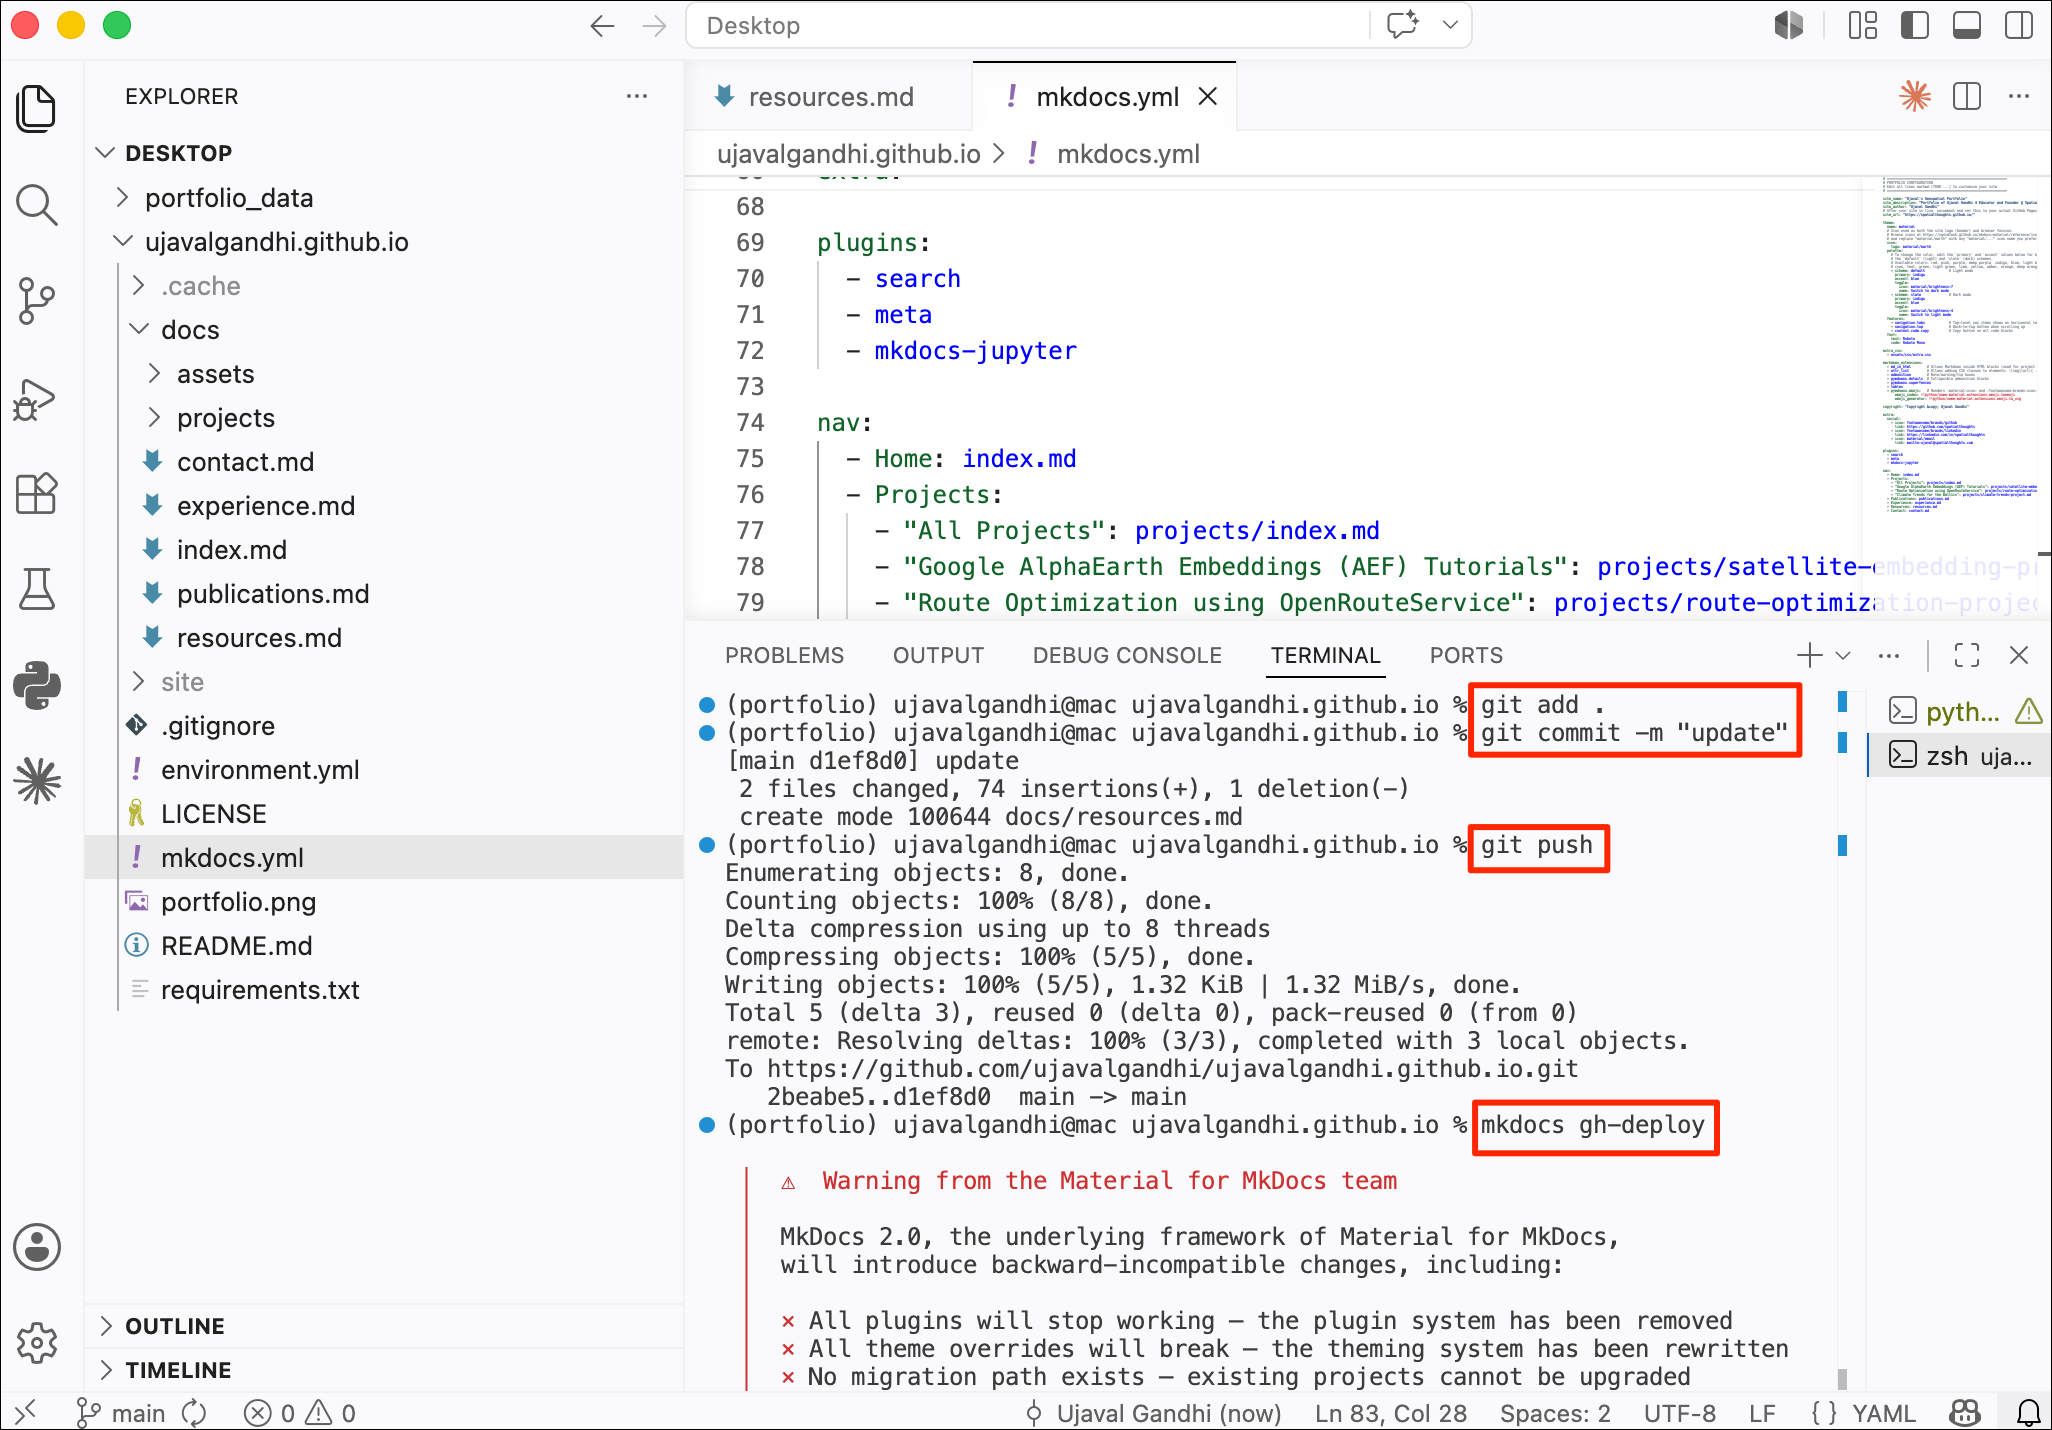
6.3 Deleting a Page
If there are pages from the template that you would like to remove,
you can first remove it from the navigation menu in
mkdocs.yml and delete the file. Let’s see the process by
removing the publications.md page.
- Open the
mkdocs.ymlfile and scroll down to thenav:section. Locate the item with the page that you would like to delete.
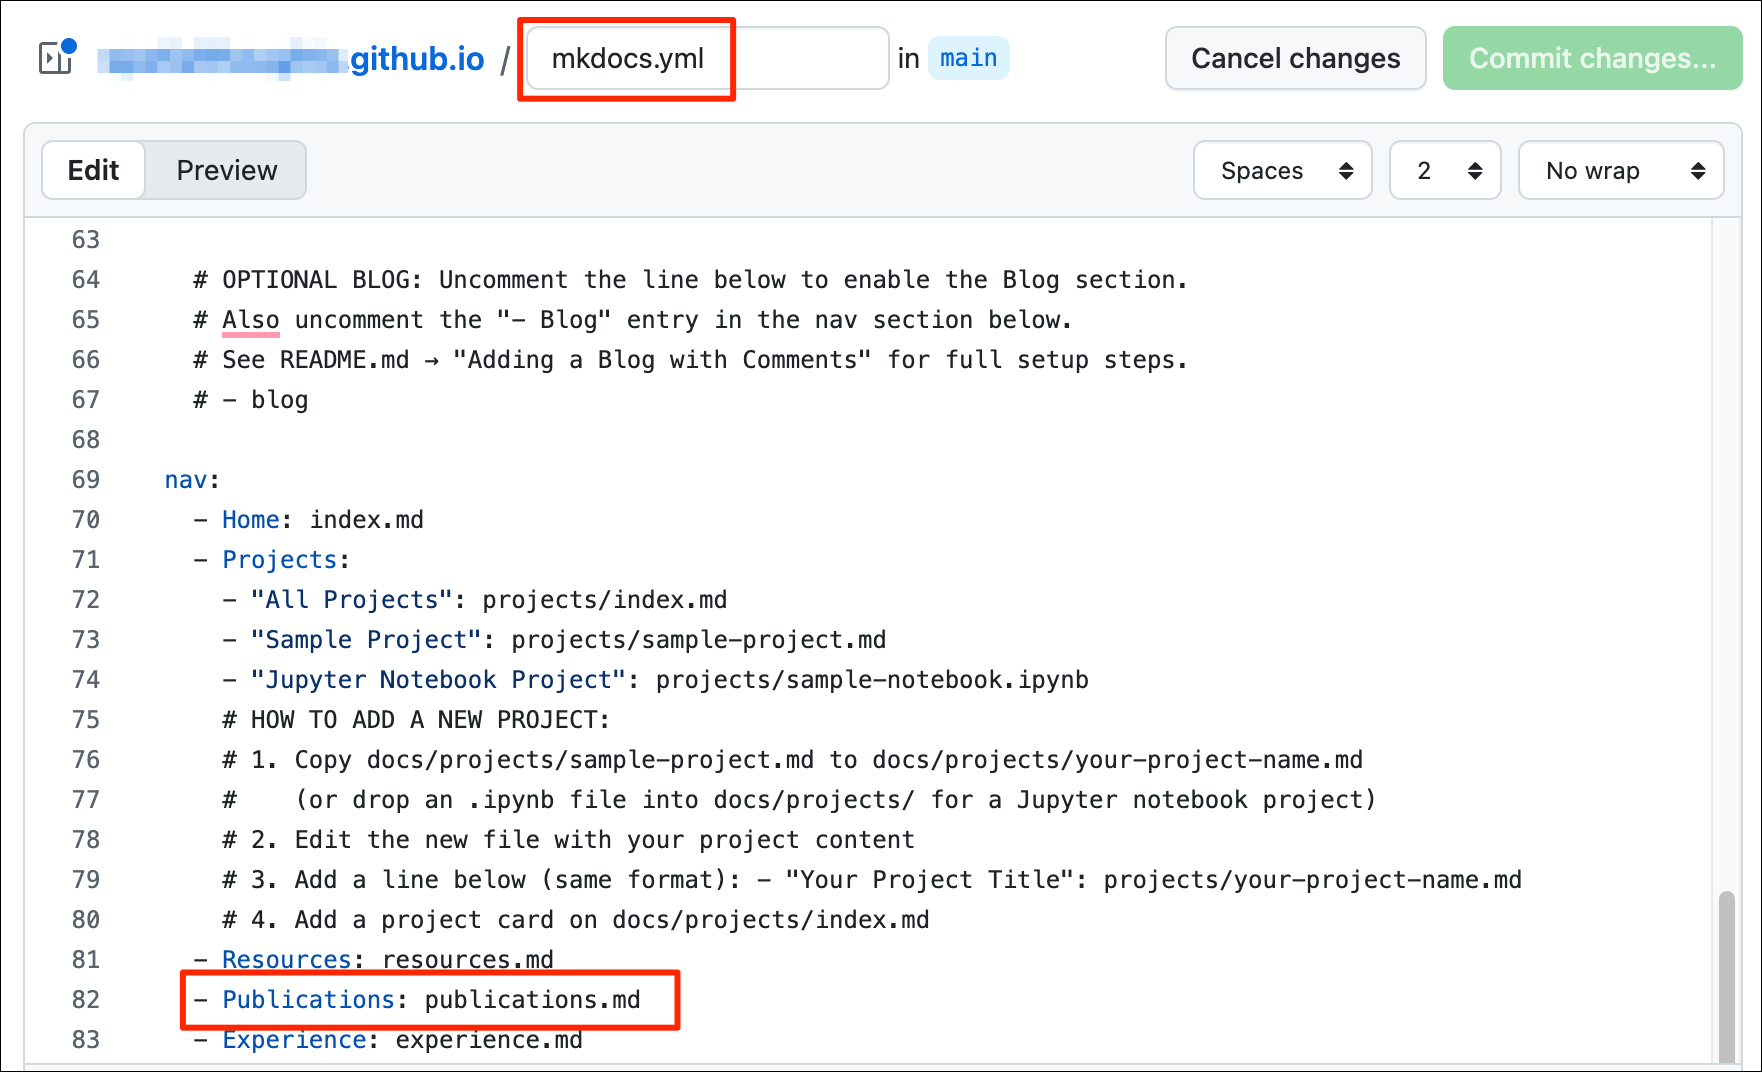
- Delete the line and save the file. This will now remove the reference to this page from the navigation menu.
- Go to the
docs/folder and right-click the file that you want to delete and select Delete and confirm.
- Commit and push the changes.
git status
git add .
git commit -m "update'
git push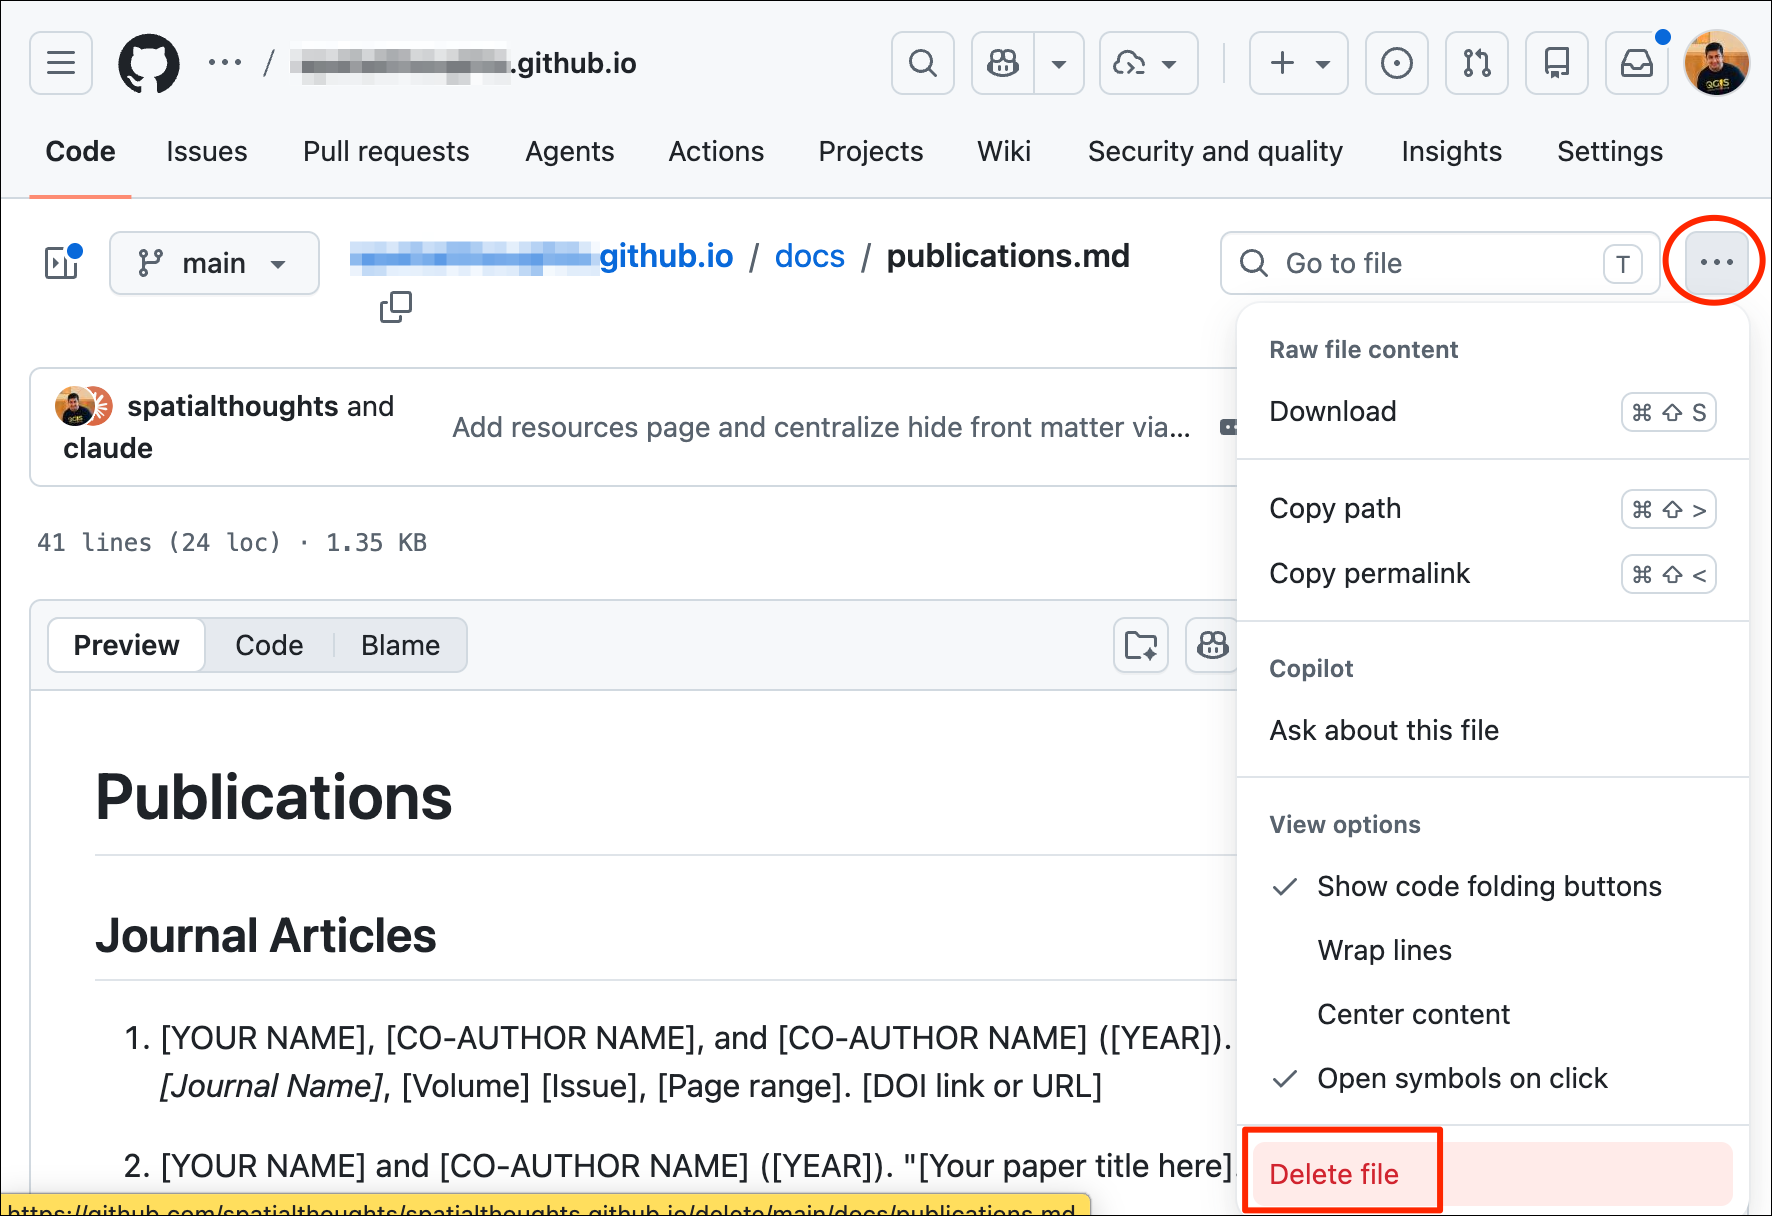
- Deploy the changes to GitHub Pages.
mkdocs gh-deploy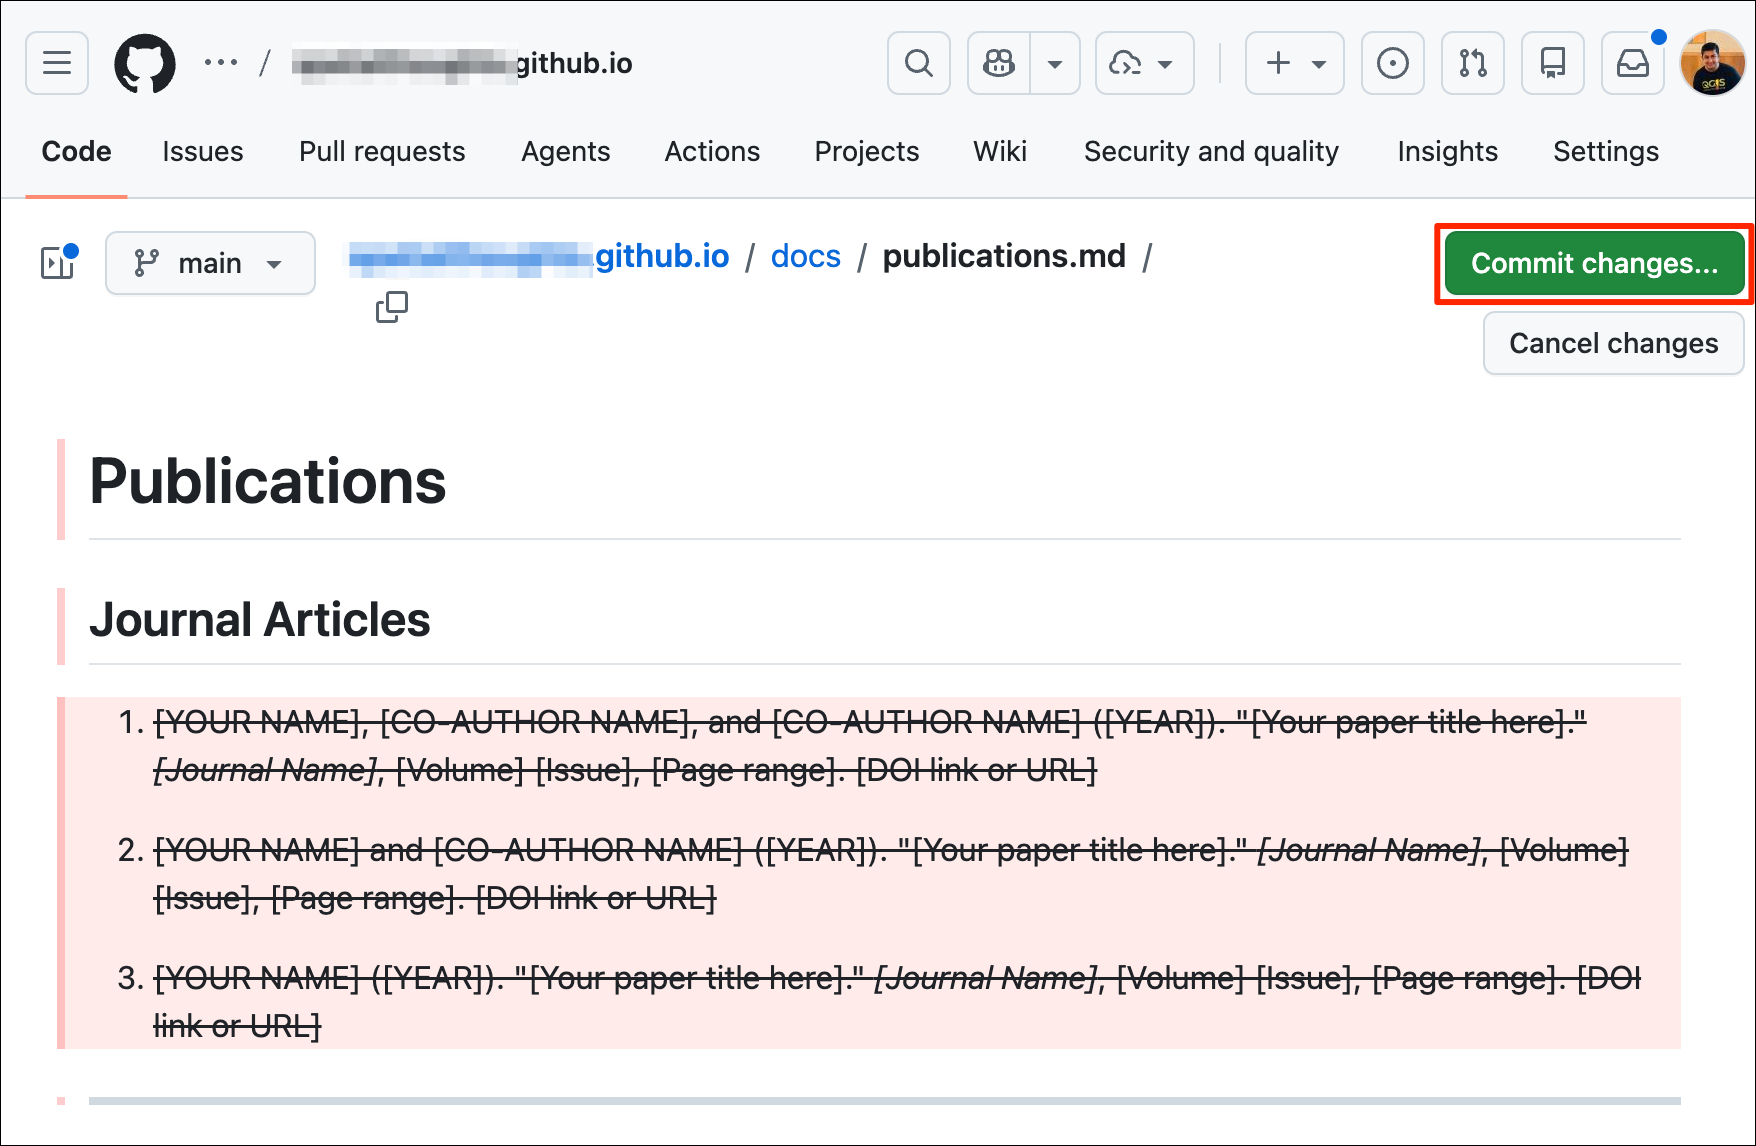
- Refresh the portfolio and you will see the updated menu.
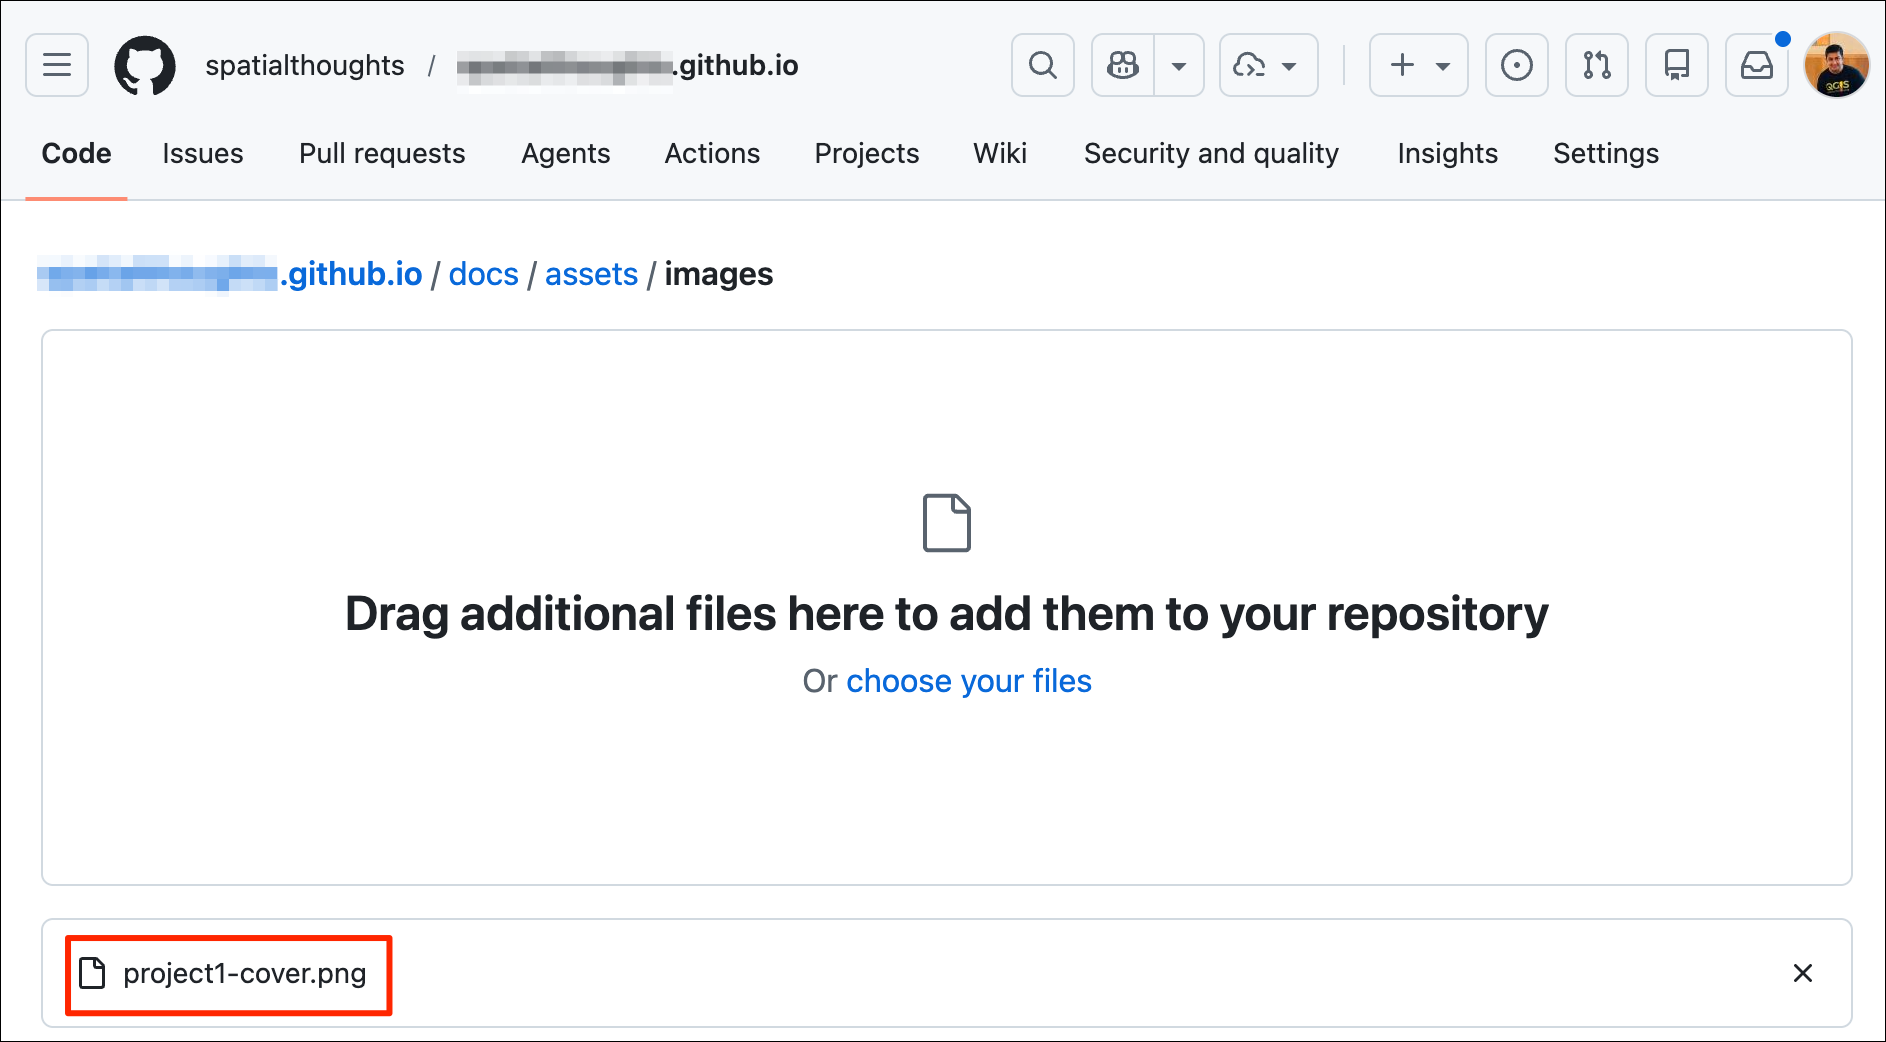
6.4 Adding a Project Page (LLM Assisted)
The portfolio template is custom design to showcase your project. You can add multiple projects to your site. Each project will be shown using a card layout. Adding a project requires uploading a cover image and creating a Markdown file.
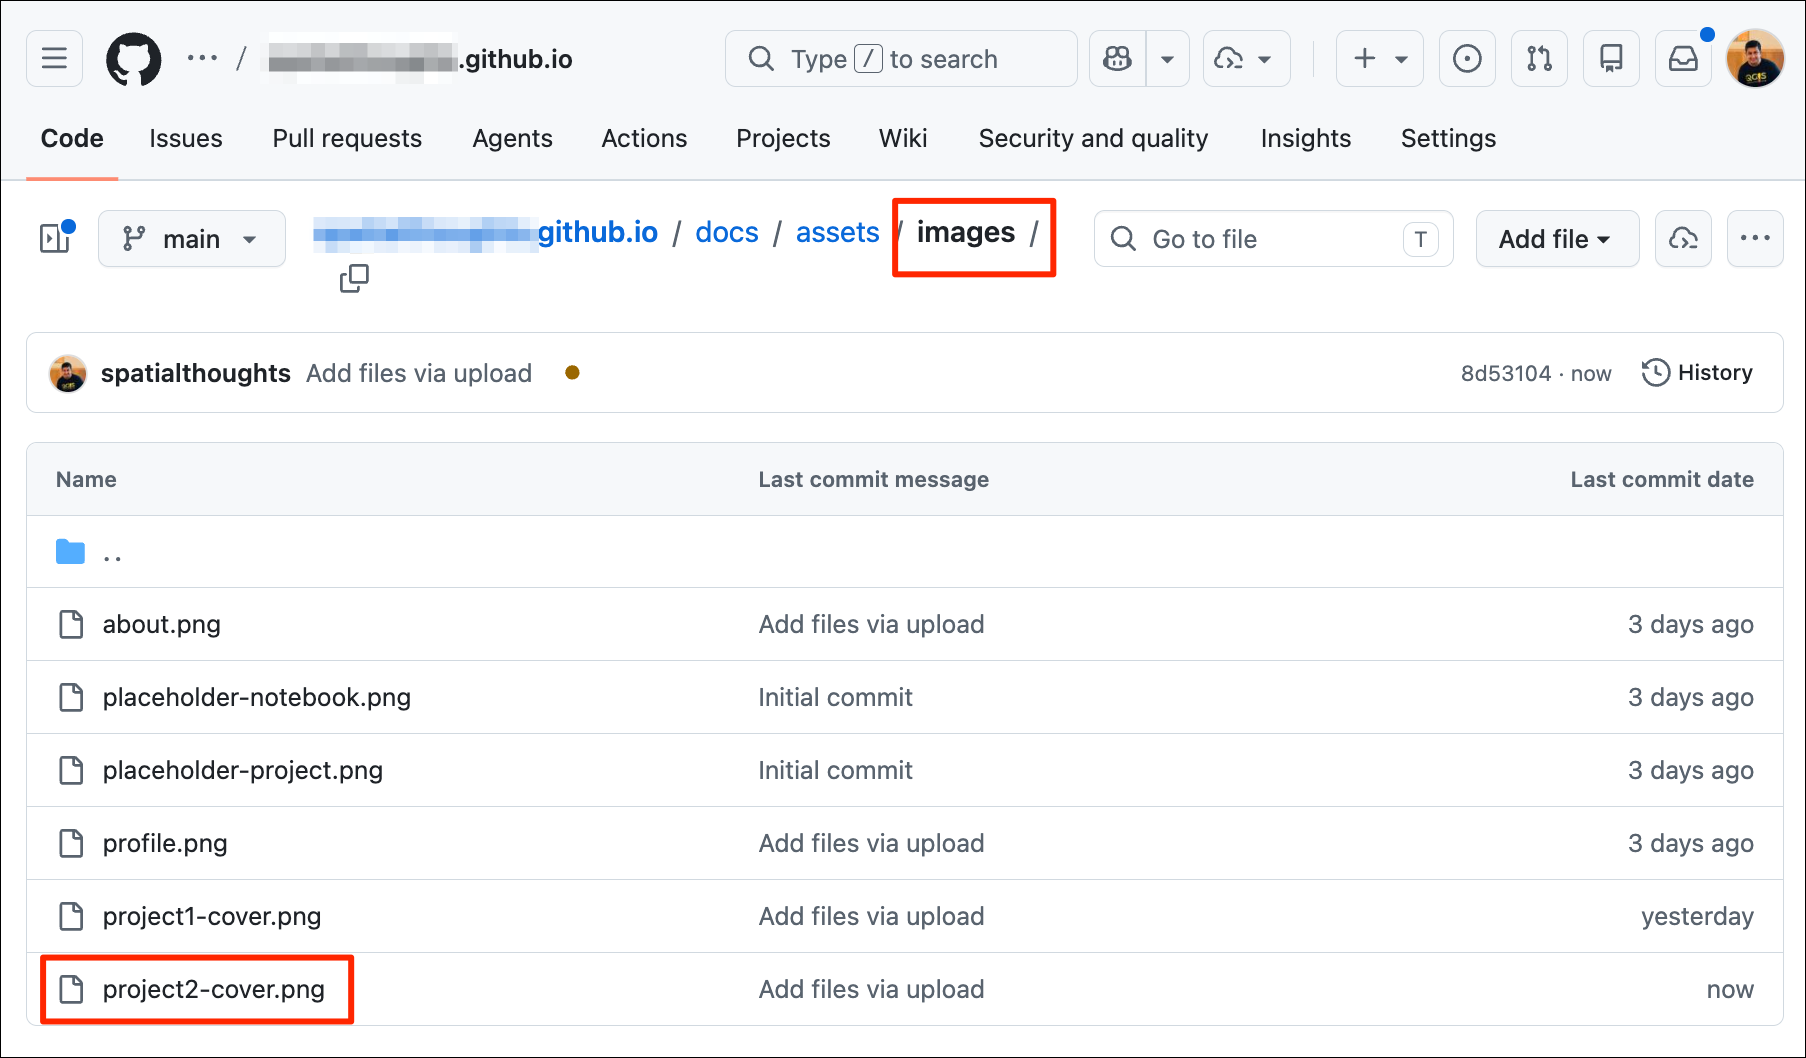
- Select a cover image for your project. The project images are shown
as horizontal cards, so choose an appropriate image with a landscape
layout. You can drag-and-drop the image file to the
docs/assets/images/folder in Visual Studio Code.

- The template comes with a
sample-project.mdfile with suggested sections for a project. Open the file and copy its content. We will use this to prompt an LLM Assistant to help us draft the project page.
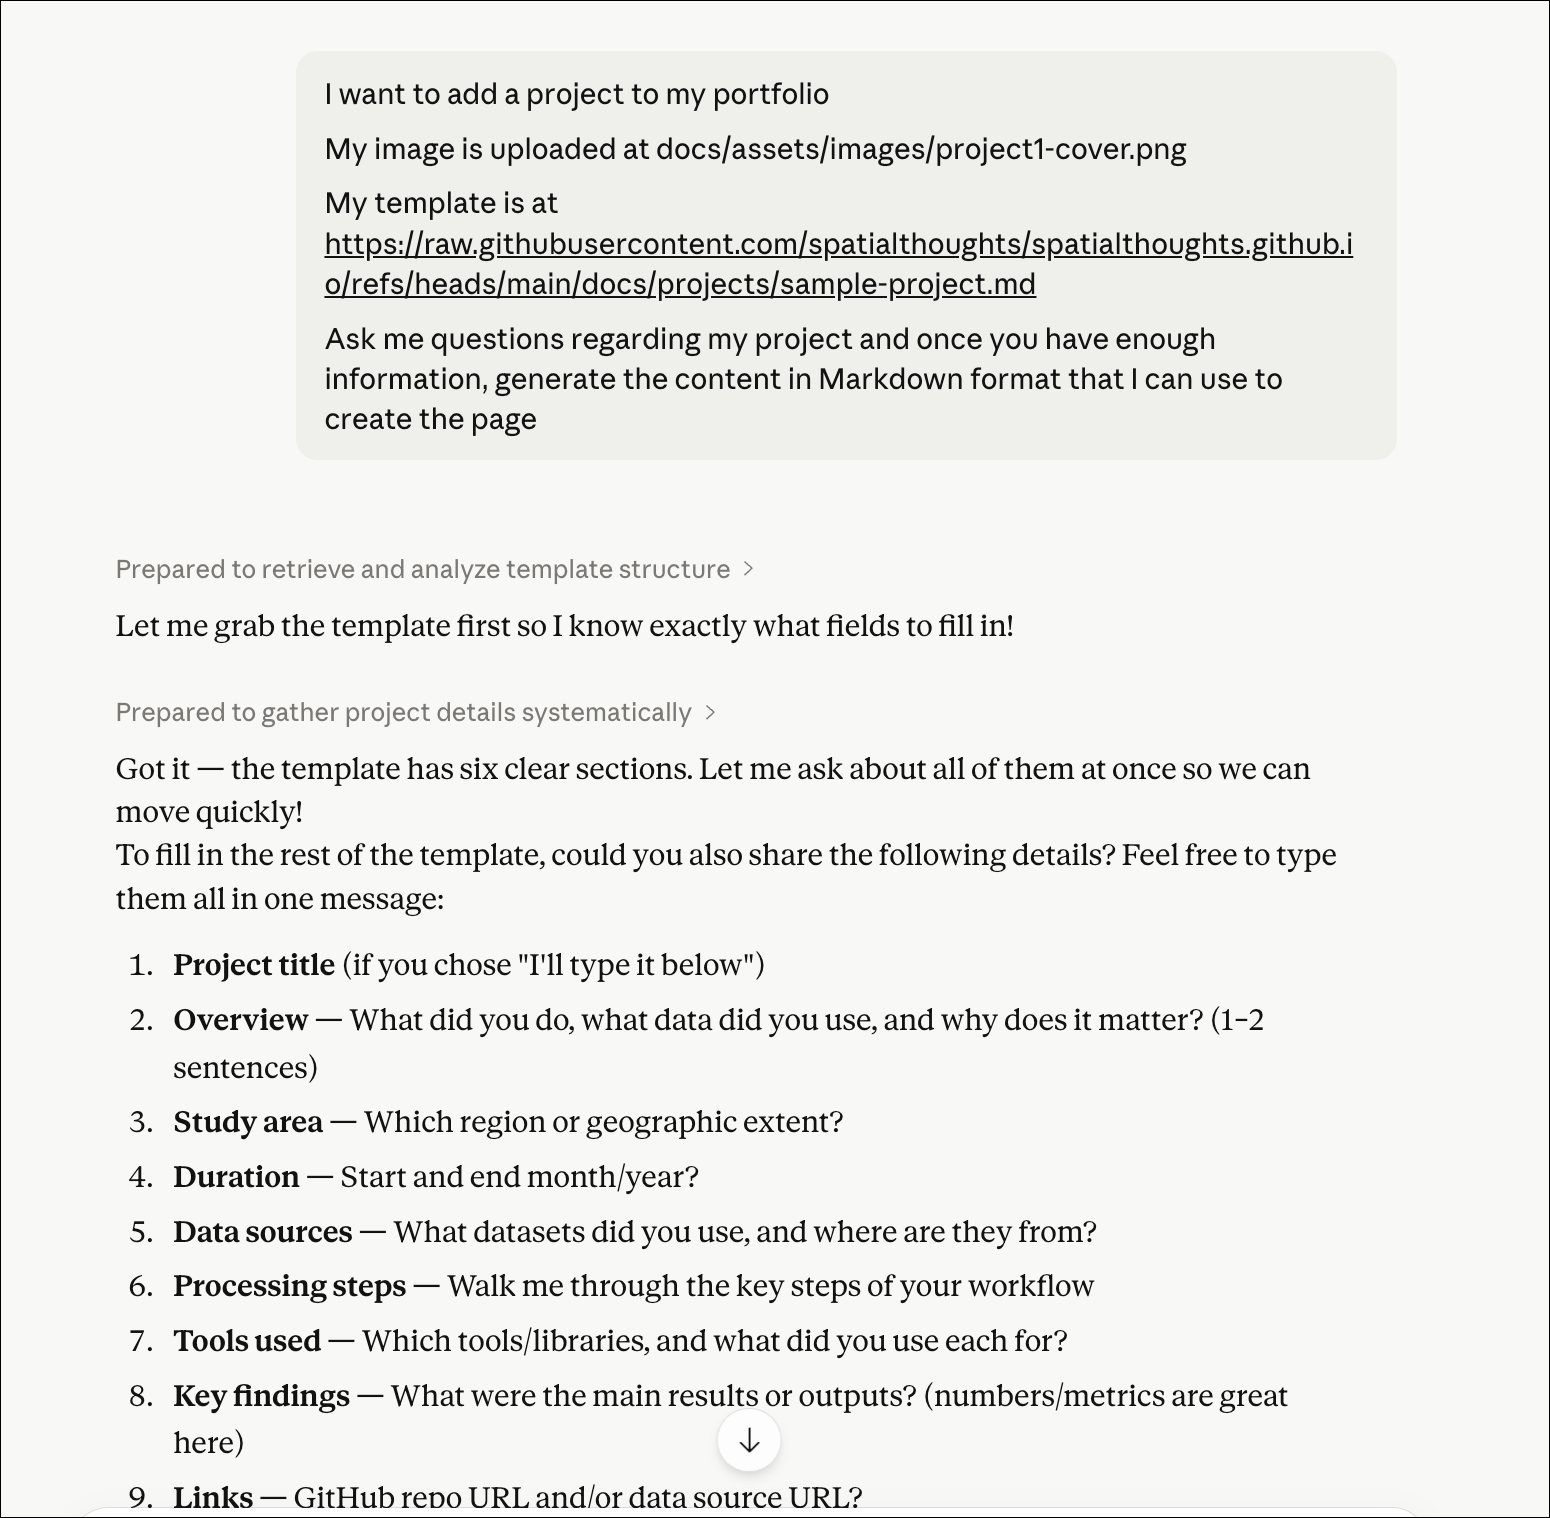
- Go to Claude AI and start a new chat. Enter a prompt shown below, replacing the image name and file path with your own. Claude will ask you questions about the project and share as much information as you can. You can optionally attach your project report or add a link with information about your project. Once the content is created, click the Copy button.
I want to add a project to my portfolio
My cover image path is docs/assets/images/project1-cover.png
My template content is pasted below
Ask me questions regarding my project and once you have enough information, generate the content in Markdown format that I can use to create the page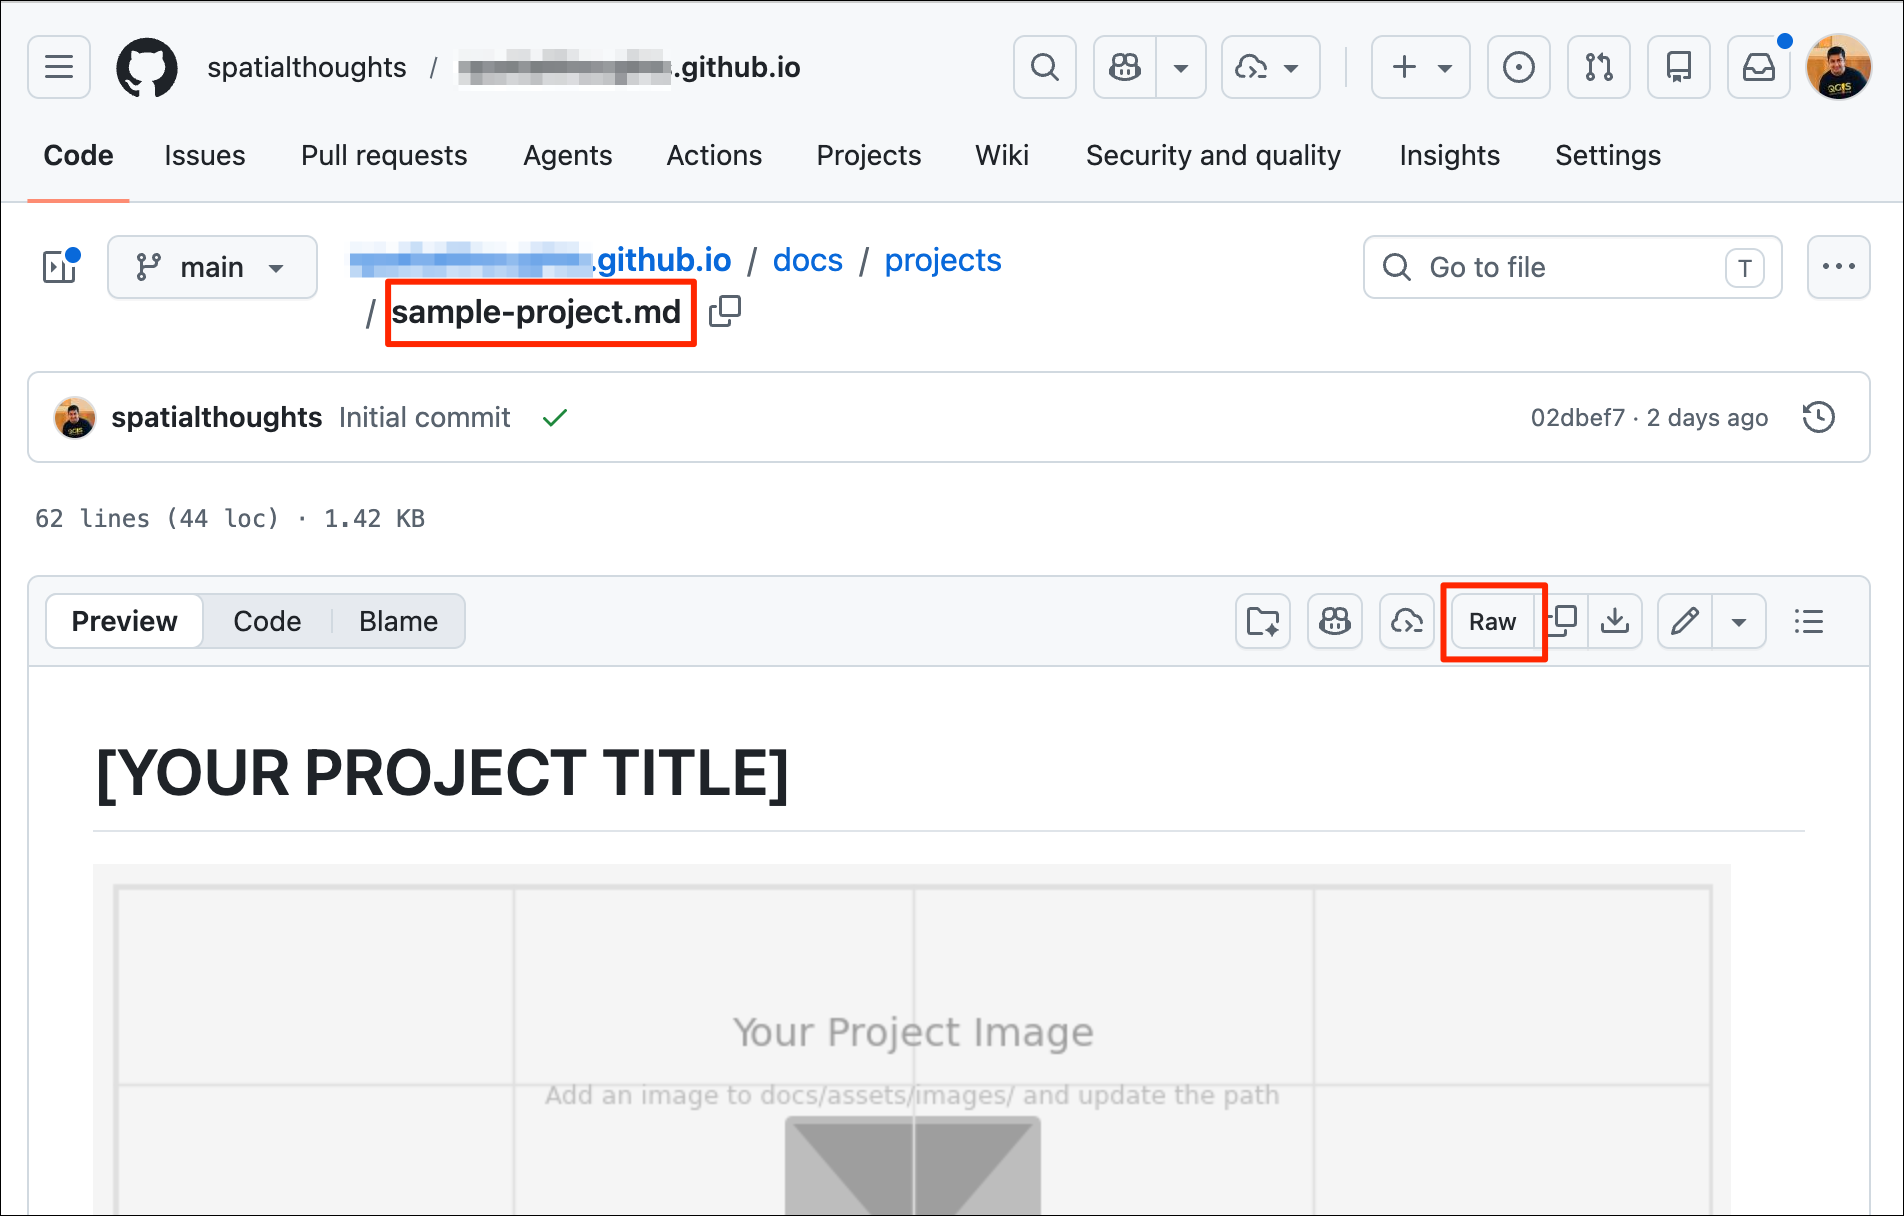
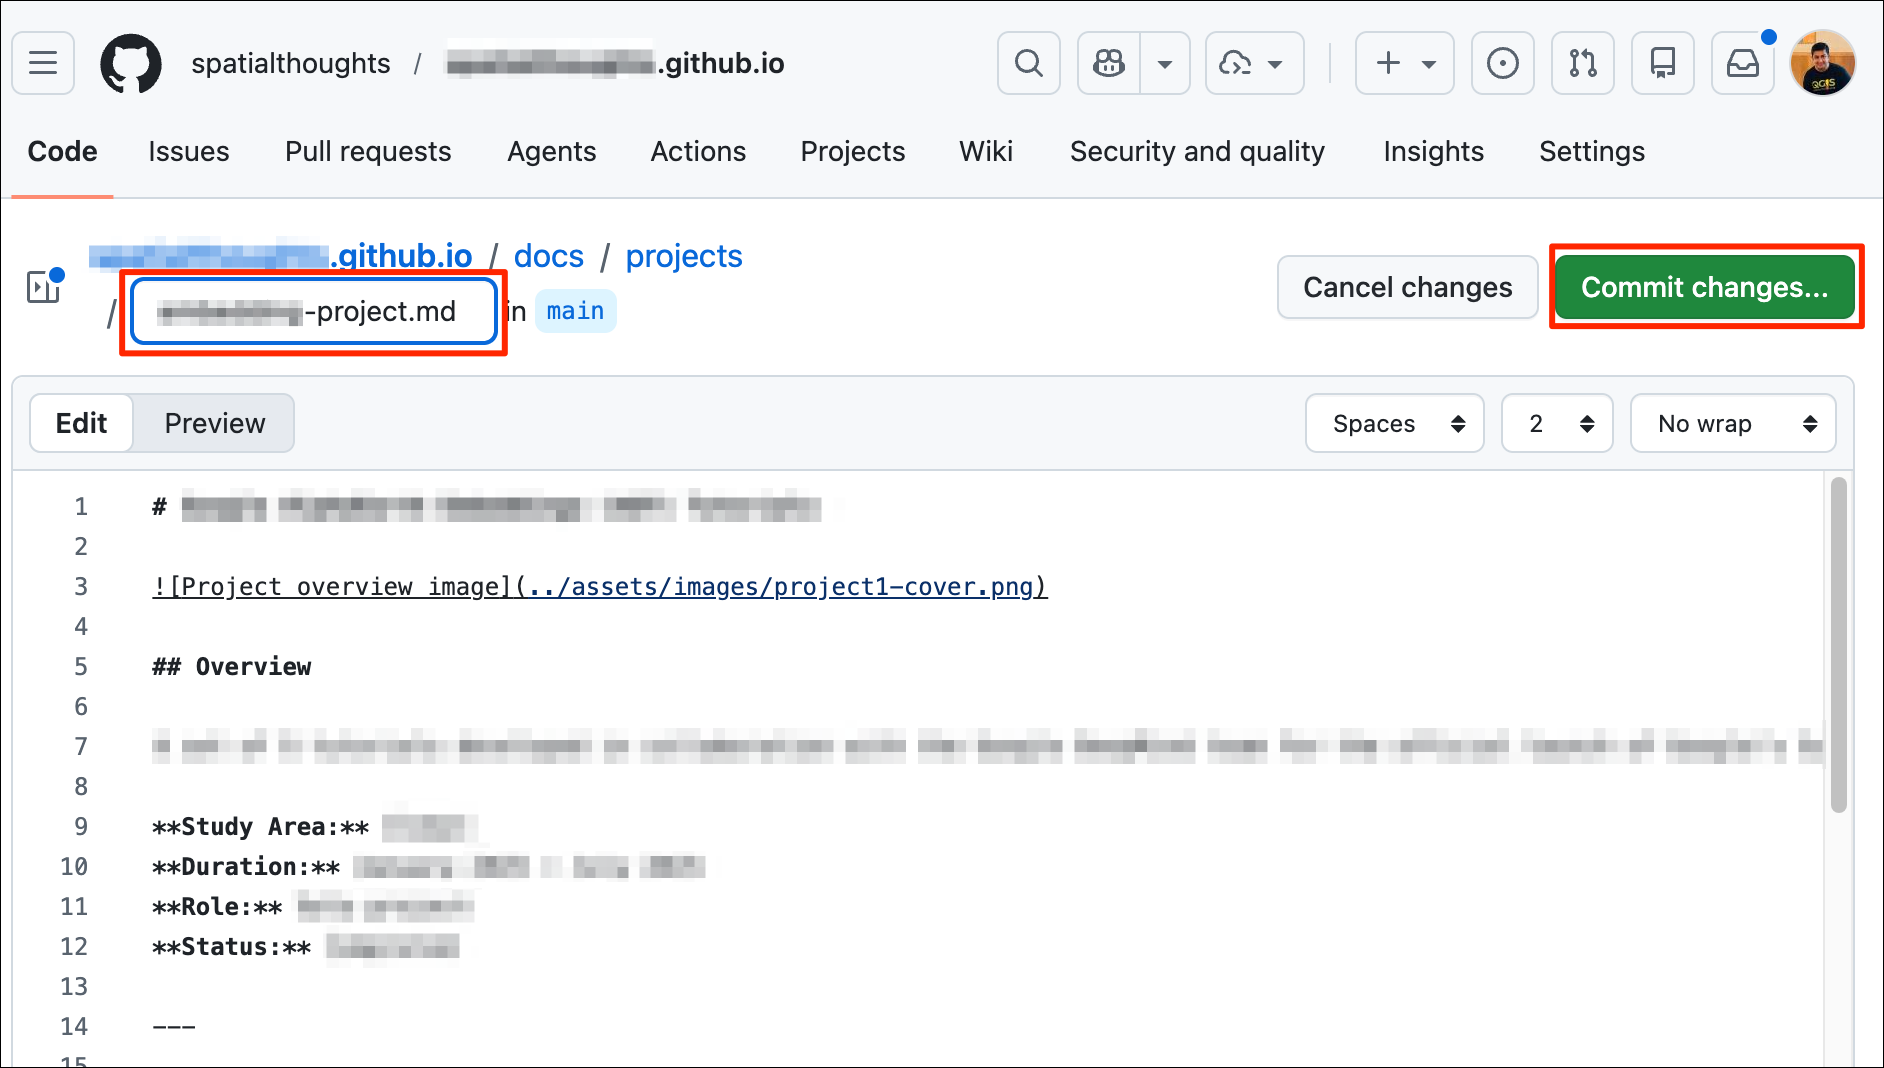
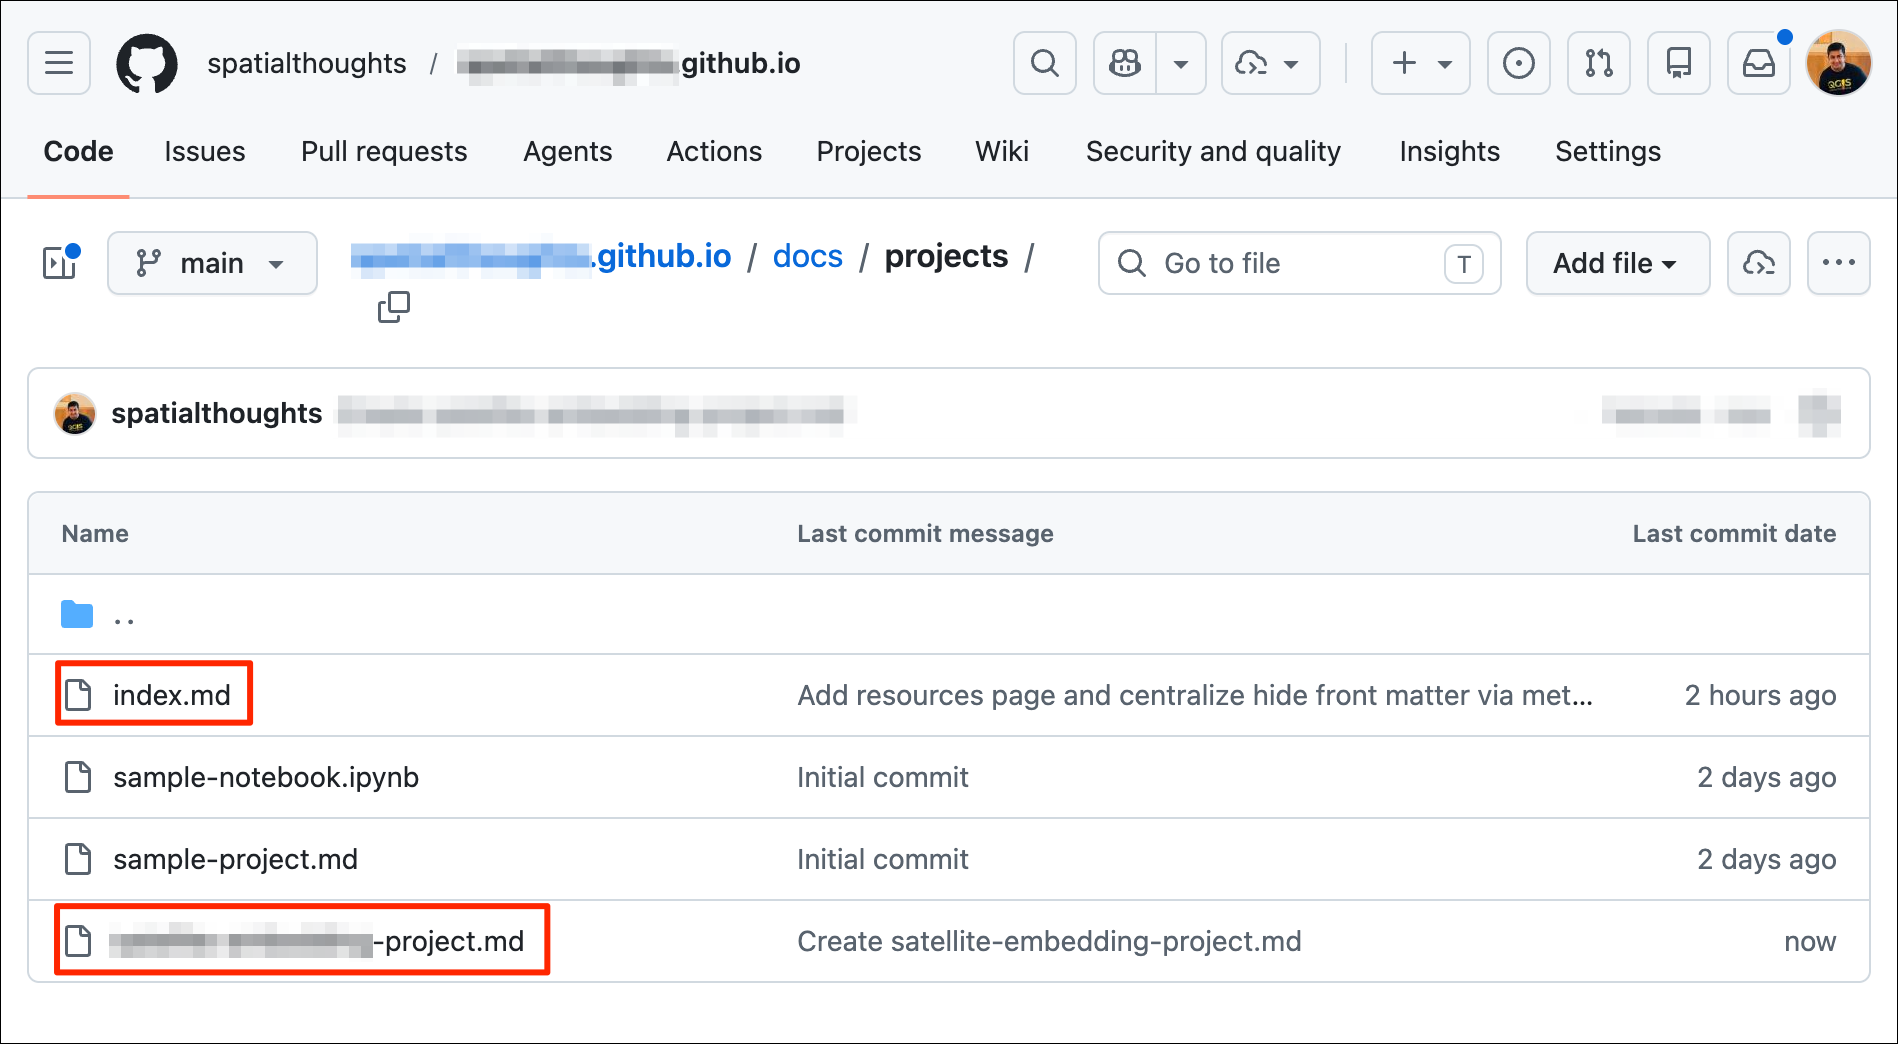
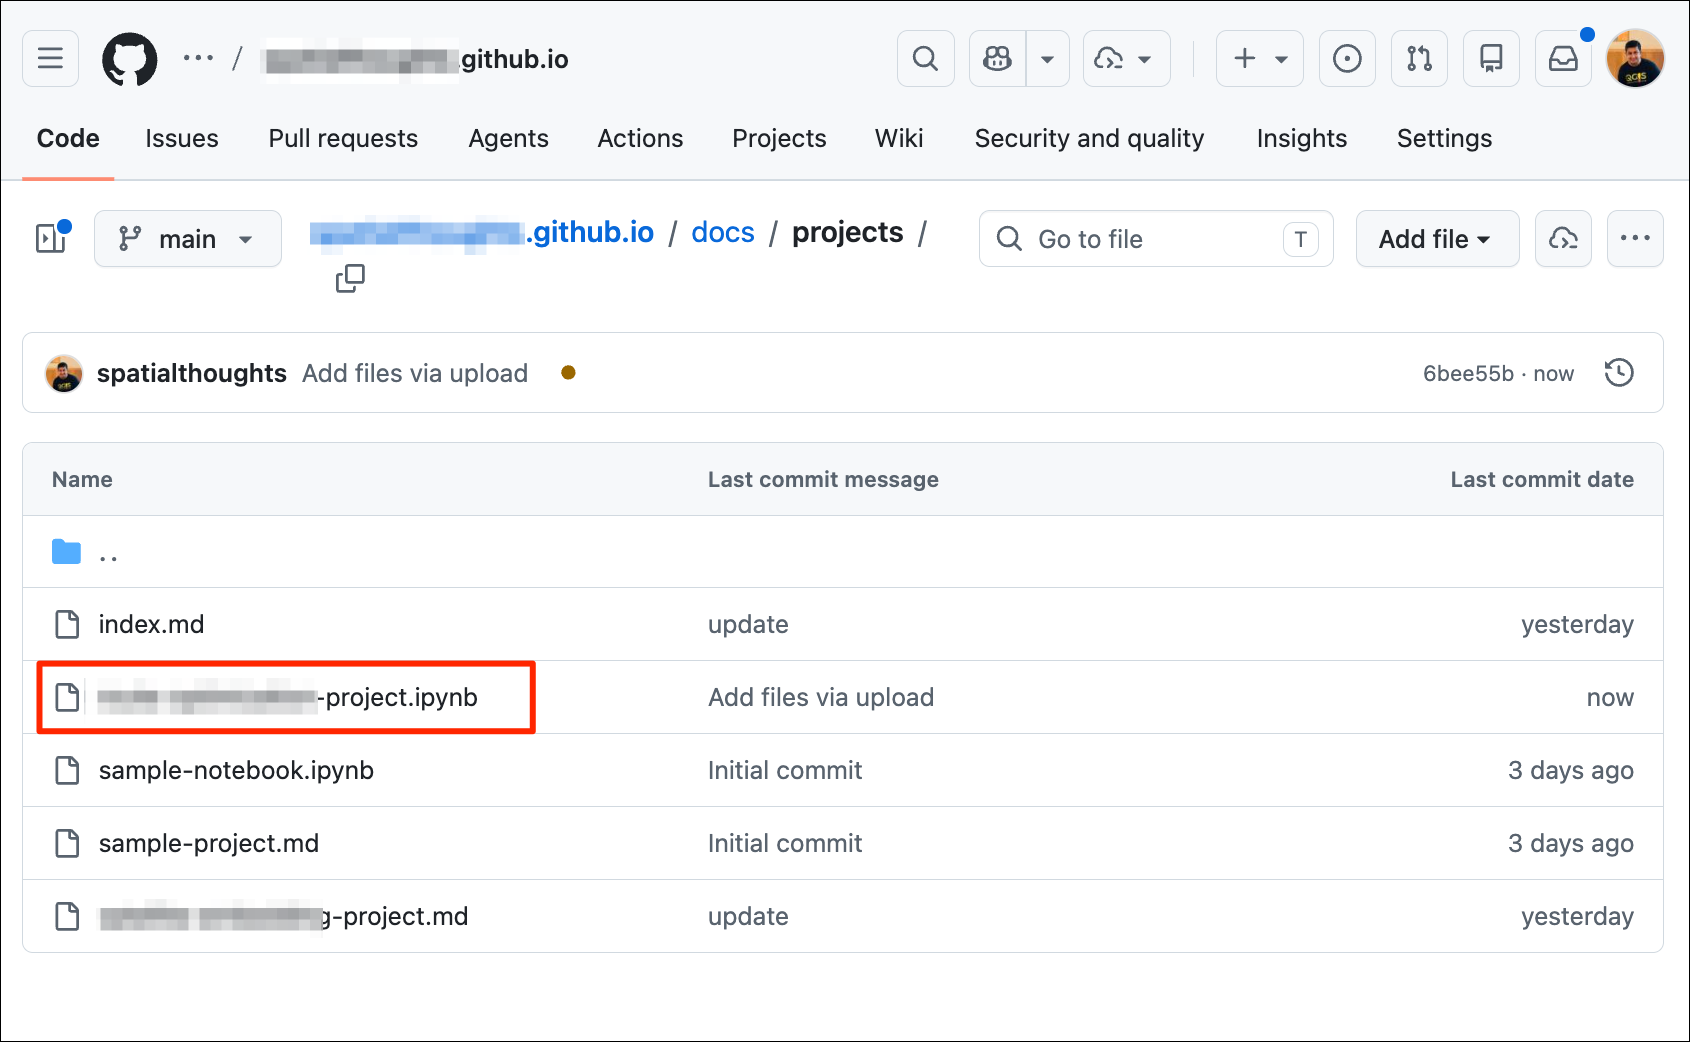
- Back in your editor, go to
docs/projects/folder, right-click and select New File….. Enter the name as<project-name>.md- replacing<project-name>is an appropriate name for your project.
- Paste the Markdown content from Claude. Edit it as required and save the file.
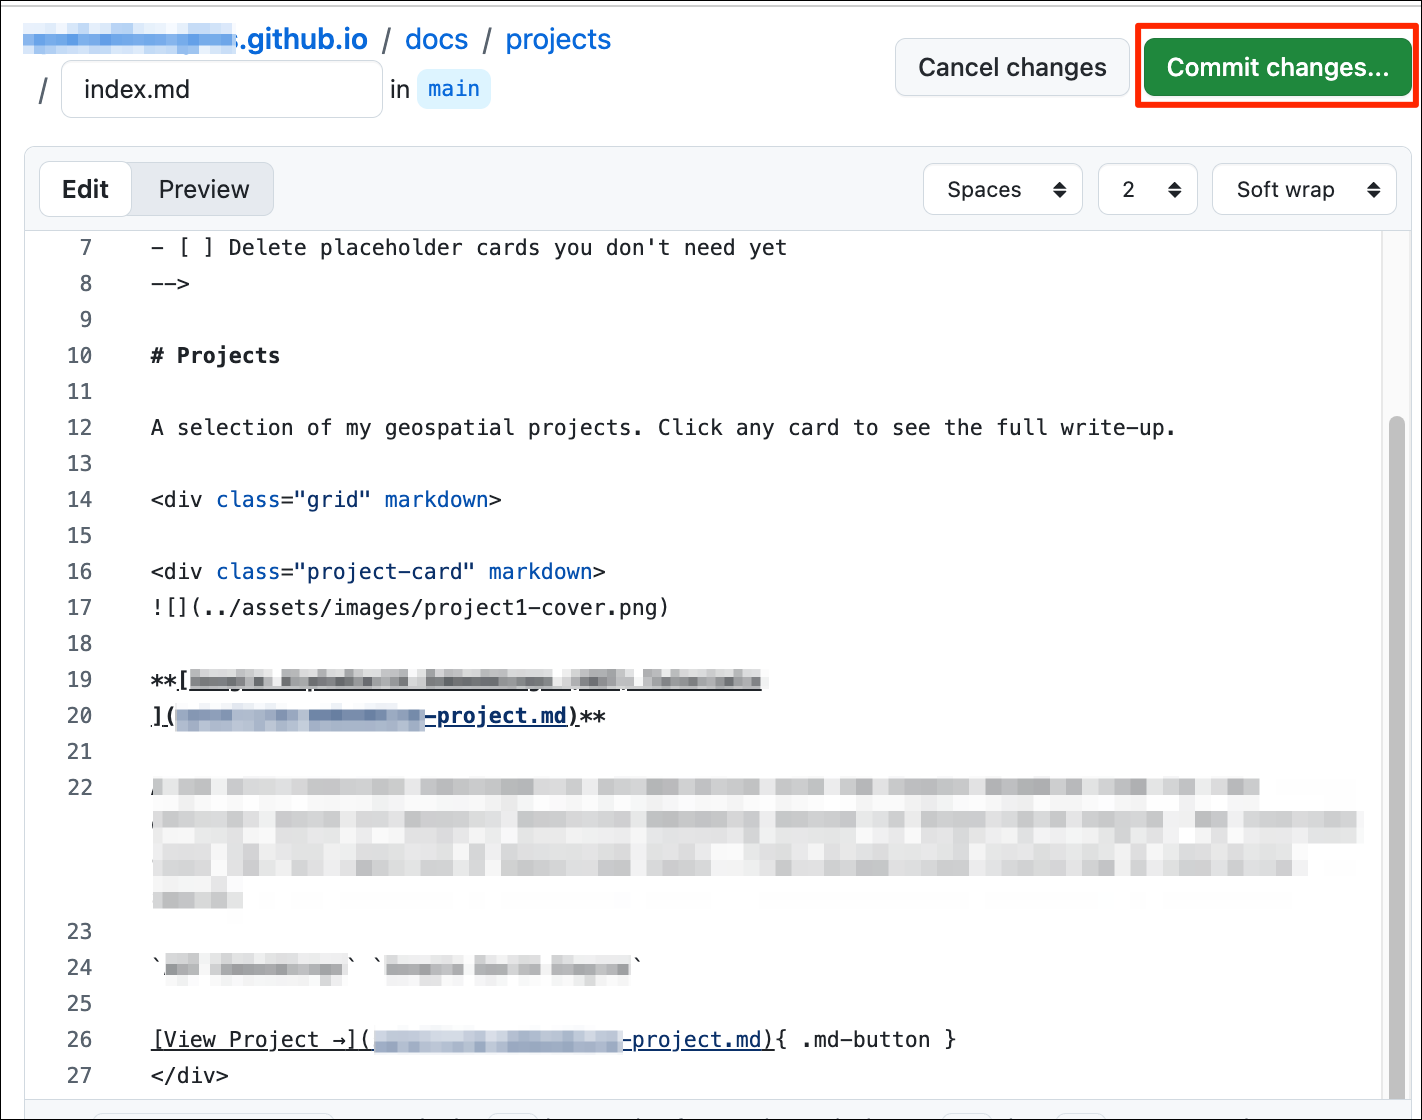
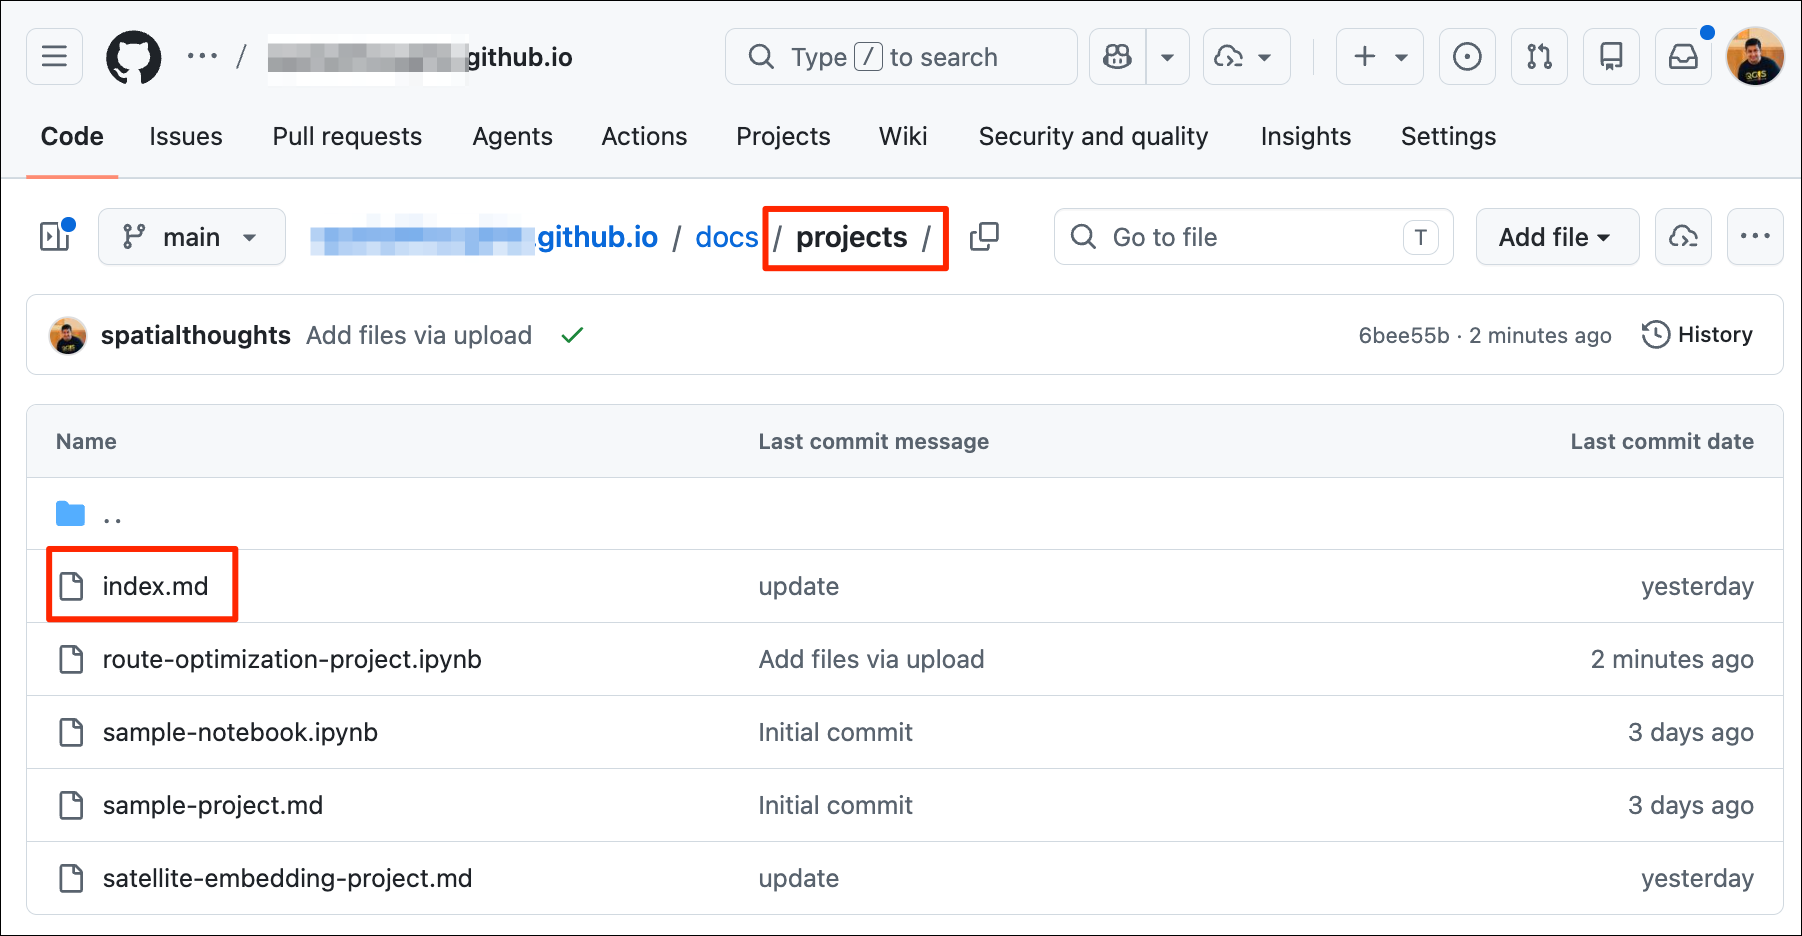
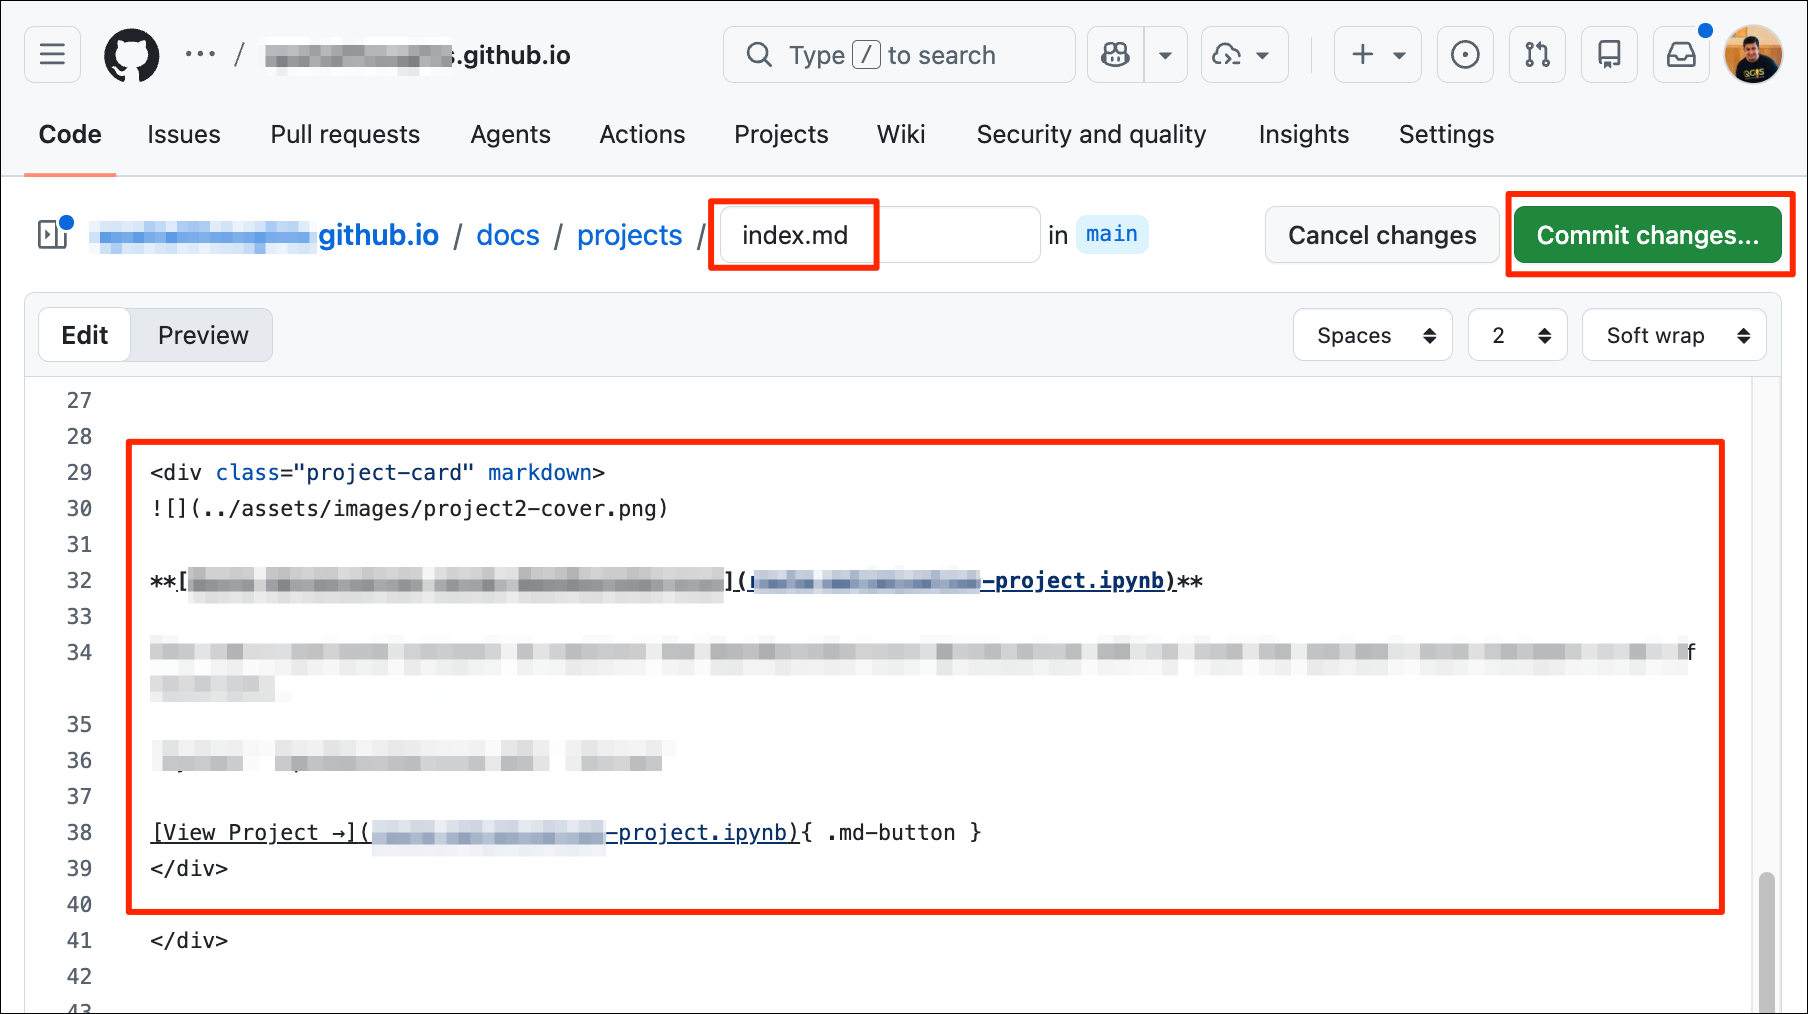
- We need to add the project to the card layout. Open the
docs/projects/index.mdfile. Edit the first project card section with the project name and description. Update the cover image and project file path.
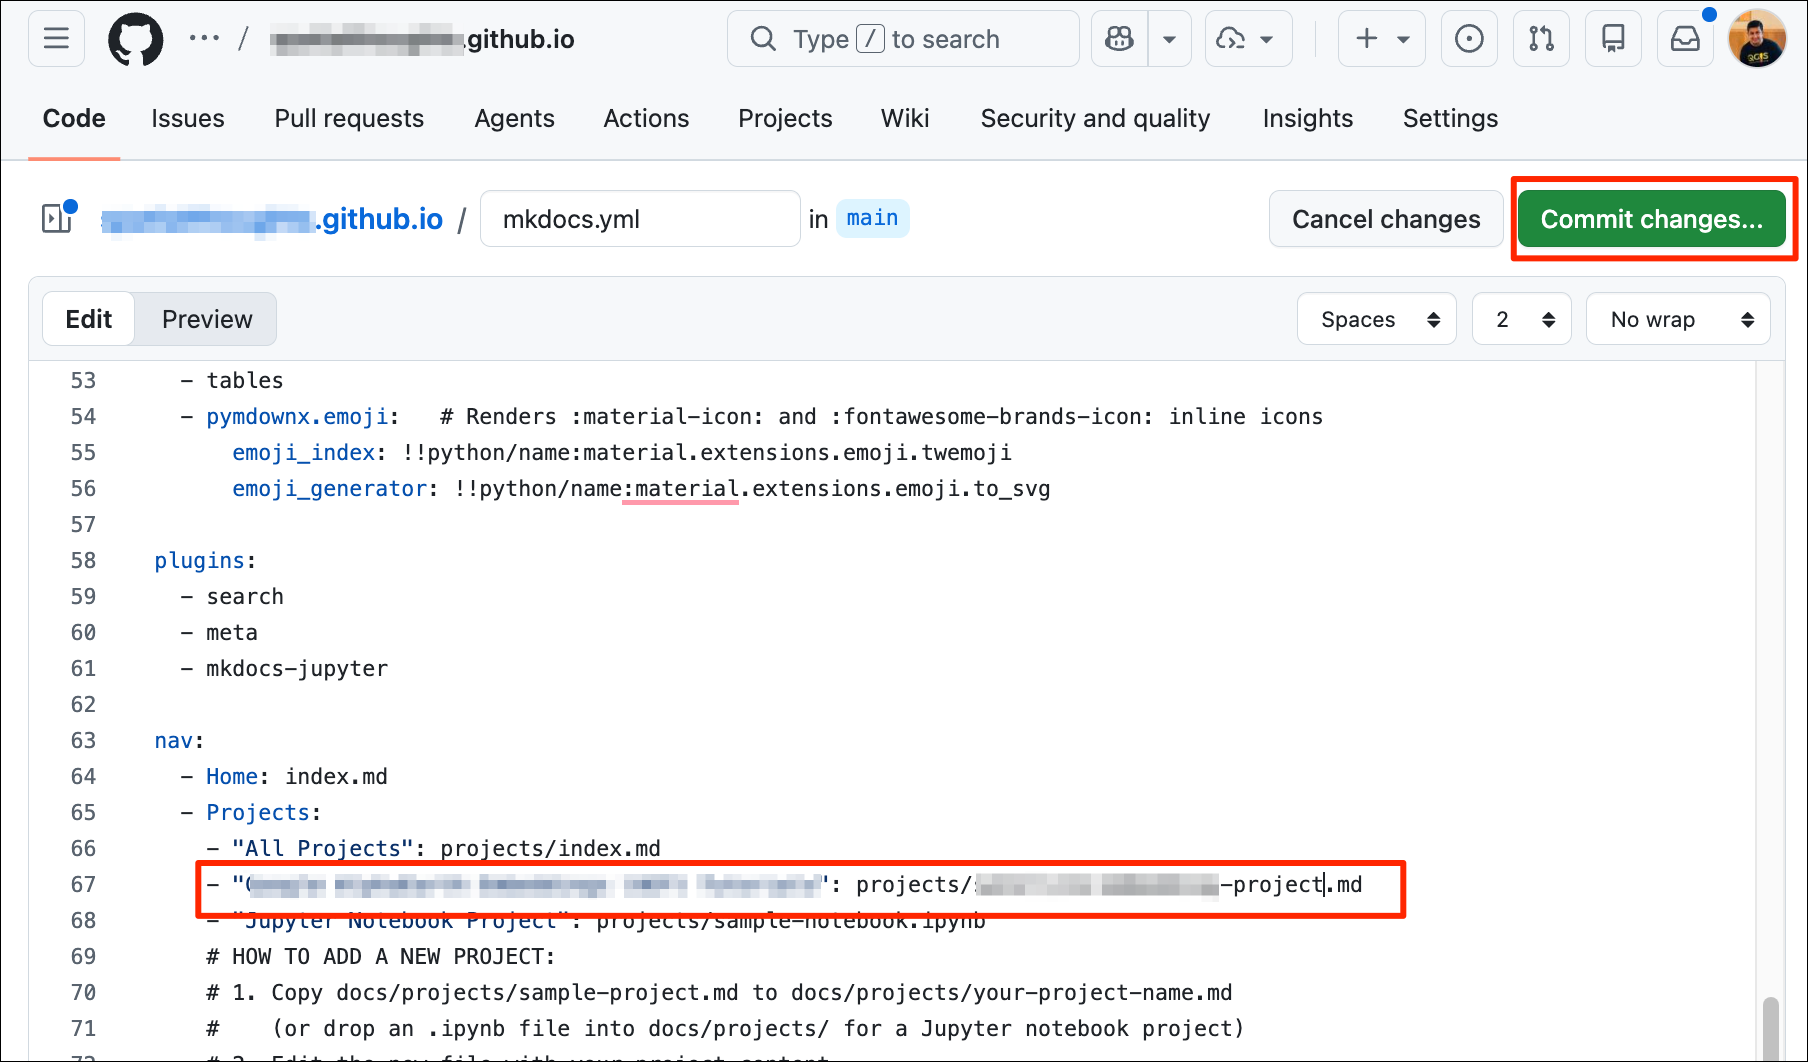
- Next, we add this project to the navigation menu. Edit the
mkdocs.ymlfile and add the name and path of the project file and save it.
- Go to the browser tab connected to the local development server at http://127.0.0.1:8000/ and head over to the Projects page to see the new project.
- Commit, push and deploy the changes.
git status
git add .
git commit -m "update'
git push
mkdocs gh-deploy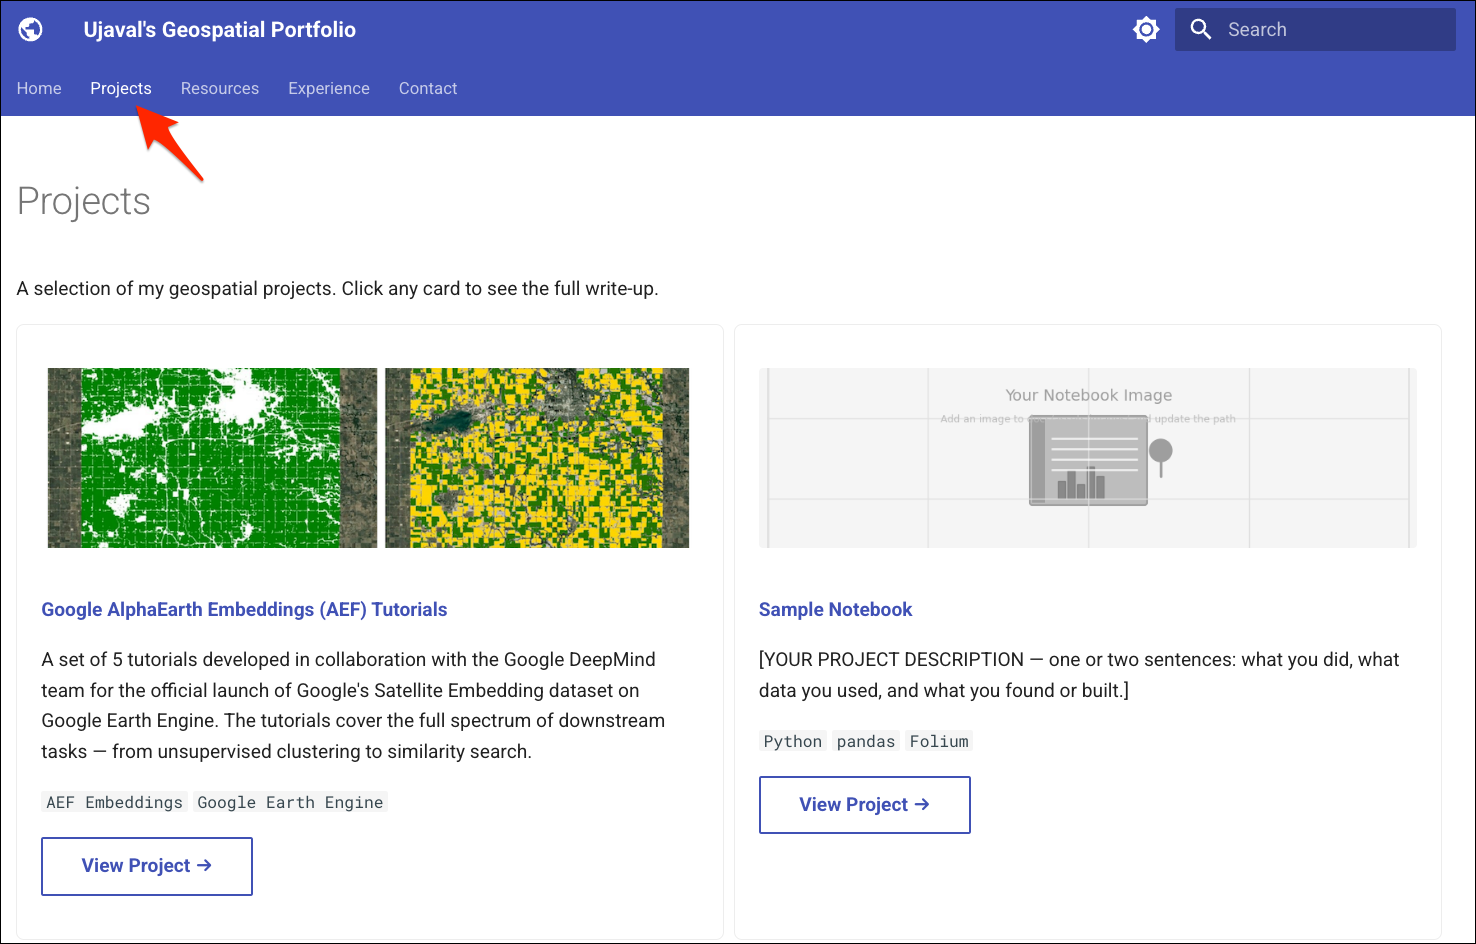
6.5 Adding a Notebook Project
The portfolio template also supports using Jupyter Notebooks
(.ipynb) as project pages. The notebooks can have cells
with Markdown content, code, charts, interactive maps. These will be
converted to compatible Markdown content by MkDocs and will be rendered
as a project page. Adding a project via a notebook requires uploading a
cover image and a notebook file.
- Copy your notebook in the
projectsfolder.
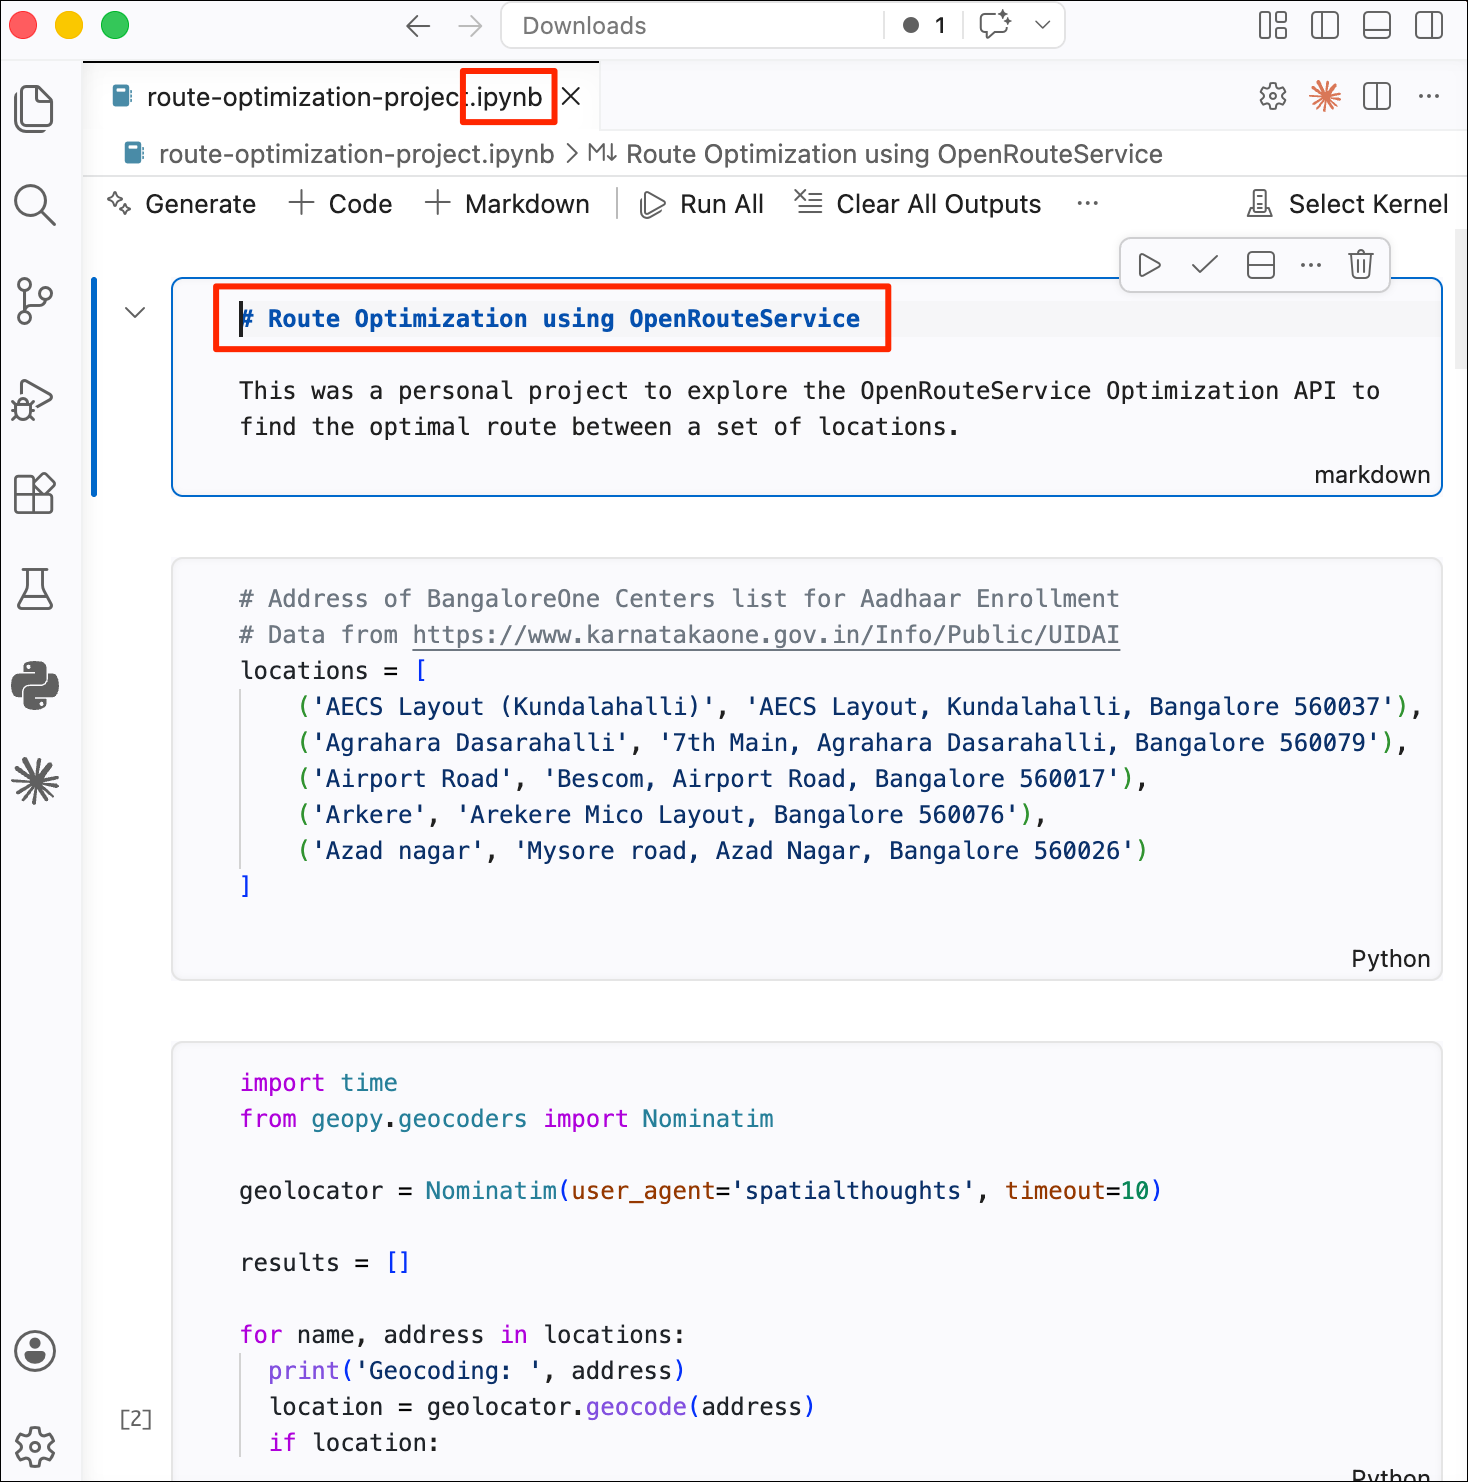
- Prepare your project notebook. Make sure to add a Markdown cell at the top with the project title. You may clear outputs of cells with warnings or unwanted outputs so your resulting page is clean. Also make sure to replace any API Keys with placeholders.

- Next, go to the
docs/assets/images/folder and copy a cover image for the project.
- Update the
index.mdin thedocs/projects/folder with the card for the newly uploaded project.
- Add this project to the navigation menu by editing the
mkdocs.ymlfile and adding the name and path of the project file.
- Save all the changes and go to the browser tab connected to the local development server at http://127.0.0.1:8000/. Head over to the Projects page to see the new project.
- Commit, push and deploy the changes.
git status
git add .
git commit -m "update'
git push
mkdocs gh-deploy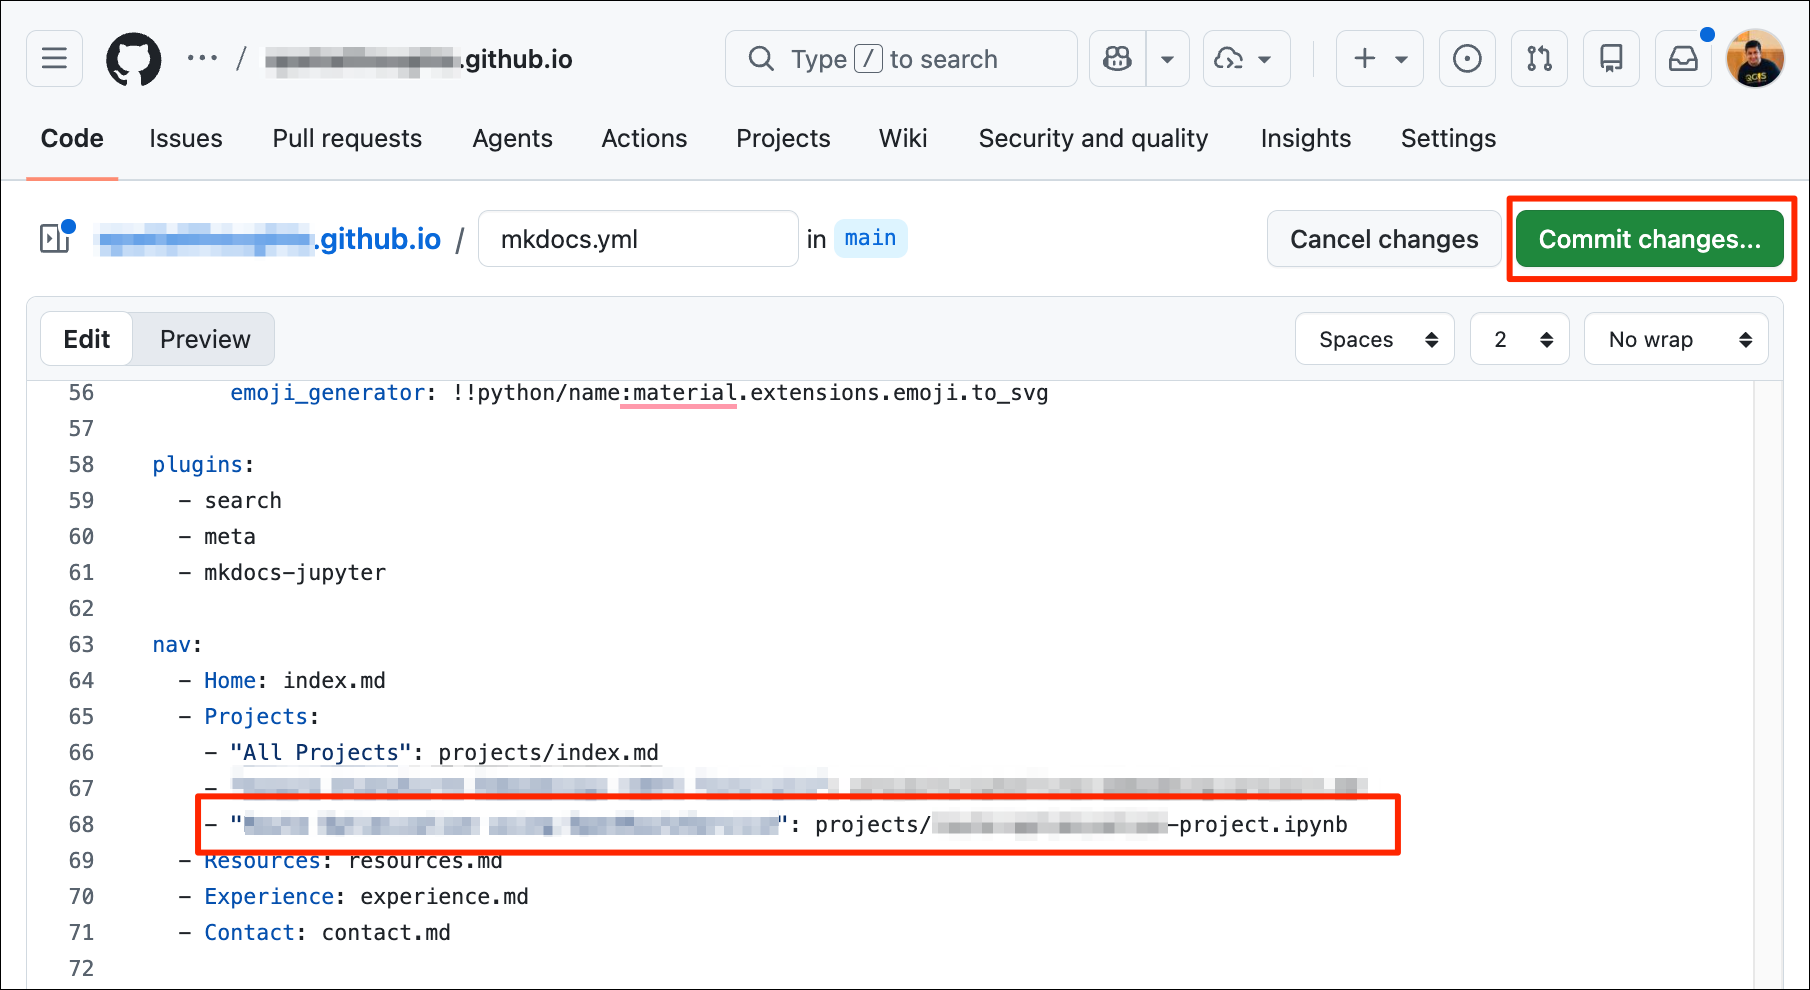
Example Portfolios
You can check out some of the portfolios created by the participants of this class for inspiration.
Supplement
Adding a Cover Image on the Homepage
To add a cover image to your homepage, add a banner image
assets/images/hero-image.png and update the Hero
section in the assets/css/extra.css as below.
/* Hero section on the Home page */
.hero {
  text-align: center;
  padding: 1rem 1rem 1.25rem 1rem;
  background:
    linear-gradient(135deg,
      rgba(232,244,248,0.82) 0%,
      rgba(240,247,255,0.82) 50%,
      rgba(232,240,254,0.82) 100%),
    url('../images/hero-image.png') center / cover no-repeat;
  border-radius: 8px;
}
Automating Deployment with GitHub Actions
GitHub Actions is
feature of the GitHub platform that allows you to automate workflows.
You can setup actions to trigger a task when a specific event happens. A
useful automation is to add a workflow action that watches your
repository and runs MkDocs to generate new set of static HTML pages
whenever you update the main branch. This way you are able
to edit your files online and update your website without having access
to a local development environment.
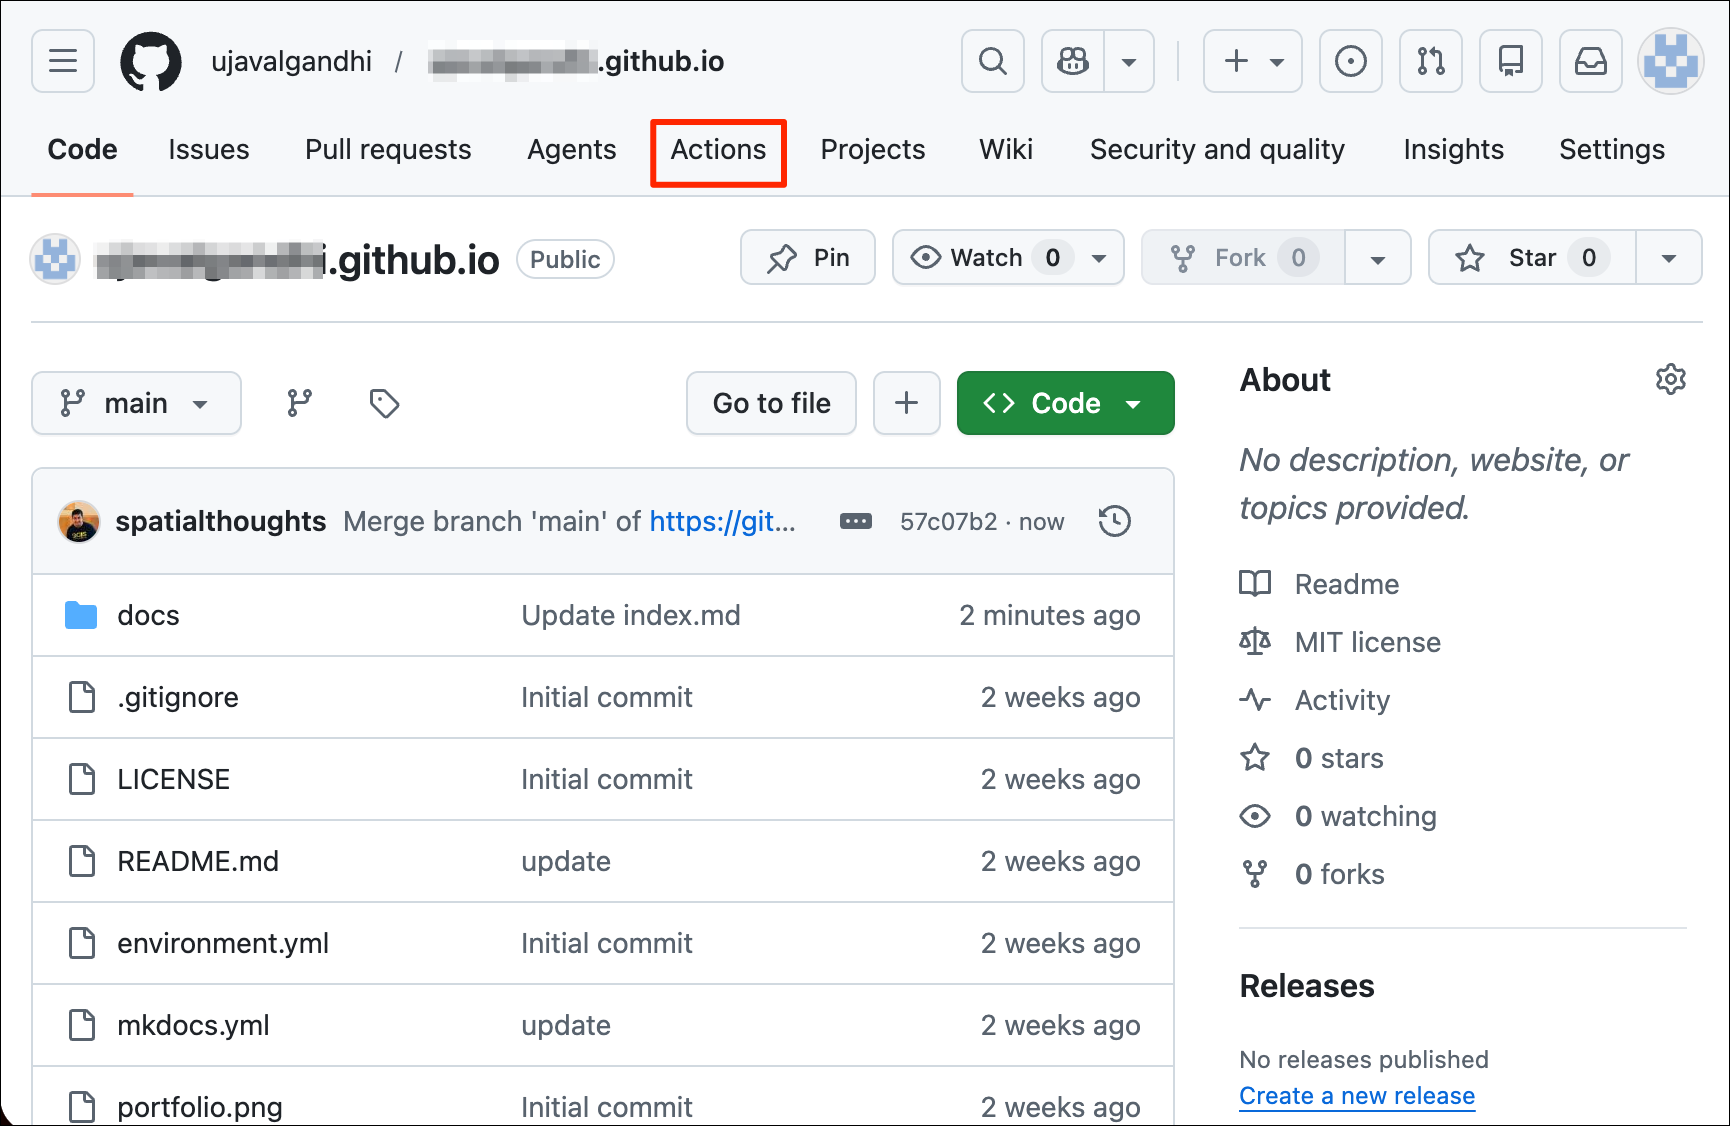
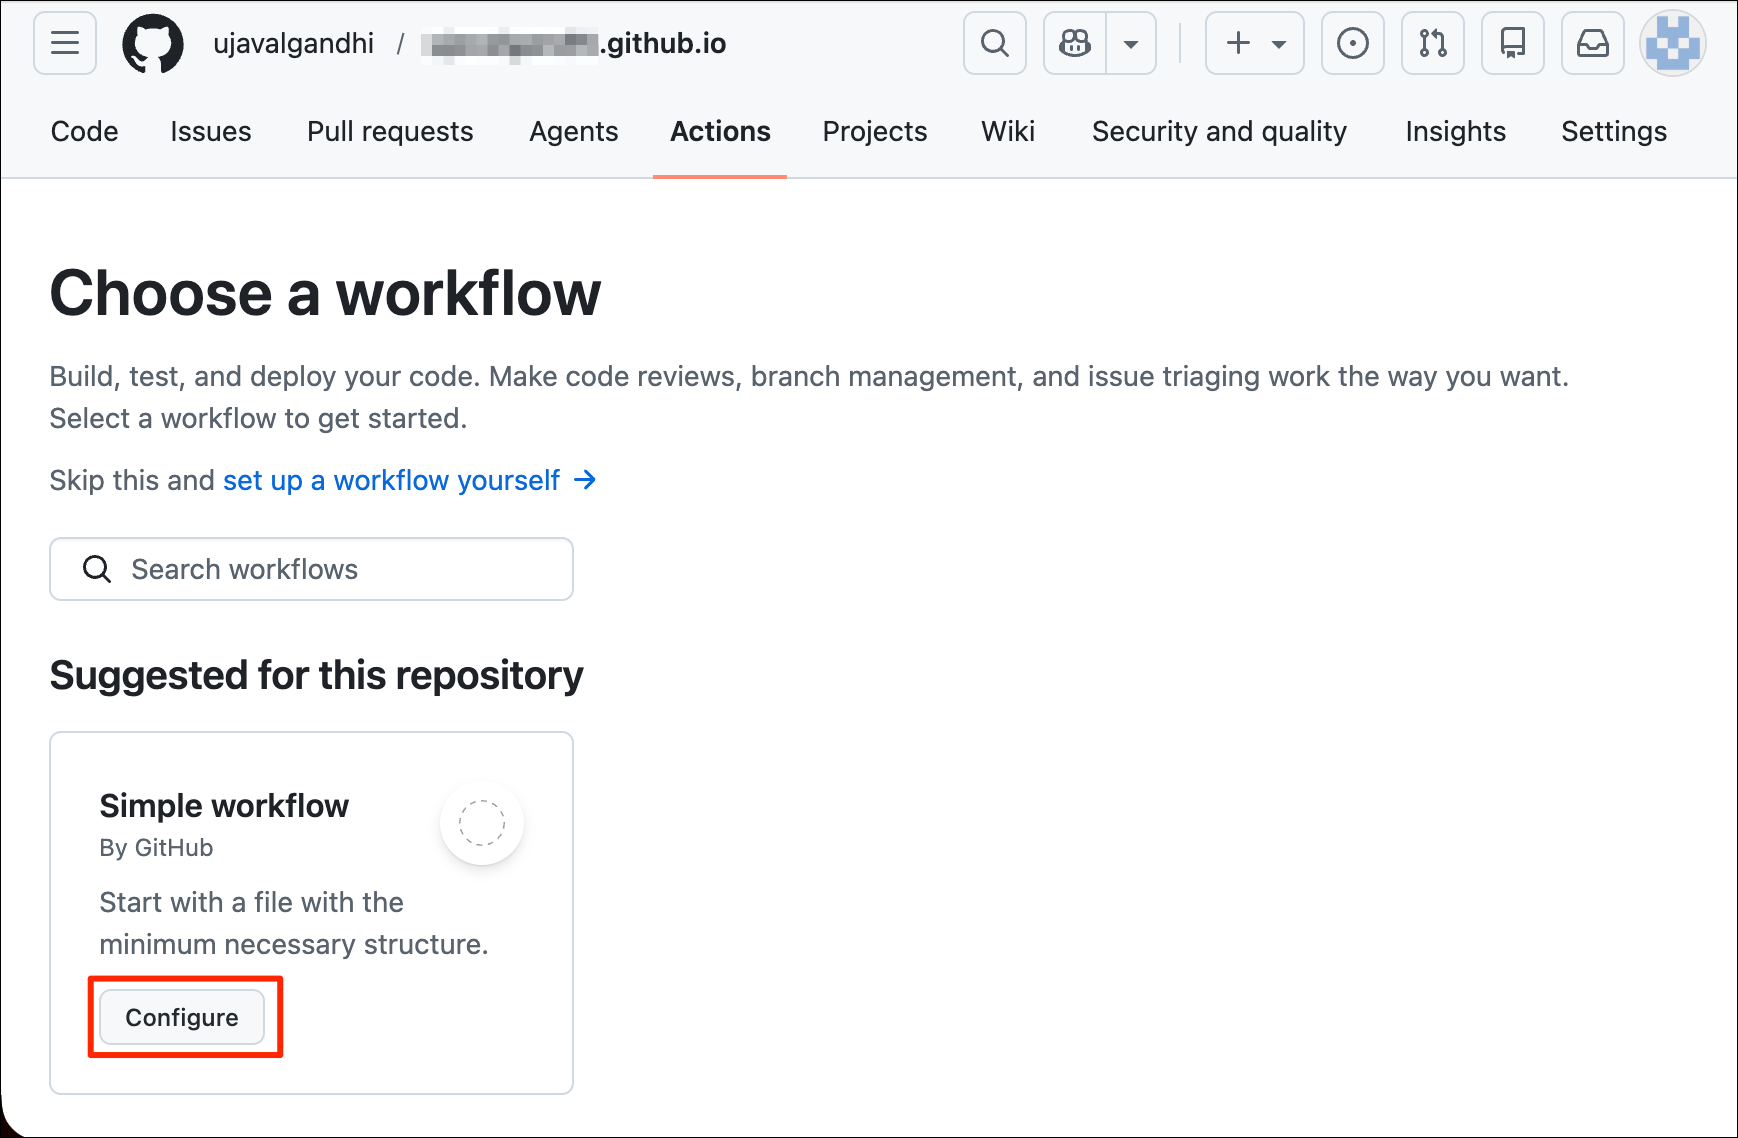
- Go to your repository homepage on GitHub and click Actions.
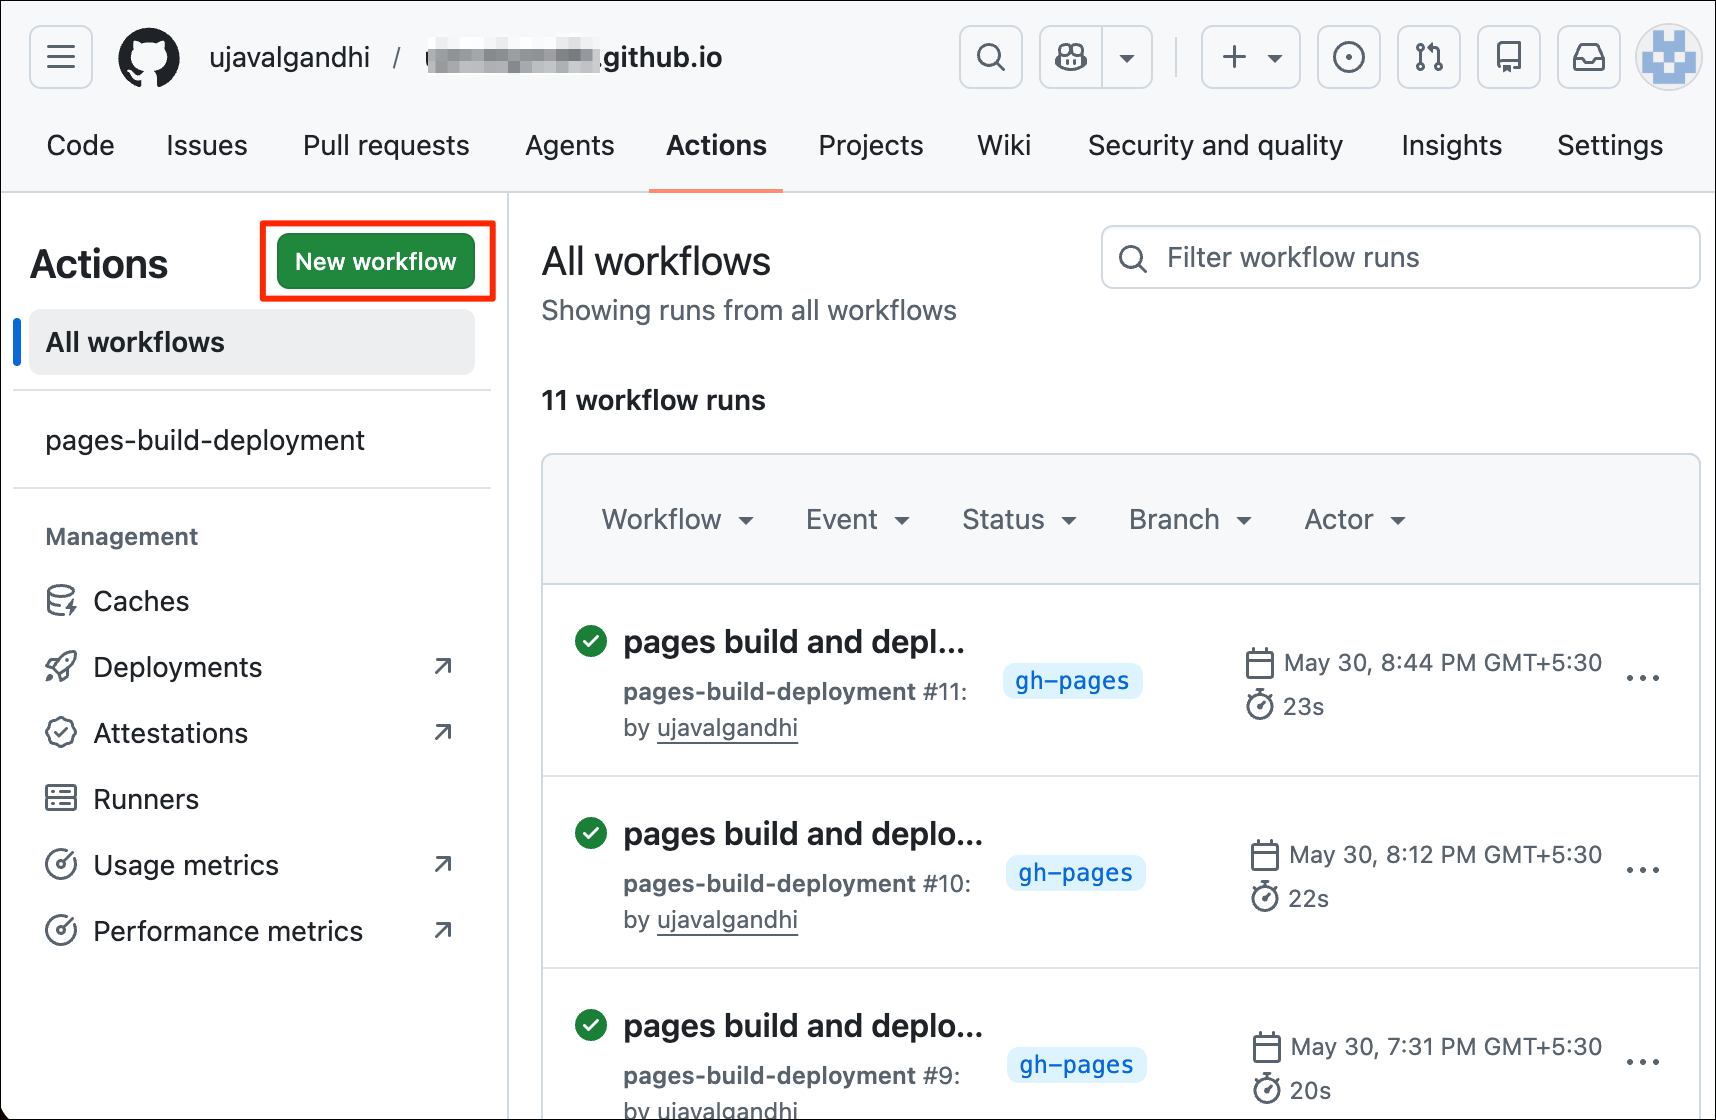
- Click the New workflow buttton to setup a new action.
- Choose the Simple workflow template and click Configure.
- GitHub actions are stored in a hidden folder in your repository at
.github/workflows/. Enter the name of the file asdeploy.ymland enter the content below. The configuration is in the YAML format and is very sensitive to whitespaces, so ensure you paste the content exactly as it is below. Once done, click Commit changes… and click Commit changes when prompted for confirmation.
name: Run MkDocs and Create HTML pages

on:
  push:
    branches:
      - main

permissions:
  contents: write

jobs:
  deploy:
    runs-on: ubuntu-latest
    steps:
      - uses: actions/checkout@v4

      - uses: actions/setup-python@v5
        with:
          python-version: "3.11"

      - name: Install dependencies
        run: pip install -r requirements.txt

      - name: Preserve CNAME if present
        run: |
          if [ -f CNAME ]; then
            cp CNAME docs/CNAME
          fi

      - name: Deploy
        run: mkdocs gh-deploy --force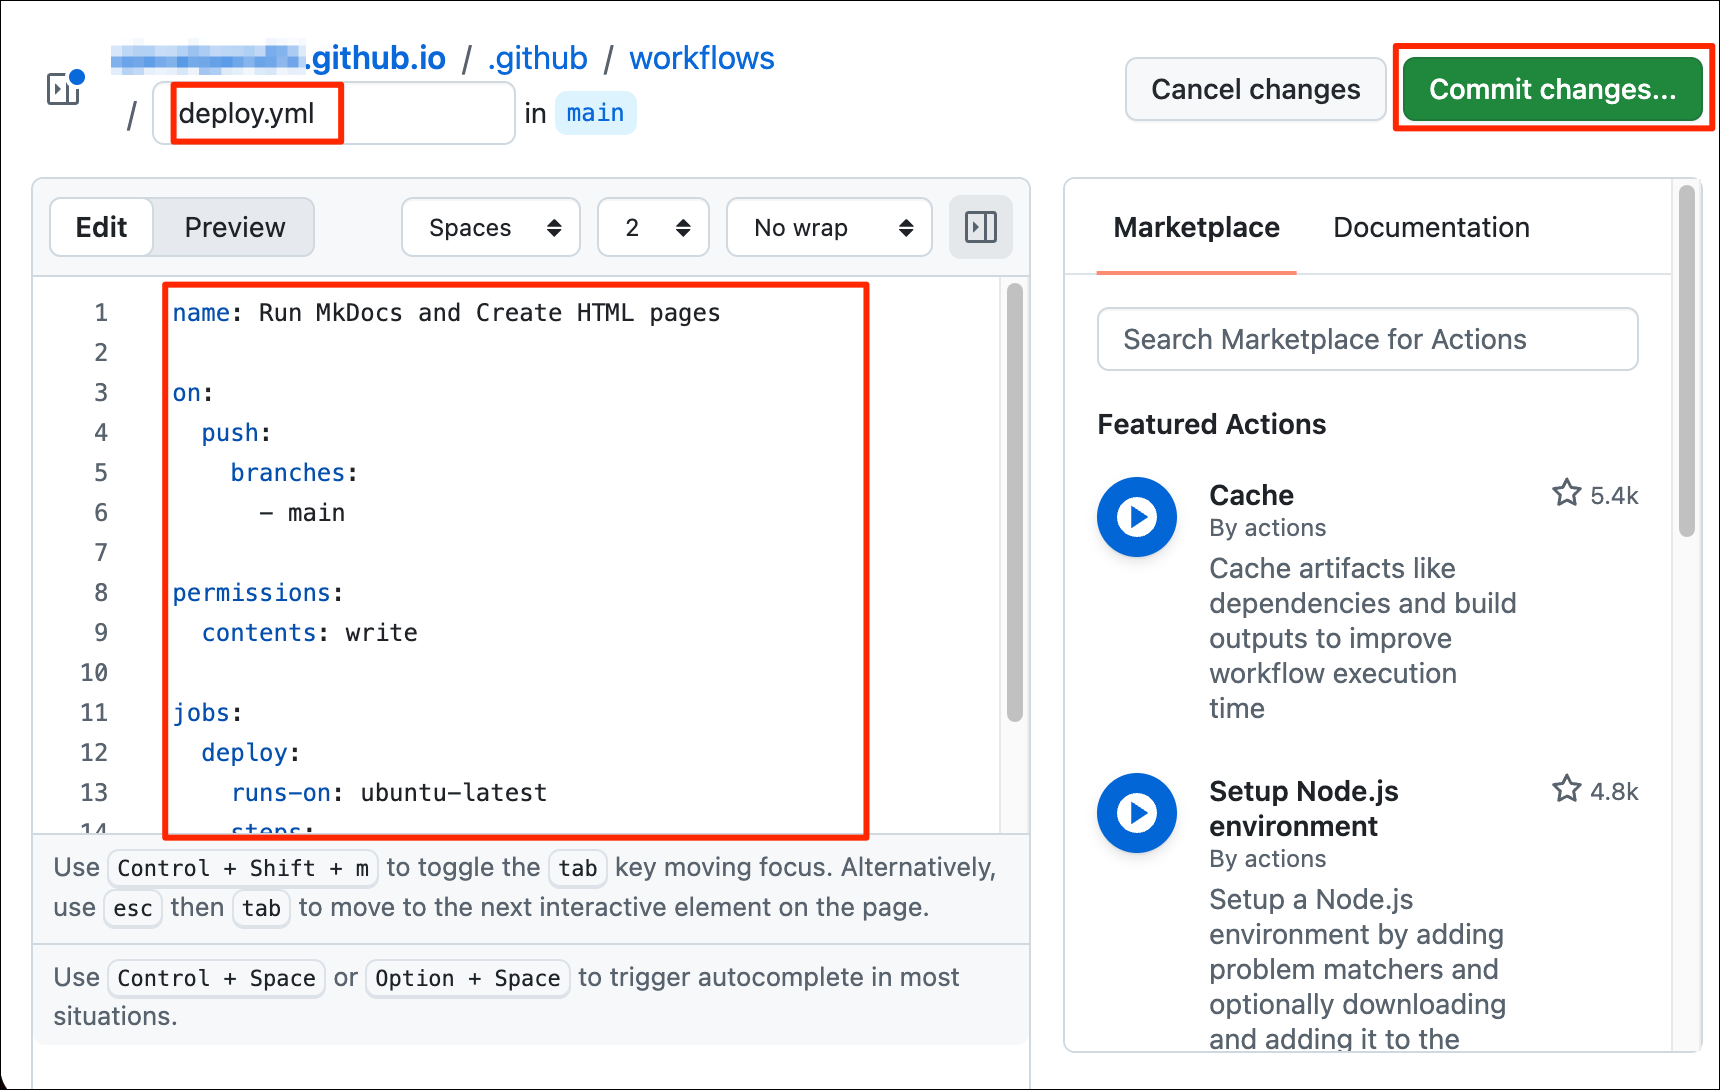
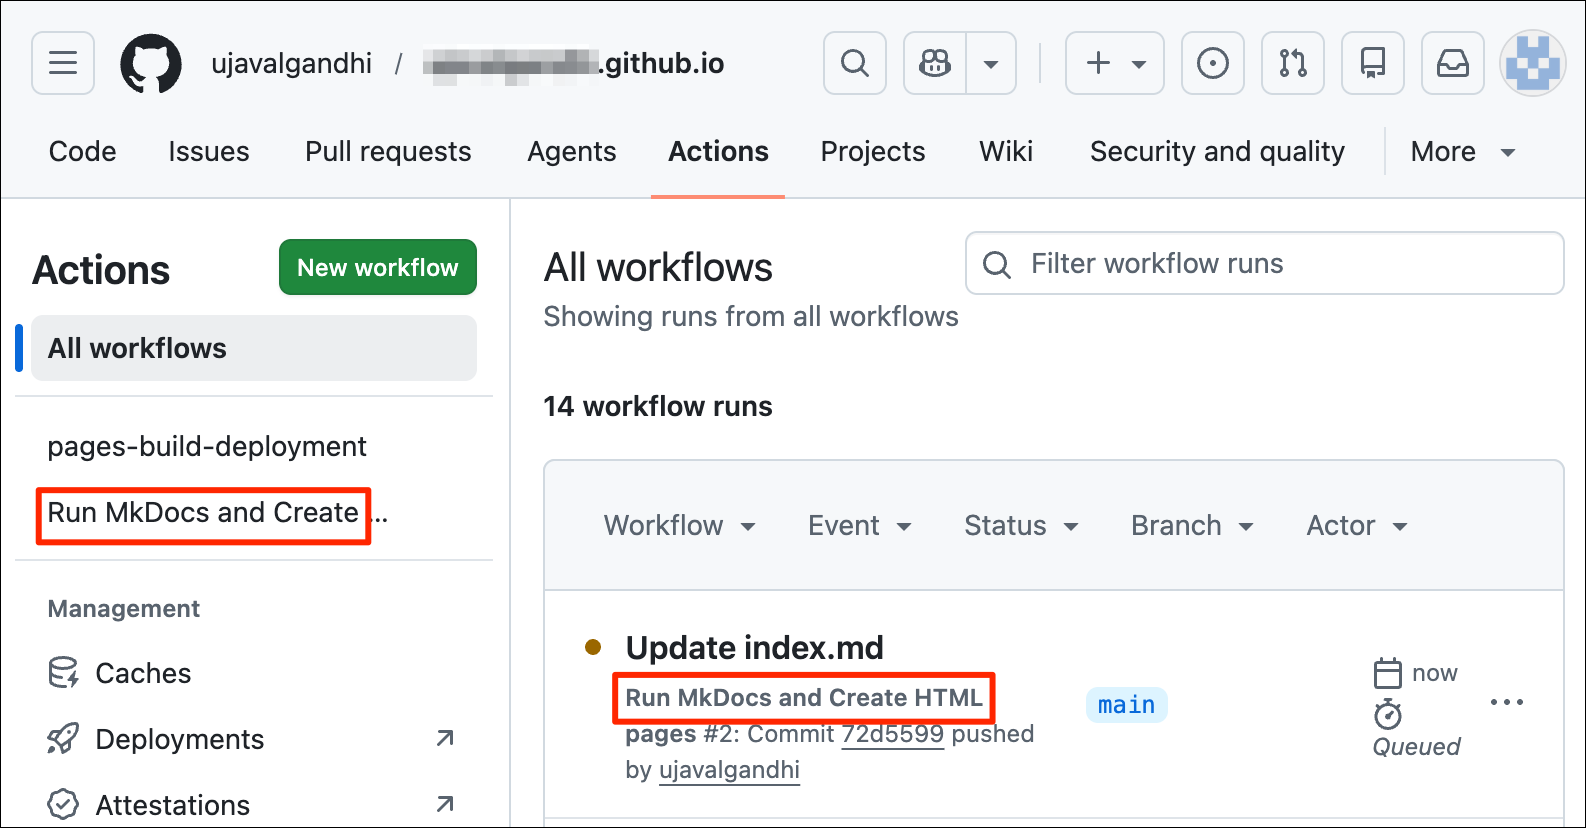
- Your action is setup. Now wheever you push new changes to the
mainbranch of your repository, this action will be triggered and will publish thegh-pagesautomatically by runningmkdocs gh-deploy.
Using a Custom Domain
GitHub Pages allows to connect your site to your own domain name and host the GitHub Pages site on it. See About custom domains and GitHub Pages for official instructions. We are providing simplified version of these instructions here for the most common setup.
- To use a custom domain, you need to purchase a domain name. There
are many registrars who sell domain names. The cost depends on the
uniqueness of the domain and the extension (like
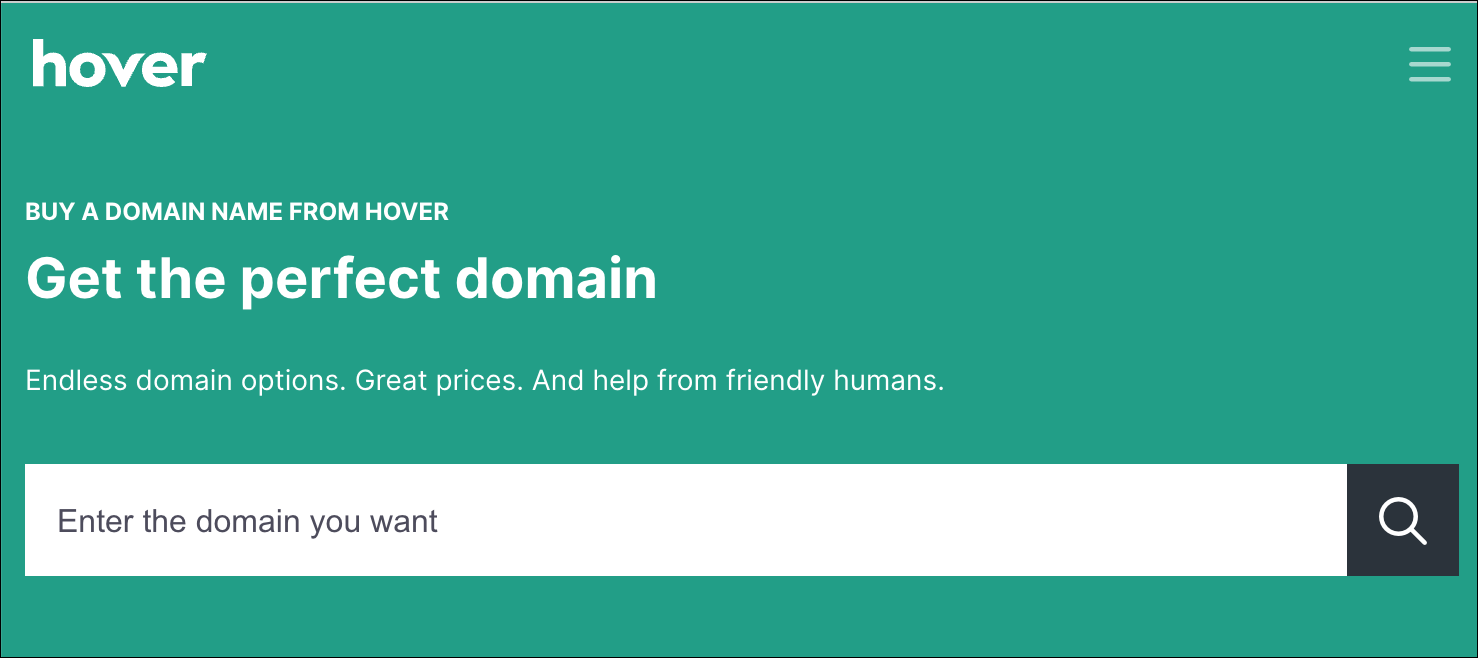
.com,.in,.ai). We recommend Hover for purchasing the domain but you can use any registrar of your choice. All you need is the access to the control panel.
Make sure to include WHOIS privacy when purchasing a domain. Skipping this may expose your contact information to the public.
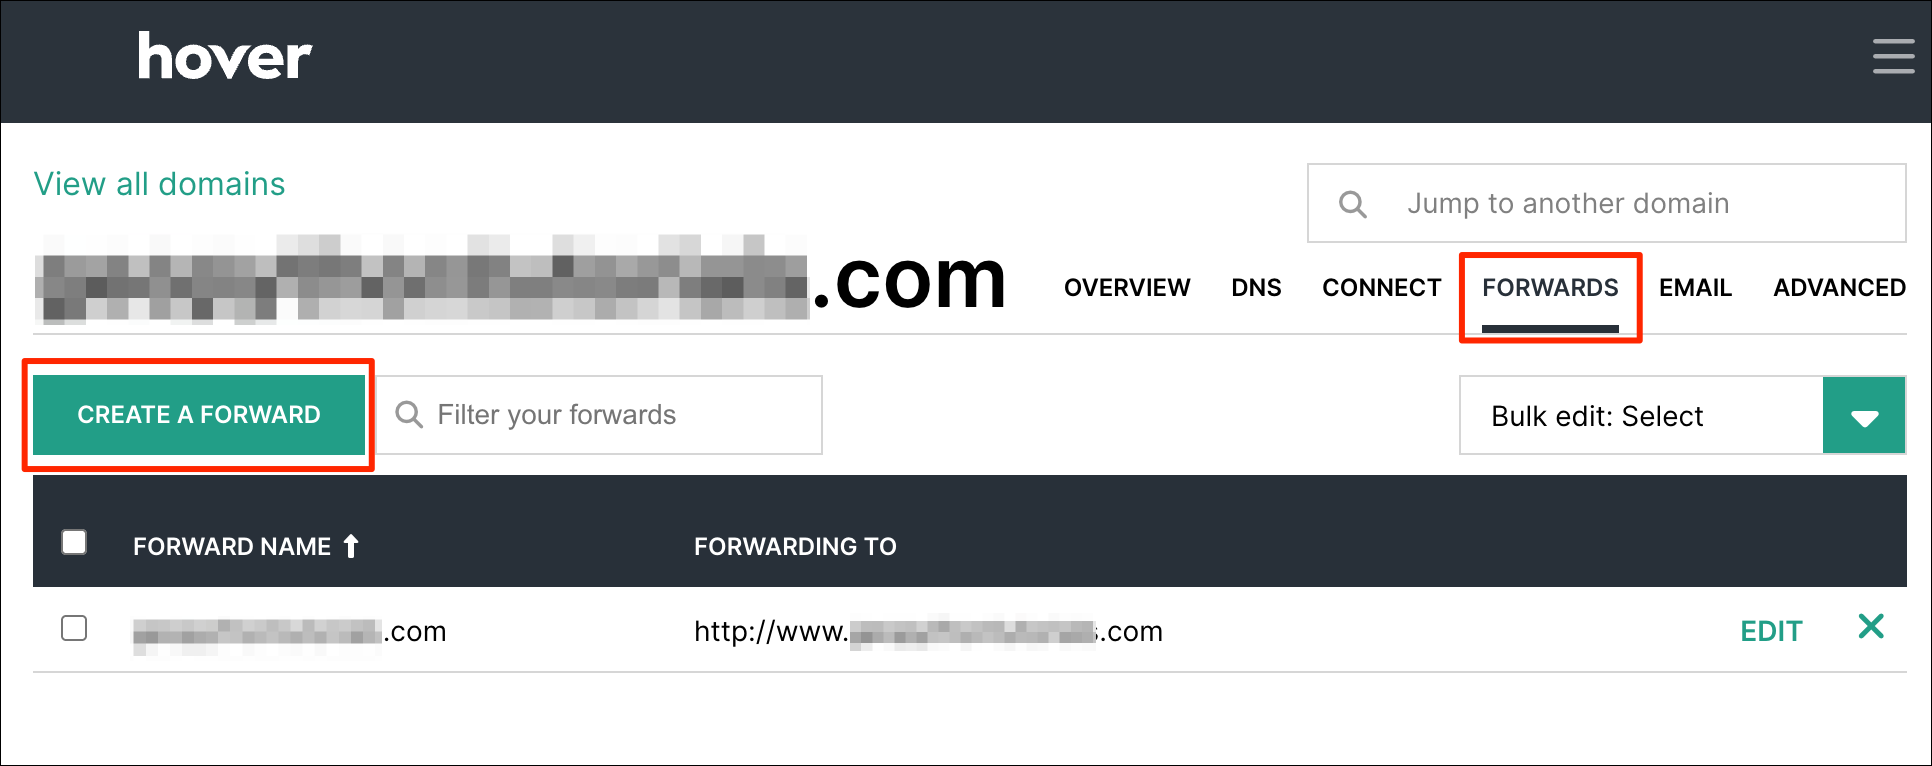
- Once you have access to the domain, login to the control panel. Go
to Forwards and setup a forward from
your-domain.comtowww.your-domain.com. This greatly simplifies the configuration needed to connect the domain to GitHub.
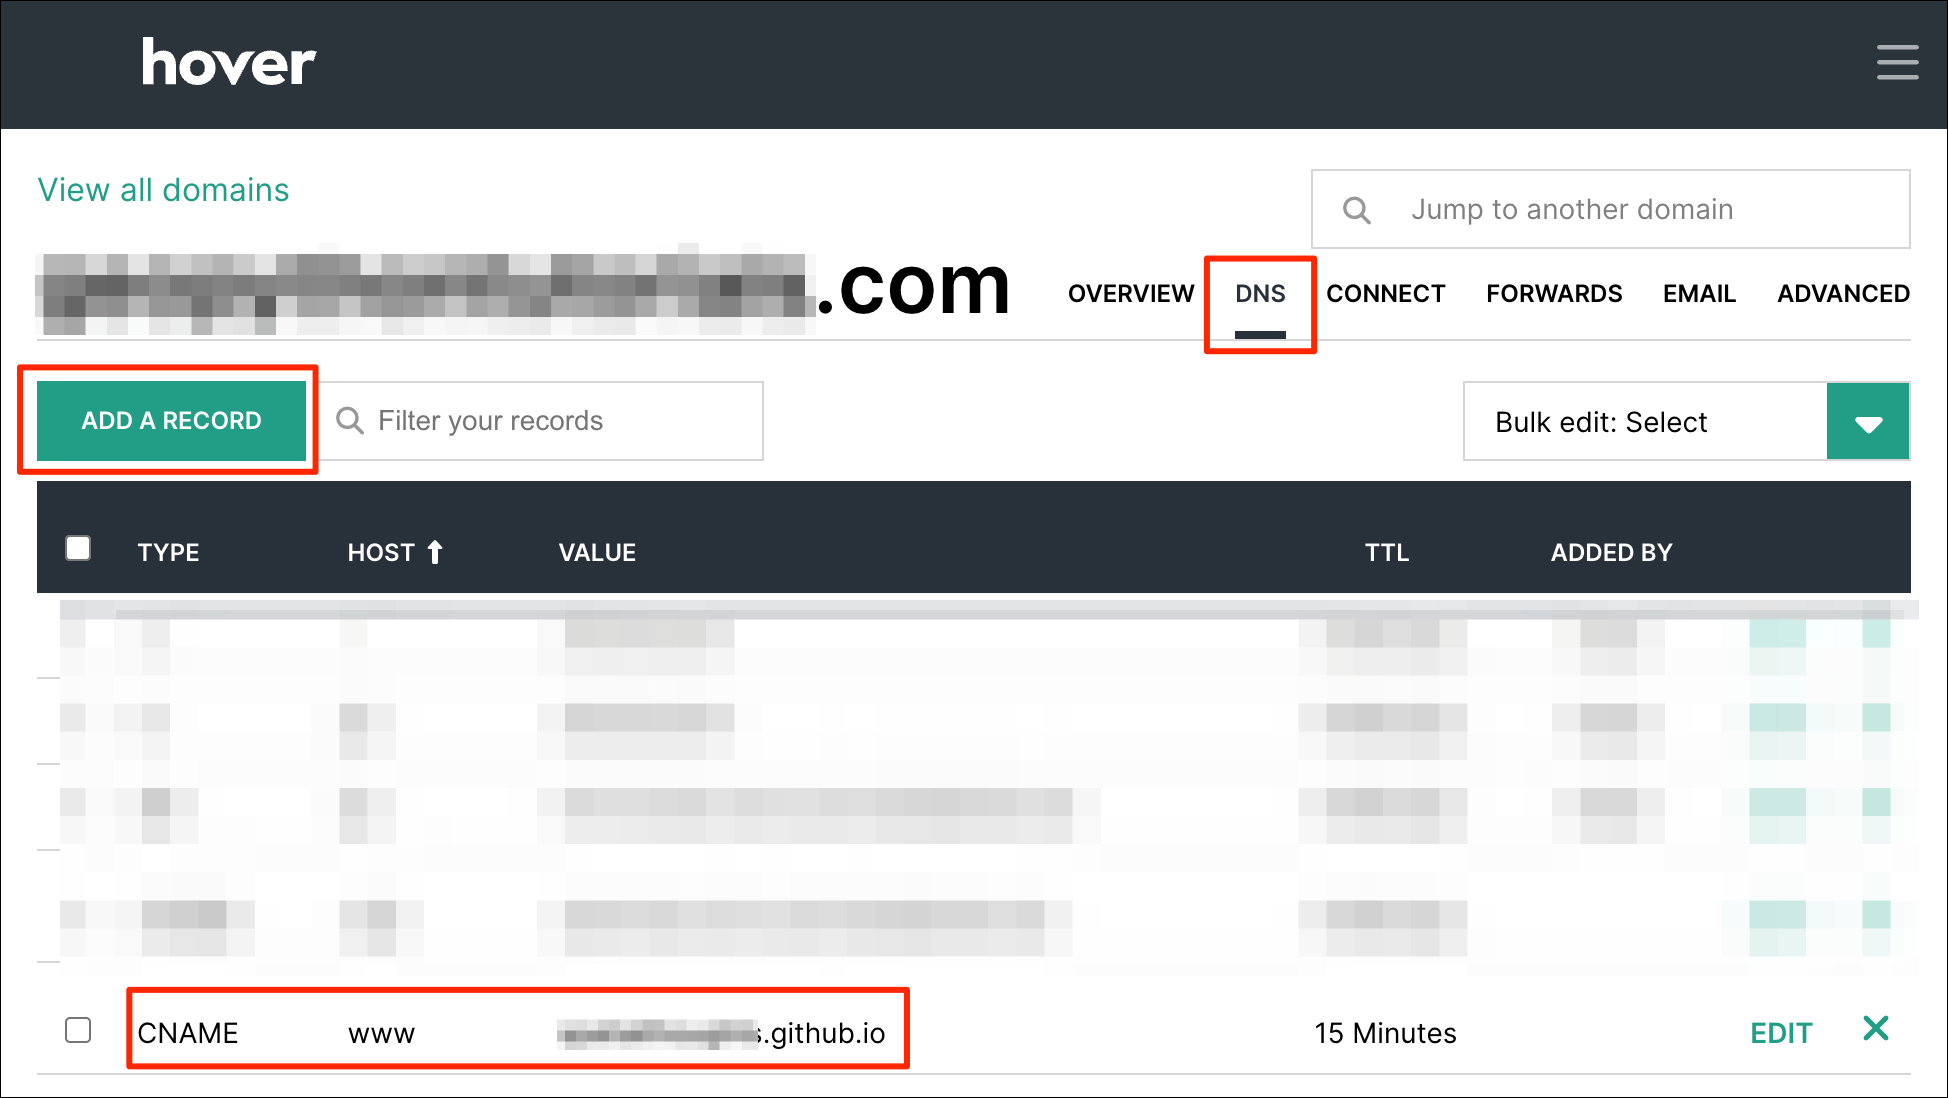
- Next, go to the DNS and add a
CNAMErecord for the hostwwwwith the valueyour-username.github.io(replacingyour-usernamewith your GitHub username).
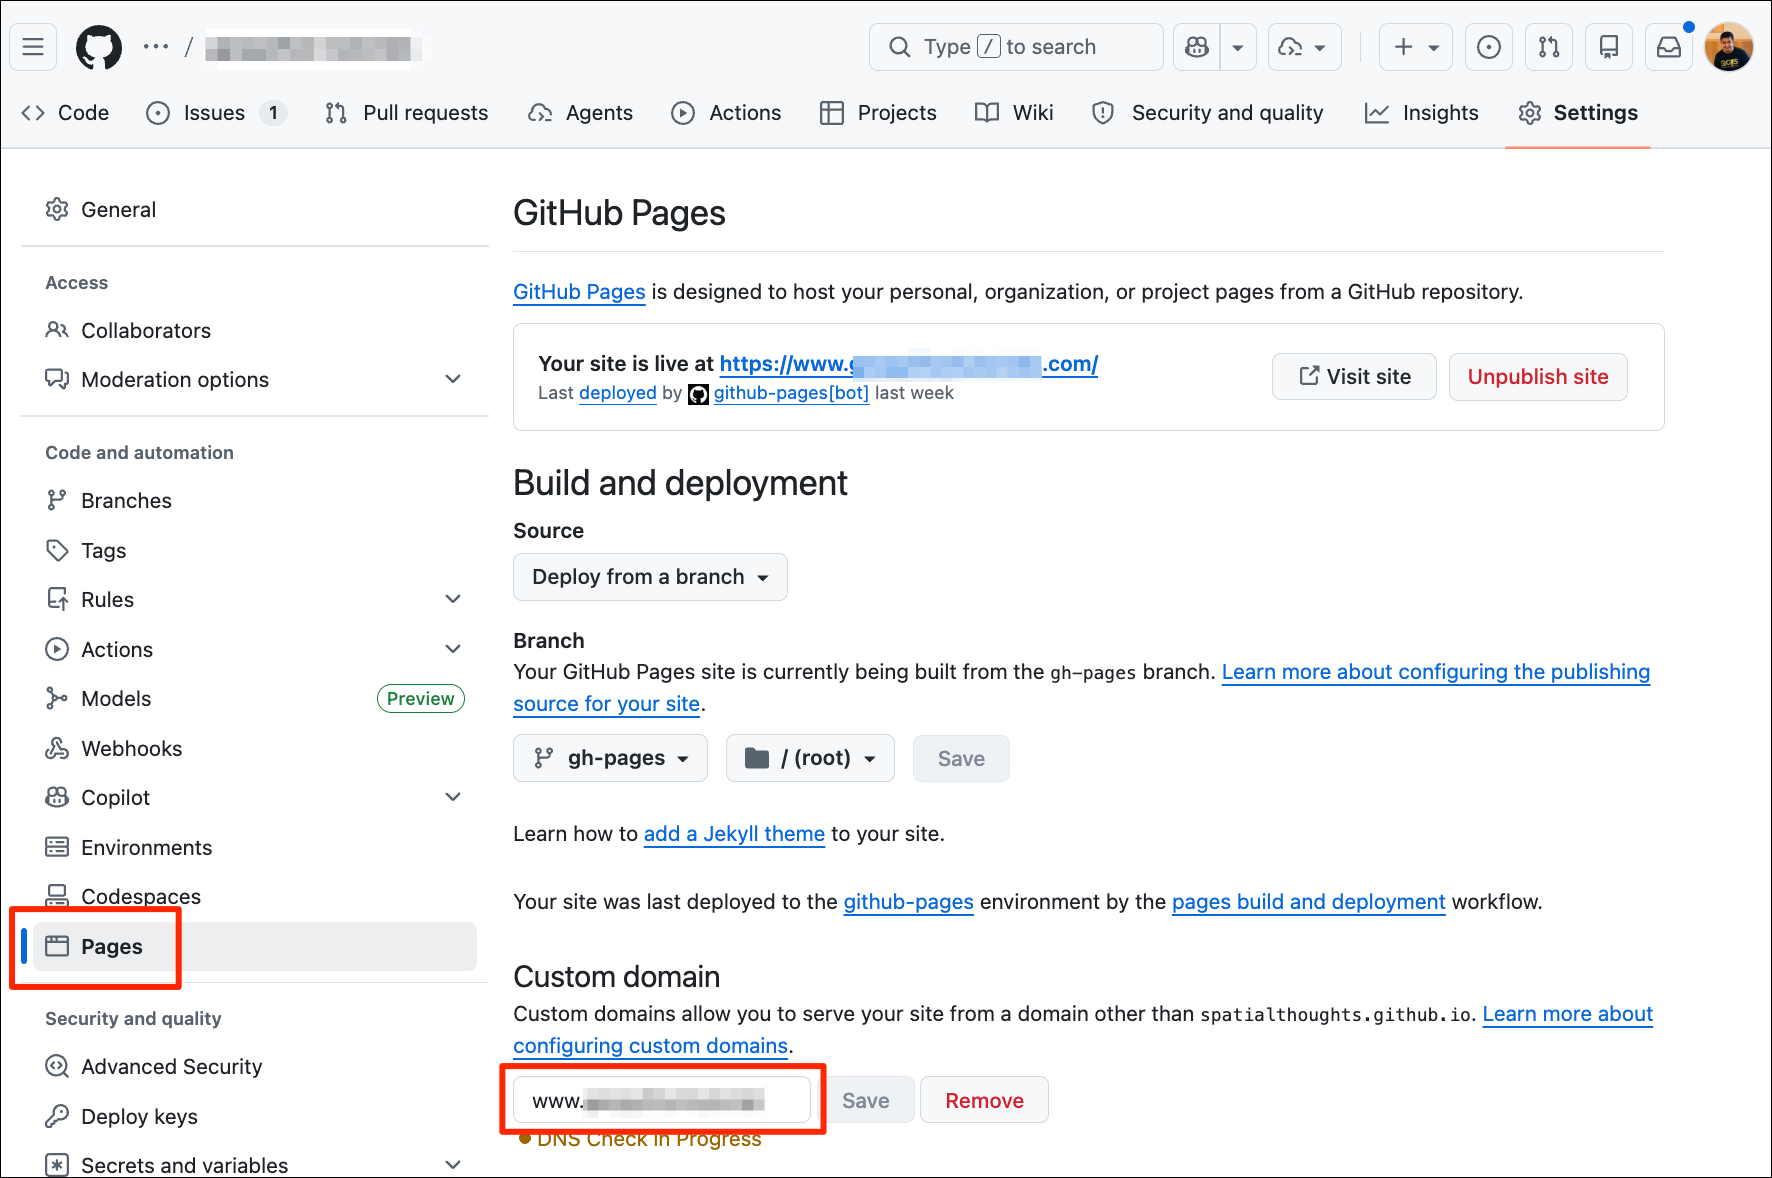
- Now, go to your GitHub repository. Go to Settings →
Pages and add the custom domain name. Make sure to prefix
wwwto the name and click Save. The site URL will update and your portfolio will be visible at the new domain.
DNS propagation can take some time. So you may need to wait 15-30mins before the new domain starts working.
Static Site Hosting Alternatives
There are many services that offer free hosting for static sites similar to GitHub Pages. Below are some of the other popular alternatives
- Netlify: Offers additional option of hosted backends that allows you to easily add forms, database and serverless functions.
- Cloudflare Pages: Free plan with unlimited bandwidth and Workers to add dynamic logic.
- GitLab Pages: Allows private repositories in the free plan.
License
This workshop material is licensed under a Creative Commons Attribution 4.0 International (CC BY 4.0). You are free to re-use and adapt the material but are required to give appropriate credit to the original author as below:
Building Your Geospatial Portfolio Website by Ujaval Gandhi www.spatialthoughts.com
© 2026 Spatial Thoughts www.spatialthoughts.com
If you want to report any issues with this page, please comment below.